Followers

Sunday 28 October 2012

The Battle of Langensalza

Perhaps I should start by admitting that this is not the Battle of Langensalza. It is, in fact, the Battle of Seminole Ridge, as described in Charles Grant's Wargame Tactics. Of the battle reports in that book, it was Seminole Ridge which attracted me, but that battle was set in the American Civil War, and if replayed in the SYW it obviously needed a new title. 'Langensalza' was the battle in the book that actually was set in the SYW, so I swapped the names round. I hope that's all clear.

The battle is a traditional attack-defence setup, with (in my case) the Austrians defending a ridge line which covers 2 bridges. The bridges are the objective of the attacking Prussians. I went for a 6' x 6' table. The river can only be crossed at the bridges or ford.


The defenders hold the Langensalza Ridge and the ground to the south of it. The attackers deploy on their baseline along the north table edge with the objective of seizing the ridge and the bridges beyond. Mr Grant gave the attackers twice the number of units as the defenders, so I of course followed suit. Forces were:

Prussia (attacking) 
Infantry brigade of 4 infantry battalions 
Infantry brigade of 4 grenadier battalions 
Infantry brigade of 1 Frei battalion, 2 jager battalions 
Cavalry brigade of 2 cuirassier regiments 
Cavalry brigade of 2 dragoon regiments and 1 hussar regiment 
Artillery park of 3 medium batteries, 1 light battery and 1 howitzer battery

21 units.   

Austria (defending) 
Infantry brigade of 3 infantry battalions 
Infantry brigade of 1 infantry battalion and 2 grenz battalions 
Cavalry brigade of 1 cuirassier regiment and 1 dragoon regiment 
Artillery park of 2 medium batteries and 1 light battery. 
3 feet of entrenchments

11 units.     

To give some interest to the deployment process, I decided on the old school process of a curtain across the table, removed once deployment was complete. The details of how I contrive this are in an earlier post. We allocated sides by dice roll - I got the Austrians, my opponent Steve the Prussians. I'll take the liberty of describing the game from my perspective. 

The Game.
Despite its rather Heath Robinson nature, the curtain went up easily enough, accompanied by comments about 'hanging out the washing on the Seigfried Line' from my opponent. There were further comments as we both set out our forces. I admit I do have a habit of muttering to myself when concentrating, but Steve's offer to call Social Services was typical of the sometimes hurtful badinage by which he seeks to gain a psychological advantage during our games. The swine. On removing the curtain, the two sides had deployed as per the photo below.

A little frightening to see one's opponent's baseline stuffed with so many troops. The important thing to note is that  all the Prussian cavalry was on their right flank, the other flank being held by light troops. My own small cavalry brigade would have its work cut out.

And so it transpired. The Prussian cuirassiers forged ahead of their comrades, who were impeded by a wood, and charged into the thin but valiant line of Austrian horse. My own cuirassiers scored first blood and the leading Prussian unit was quickly done for.

Here we see the advance of the Prussian grenadiers. The Prussian line infantry (being moved in the background) proved reluctant to advance beyond Langensalza for a number of moves, with a hesitancy which (in my opinion) bordered on cowardice.

The cavalry melee intensifies as the dragoons of both sides clash. There really was only one possible outcome, but I felt I had little choice but to fight it out and hope for the best.

Overview around mid game. In the distance you can see that my cavalry have been overcome and the Prussian dragoons are preparing to attack the flank of my infantry line. In the foreground, Prussian light troops and the grenadiers make steady but unspectacular progress. The line infantry brigade is stuck at Langensalza, whilst the Prussian artillery on the Langenburg fires at the Austrian entrenchments, with surprisingly little effect so far.

Again my forces are overfaced, this time on the right flank. Two grenz units do their best to hold off Prussian jager and grenadiers. Once more, the eventual result was not in doubt but the Austrian light troops had the pleasure of seeing the Prussian Garde Grenadier battalion leave the line and hasten to the rear, as a result of their steady fire.

Another overview around the same time. The noose is tightening around my troops, on both flanks.

And so to the awful denouement. Here you can see that the leading Prussian dragoon regiment has driven one Austrian infantry battalion from their entrenchments, then continued on to charge the supporting artillery unit. The gutsy gunners saw them off but there was plenty more Prussian cavalry to come...

... as you see here. The Prussian cavalry threw a double move, and now charged the guns in flank, as well as charging 'Loudon's Grenadiers' who were attempting to come across the table to prop up the crumbling Austrian flank. The Prussian hussars exploited the work of their comrades by galloping over and capturing the western bridge. No prizes for guessing that my artillery battery was destroyed, along with Loudon's battalion, which had been caught in march column.

Prussian artillery fire had also now dislodged the Austrian units manning the eastern end of the entrenchments, and the attacking grenadiers are seen here cresting the rise to the astonishment of a lone Austrian staff officer. The Austrian artillery battery at this end of the ridge struggles to extricate its guns.

Oh, please make it stop! The second unit of Prussian cuirassiers, having hacked down my  artillery unit, moved on to charge the last remaining infantry unit on this part of the ridge in flank. Already softened up by a blast of canister, the white clad men were quickly done for. The Austrian light gun in the foreground predictably did little to bother the Prussian hussars crossing the bridge. 

And that was about it. Only the light troops on the Austrian right flank still held their original positions. This overview shows the situation around about move seven, though by this time I had given up counting moves as unit after unit headed off the table for their storage boxes. Oh, the shame!

The Prussian line brigade is seen here finally leaving the outskirts of Langensalza as the game ended. They hadn't been needed in the end, but their threat had helped to pin my own infantry in their entrenchments.

Another Austrian staff officer has an unexpected encounter with advancing enemy troops.  The bridge is a new one  acquired at 'Colours' in September.

Conclusion.
I had been resoundingly thrashed, losing 7 of my 11 units, as well as one of the bridges and the whole of the ridge. Steve had lost only 2 of his 21 units. My tactics were certainly not the best. It was obvious from the start that my cavalry would be overwhelmed, and I should have redeployed some units to cover my left flank in anticipation of this. Both sides had their share of bad luck, so I certainly couldn't blame the dice rolls either.

There is the question of how evenly balanced the scenario was, but Mr Grant rarely gets these things wrong. The battle when played out in his book was a near run thing. I think I would add another infantry unit to the Austrian force in future, though.

The rules used were my own. Gaming time was about 2.5 hours. And yes, I did enjoy myself, despite a crushing defeat. That's wargaming, after all.

Wednesday 17 October 2012

Battle! - The Missing Chapters


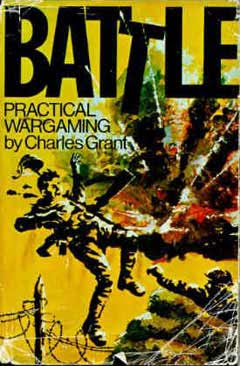
Now I've owned Charles Grant's Battle! Practical Wargaming since the reprint came out in 1972. Of the classic wargaming books on my shelf, it is unique in being the only one bought at the time, not borrowed repeatedly from the library at the time and then finally bought decades later. This book was central to my wargaming for many years - I used the original rules, then adapted them extensively.

I thought I knew this book inside out, but there was evidently one thing I didn't know. The book was, of course, constructed from a series of articles in Meccano Magazine. But (possibly for reasons to do with the size of the book, or time constraints), there were six articles in the magazine that didn't become chapters in the book, dealing with terrain and the use of maps.

I guess a number of you will already know this. This post is one of those where I try and publicise something that others have found out, so that it might be known more widely. So, if this interests you, go to http://wargaming.info/2011/charles-grant-battle-practical-wargaming/. God bless John from New Zealand for telling us all about this on his blog. Downloading the missing chapters is entirely free and legal.

And there's more. An 'expanded' version of the original book is also now on sale from Caliver Books. I thumbed through a copy at Colours, but didn't take too much in. A bit of supplementary content and a few colour pics if I remember rightly. The 'missing chapters' are included. I decided it was not worth the £27.50 asking price for me, but you may well disagree if you check it out.

Sunday 14 October 2012

Holger Eriksson Artillerymen

Something For The Weekend Sir?
It's been said before by many wargamers, but allow me to repeat here that a nice part of the hobby is when one of those little packages drops onto the front doormat. And this time, it came all the way from Sweden!

Address deliberately obscured - thanks Steve.

I like to dabble in bits and pieces from other figure ranges apart from my normal RSM95s, and this time it was the turn of Holger Eriksson figures, ordered via the Spencer Smith website. Just a few artillerymen, but they were needed to fill a gap. SSM have to order them via Sweden, so postage is a little higher than normal, but full marks to the guys for pointing this out before taking the order.

Unfortunately the arrival of the package coincided with the departure of our family to a rare weekend in the country. No sooner did I have the little box in my hands than my wife was indicating that there was no time for fiddling around with toy soldiers - the car needed packing up and we needed to get away to beat the Friday afternoon traffic. So the packet came with me: unopened.

Quite why this should be a source of amusement and ridicule to my wife and children I have no idea. Opening my little parcel and checking out the contents would simply add to the pleasure of the weekend. And in this I was quite correct. (Thank goodness they didn't catch me taking the above photo at the cottage). 

The Figures
So, just 8 artillerymen to unwrap. Elegantly proportioned figures with little or no flash and an acceptable amount of detail - much better in this respect than the Spencer Smith miniatures themselves. Being Swedish they lack the pigtails and turnbacks usual in mid-18th century soldiers, but the figures are very compatible with RSMs and ranges like Willie. If used in small numbers I reckon they add variety without anyone really noticing that the uniforms are a bit wrong. In this spirit I painted the first 2 figures as Bavarian artillerists, and here they are flanking an RSM figure. And no, I didn't take my paints with me for the weekend. Cleaning up and painting took place after my return!

Yes, my painting standard isn't really designed to cope with close up shots.
You'll just have to put up with it.

Now, according to Knottel, SYW Bavarian artillerymen did have the usual 'Germanic' style uniforms, with turnbacks and lapels etc, as well as crossbelts, so even the RSM figure is wrong. You'd be better off using Prussian figures. But I think the light grey and cornflower blue work very well. I also like the 'clutching a cannonball' pose on the right. And frankly I'm not that bothered about strict accuracy. These guys will also be manning a yellow painted Austrian howitzer, instead of a grey-blue coloured Bavarian piece, as the artillery itself is already painted: my decision to go Bavarian for the crew was last minute. But I enjoyed my little painting exercise and these guys can join the small Bavarian contingent fighting alongside my Austrian army.  

Tuesday 2 October 2012

A Bridge Too Far - The Board Game

The Set Up
Well now. Up until a few weeks ago I'd never ever played a board wargame. Ever. They didn't have the visual appeal I wanted in my wargaming (too many weeny cardboard counters), and I'd heard the rules tended to be fiendishly complicated and long winded. But they do have the advantage of taking up a small amount of space, and there's no painting involved. Now, my friend and wargames buddy Paul is a bit of a board and parlour game enthusiast - loves inviting people round for a spot of Monopoly or some such - and so when I happened upon the Flames of War 'A Bridge Too Far' boardgame a few months back, we agreed to go halves on it. What the heck.


The Package
We ordered from Maelstrom Games, and paid £27 including p+p, which is about as cheap as you can get it (RRP £30). A reassuringly big box was delivered in the post a few days later. Of course, I'd done my online homework so knew more or less what to expect, and I was not disappointed (apart from the corny artwork). 

The game board is good quality and very nicely printed out. It comes in 3 sections and measures a total of 48" x 22" (120cm x 55cm). The playing pieces are vehicle models in around 1/285th scale, and infantry figures in about 1/100th scale. They are hard plastic and could easily be painted up if you wanted. Overall they are quite nice representations: they certainly satisfied my own need for 'real' miniatures rather than counters. There are some cardboard counters, which are nicely made from thick card, some themed dice (you can never have too many dice) and a few other bits and pieces. The rule set is full colour with loads of the type of illustrations you would expect from FoW.

The Game
You can play the 'historical' game, where deployments are made according to those of 1944, or you can choose your own deployments and see how your ideas work out. Paul and I have played one of each type of game, and both were very enjoyable. I won't bore you with a detailed run down of the rules. We found them complex enough to make an interesting game with some mild intellectual stimulation, but simple enough not to be a drudge. The various moving, deployment and fighting phases interlock well. Chance has a significant role, but good tactics and thinking things through will give you a good prospect of success. We found no glitches or problems during play - this seems to be a well worked-out and well play-tested game.

Games have a standard length of 5 turns. The box claims games take 60 - 90 minutes. Well, our first game took 3.5 hours, with the usual learning process and frequent reference to the rules (which are well laid out and well explained). The second game a few weeks later seemed much quicker and easier, but still took the best part of 3 hours. This was not a problem - the time flew by. But I reckon playing a game in under 2 hours is unlikely, unless you play on a really regular basis.


After a tough three and a half hours in command, Paul needs a snooze.

There is not much online support for the game, though you can find some comments and reviews at Board Game Geek. There is also the odd comment on the official FoW forum, but this seems to be The Boardgame That Battlefront Forgot, which is a shame as it makes for an entertaining change from getting the miniatures out. There is plenty of replay value - the more familiar the rules become, the more you begin to appreciate the various tactical options. I know we'll be getting this game out again in the future. 

In short, this is a good cross between 'real' wargaming and those boardgames you've been avoiding all these years. Well worth looking into.