Followers

Showing posts with label WW2 Desert. Show all posts

Sunday, 28 January 2024

Ah Yes...Facebook

I have never really thought Facebook was a good place for wargaming sites. The Facebook pages or groups I visited seemed to lack focus and looked to me like a jumble of messages and posts with little order or organisation. So I set up 'proper' websites for Honours of War and Shadow of the Eagles, with forums, download sections, author content etc. 

Well, the Honours of War site has worked pretty well for about 9 years, but activity is now limited to a few stalwart members. These guys post some great content, but for a set of rules published in 2015 a website was beginning to look like a luxury I couldn't afford.

The Shadow of the Eagles site had some interest at first, but this has faded recently and there is currently very little activity. The simple fact is that SotE sold less copies than HoW. This is pretty easy to explain - the Napoleonic rules market is much more competitive than the SYW one, and Osprey have a much higher profile than Partizan Press - particularly with their 'Blue Books'. With the annual renewal of the site coming up, at much increased cost, renewal just didn't seem worth it for a site generating almost zero posts on the forum. (As an aside, check out the Little Wars TV review of the Blue Book series HERE).

On the other hand, people kept telling me Facebook and Instagram were the places to be if one wanted to generate interest in your rules. Once you joined Facebook and your page or group got going, you became part of a significant online conversation, where people joined and posted on your little group, and you joined and posted on their groups. Interest might therefore flourish. This is the problem for small-time rules authors - once the initial publicity has faded, there is the danger that your rules will just sink without trace amongst all the other rule sets.

So there we are - I want to keep interest in my rules alive, and Facebook seems to be a good place to help that along. At least, that's the case according to my kids - and my wife. And a number of fellow gamers. And Dave Ryan at Partizan Press, who always wanted me to have a Facebook page. And recently, well-known military historian and Osprey author Angus Konstam also encouraged me along this route.

So, in a month or so, I will be saying goodbye to the HoW and SotE sites. To anyone who ever posted on those sites, or just joined to download free stuff, my sincere appreciation and thanks. I learned a lot from the questions asked and comments made, and this resulted in some rule amendments and errata corrections. All the errata and new or amended rules will continue to be available on Facebook, free to download. 

The Facebook group is set up, and you can apply to join via the group page:


As for Startline, the discussion group on groups.io will continue (see the Startline Discussion Group). After all, this group has only just started and I want to keep the momentum going. Anyone interested in Startline should keep an eye on both groups. 

For the record, where Startline is going remains uncertain, but I'm enjoying working on the rules immensely. I'll just keep plugging away and time will provide an answer as to what to do with them. The secret to success (as the Buddhists and mindfulness experts tell us) is to love the process, not crave an outcome. That works for me!

So, I hope to see you on the new platform. 'Til next time!

Monday, 6 November 2023

STARTLINE - Wargaming World War Two

I have mentioned previously on this blog my work on a set of company-level WW2 rules inspired by the WRG 1973 set 'Armour and Infantry'. I have spent many pleasant hours working on these rules recently, and thought it was now time to open up the content to my fellow gamers.


The changes to the original rules have increased to the extent that I now consider the rules to be a new and separate set, which I have called Startline. You can go to the group via the link below, and join up if you wish:

All interested wargamers are welcome to join. If you have not received a specific invitation, membership is subject to approval, to keep out spammers. 

You can download the present version of the rules and a few other files I have included for background. At the moment a QRS is not available, mainly because creating one is a bit of an issue. Startline covers the whole of WW2, but each wargamer will only want the details relating to the part of WW2 he or she is gaming. So I'm still working on a useable format.

Those of you on the CWD mailing list should have received an invitation email - if not, one will arrive in the next day ot two. Apologies if this represents unwanted junk mail - just ignore it and it will go away! Wargamers who have expressed an interest in my ongoing work via this site should also receive an invite - but if you want to just go straight to the group and sign up, that's fine.

Finally, this is a just a hobby project at the moment. The group is there for individual gamers to download a set of rules, game with them if they wish, and post any comments or suggestions they have. In other words, we are just exchanging ideas on a personal set of rules. 

I hope to hear from you via the comments on this post, or via the group. 
 

Tuesday, 6 June 2023

Things Go Wrong In The Western Desert, 1942

So, a few weeks ago, I headed over to Roy's full of anticipation for a WW2 game set in the Western Desert. I had been working on my WRG-derived rules - I had recently checked over all the gun and armour stats and had even come up with a fancy alternate activation scheme for the turn sequence. What could possibly go wrong?

The day actually started very well. Roy had a pile of box files waiting, extracted from the depths of his Alladin's Cave of a wargames room, and I had the pleasure of picking out the forces I thought would make an interesting game. We threw history to the wind and went for a Flames of War-style tank punch-up set in 1942, with minimal infantry and just a battery of supporting artillery on each side. The table was 6' x 4'. The forces were:

British - Force HQ: Dorchester ACV
Crusader tank company: HQ (Crusader III) plus 3 platoons each of 3 x Crusader III
Grant tank company: HQ (Grant) plus 2 platoons each of 3 x Grant
Carrier platoon: in 6 x Universal Carriers
Recce section: 2 x Humber II
Artillery: 4 x 25pdr off-table plus AFO

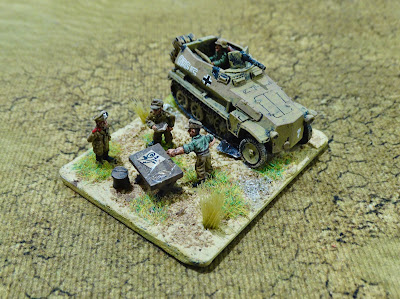
German - Force HQ: Sdkfz 250 with Rommel impersonator
Panzer company: HQ Pz. III (kurz 50mm), platoon of 4 x Pz. IVG, platoon of 4 x Pz. III (lang 50mm), 
platoon of 4 x Panzer III (kurz 50mm)
Infantry platoon: in 4 trucks, plus towed 88mm Flak 36 and towed 50mm Pak 38
Anti-tank section: 2 x Diana SP 76.2mm
Anti-aircraft section: 2 x SP AA 20mm
Artillery: 4 x 10.5cm LeFh off-table plus AFO

The British had 17 tanks to the Germans 13, but the latter had some powerful anti-tank gun support. The models were 15mm-1/100th scale.

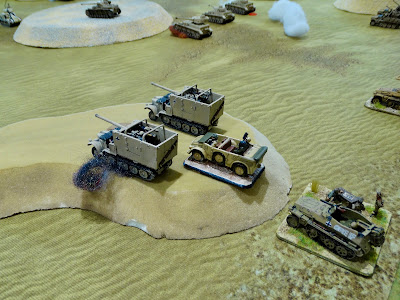
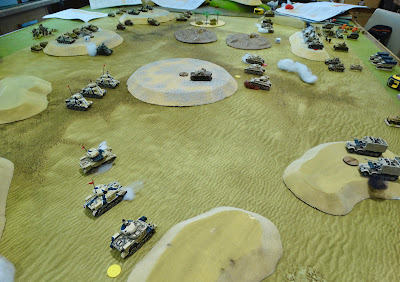
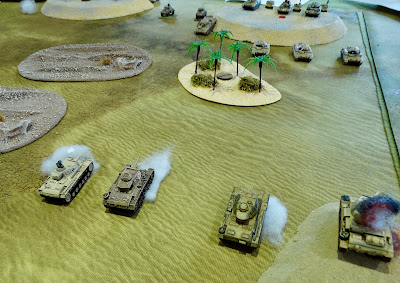
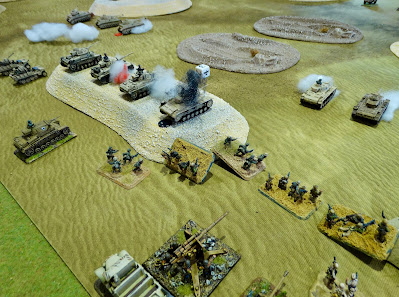
We deployed by alternate platoons, and then set to. The action was quickly under way, and proved deadly - rather too deadly, in fact. But before some analysis, here are some snaps of the game:
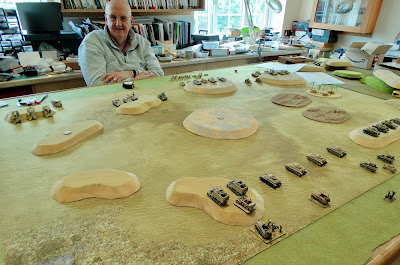
Roy took the Brits - Crusaders to his left, Grants to his right.

The cracking Diana models - or to be more accurate, the two
 7.62cm FK36(r) auf Panzerjäger Selbstfahrlafette Zugkraftwagen 5t (Sd.Kfz. 6/3).

The Grants get going in the foreground.
Their thicker armour was useful, but 2 were soon knocked out.

But by move 4 the Pz.III (kurz) platoon had been wiped out...

...as had the platoon of Pz.III (lang). Plus half of the PzIVs!

2 or 3 Crusaders had also been destroyed, but my Rommel impersonator had little
choice but to call it a day. A game that seemed to be over before it had really started.

Truth be told, it had not been much of a game. It wasn't hard to see why. A stationary Crusader with a 6pdr could hit on a 2 up to 500m, then a 3 up to 750m (the usual battle ranges). Against a Panzer III, a knock out was automatic if hit. So tank knock outs were just too easy and predictable, even if the stats stood up historically. Firing from the other direction was slightly more difficult, with even the long 50mm gun rated slightly weaker than the 6pdr, but knock outs were still pretty easy. 

This was a result of not seeing the wood for the trees. I had gone over the stats repeatedly with my reference material, but the consequences during a game had eluded me. Most of my games had been set in Poland 1939, where the tanks are mostly just armoured cars with tracks, so easy knock outs are expected. Not so later in the war. This was also the first time I had tried a real tank-heavy engagement, popular with many gamers but a rare occurence in real life. So this had been a valuable play-test. But how to solve the problem?

The Phil Barker mechanic for deciding whether AFVs are knocked out was quirky and original, and I had decided to keep it as part of the character of the rules. For those not familiar, it consists of a table with most WW2 tank and anti-tank weapons down one side, and the six armour classes (later increased to 8) along the top. A typical cell has a range band and a number - '4 at 500-1000m', for example. This means that a particular gun, firing at that particular armour, will knock-out automatically at under 500m, knock-out on a roll of 4 or more at 500 to 1000m range, and be ineffective at over 1000m. Also, quite a lot of cells say 'All K-O' or No K-O'. The system was refined a little in rule books after 1973, but the basic mechanic was retained. It might be of interest to show an extract, pictured below:
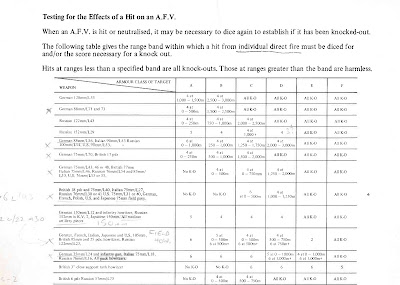
© WRG 1973.

One obvious option was to just go through the table I was using and alter all the stats to make things a bit less deadly. But I quickly began to think about ditching the system in its entirety. It was rather inflexible and lacked nuance - it was usually a choice between no knock out possible, a 50-50 chance of a knock out, or an automatic knock out if hit. It had also become apparent that fitting particular AFVs into one of the 6 classes could be tricky when they were on the cusp between the parameters for one class and the next.

My decision was to change to a much more well-used and familiar system - attack and defence values, which I had first encountered in Donald Featherstone's War Games from 1962. I had been tempted to make this change from the outset, but respect (and nostalgia) for Mr Barker's concept had held me back. But now it was time for the change. No need for armour classes - each AFV could have a defence value number that represented my best guess at the strength of its armour, whether front, side or rear. And similarly for guns - the attack value number at any particular range (and with any particular ammo type) could be tailored as required. 

There are a variety of ways the system can be used, but I went for that described by Charles Grant in his 1970 book Battle - Practical Wargaming. Look up the attack value at the appropriate range, add the sum of 2 D6, and the total must exceed the defence value of the tank's armour to knock it out. If not knocked out, the tank remains 'neutralised' (i.e. suppressed) as a result of being hit, as with the original WRG rules.

The good news was, I had a specimen system already available from my own adaption of the Charles Grant rules, which I had used for many years back in the 1970s and 80s. A few hours work and I had my attack and defence value tables done. Interestingly, I checked the probabilities of various knock-outs with my most recent set of commercial rules (the Battlegroup series, which use a very similar system) and found a reasonable match. So I'm going with this change. Rolling 2 dice is somehow rather more satisfying than rolling just one, which is an additional bonus. The inevitable tweaking of probabilities that will take place in the future will be much easier with the new system. All other firing rules from the WRG system remain in use, although I once again adjusted the hit probabilities to make hits just a little less likely.

As an example, to knock out one of those Panzer IIIs pictured above with a 6pdr will now need a hit roll of 2 up to 250m range, then 3 for up to 500m, then a 4 for up to 1000m. For a frontal attack, the attack value of a 6pdr at 500-1000m is 5, the defence value of a Panzer IIIH is 11, so a roll of 7 with 2D6 is required to knock-out, a probability of 58% in favour. Naturally, as the range shortens this probability increases. 

As with so many things in rule writing, I have once again been taught that getting the 'feel' right for a satisfying game is more important than a spurious 'accuracy' which says that if this gun could penetrate this armour at this range, then a knock-out will always result, whether in real life or on the gaming table.

By the way, the alternate activation system seemed to work quite well, replacing a standard IGO-UGO arrangement with one where units from each side take their 'bound' alternately. That is, in the game described, a German unit fires and moves, then a British unit fires and moves, and so on. It seems a bit more modern (I might even say a bit more 'on trend' for 21st century gaming), and gives more of the feel of real battle where punches are traded in quick succession. Plus, the choice of what order to activate your units gives a little more tactical choice.

I hope this hasn't all been too tedious for readers. Perhaps this kind of detail may be of interest to some of you. And of course, this blog is for me as much as you, recording my adventures and decisions in this strange hobby.

Roy has foolishly agreed to a re-match, so with luck we will have another, rather more enjoyable, game with the same lovely models. I will endeavour to report back.

'Til next time!

Monday, 31 October 2011

GHQ Desert Armies For Sale


I have decided to sell my British, Italian and German desert armies to try a new period. The whole collection consists of around 200 vehicles of all types, 80 or so infantry/heavy weapon bases, and 20 bases with ATGs or artillery. The quality of the pieces can be viewed on my various 'WW2 Desert' posts. I am also interested in selling off my related terrain items including sand TSS tiles. 

I would be looking for £1 per vehicle or infantry/gun base. All items painted of course, and all GHQ. I would prefer to sell the whole collection as a job lot but might consider breaking it down subject to negotiation.

Leave a comment if you're interested and we can go from there.

Update, 5th November.

Details:
Infantry bases (2cm x 2cm) have 3 figures. Heavy weapon bases have the weapon plus crew. Towed guns have a base with the deployed weapon and crew, plus a combined base with the tow vehicle and second gun in the towed position.
Some of the trucks and tanks numbered below are included on command bases designed for BKC, all the other vehicles are unbased. The listings are the fully painted models, all undamaged and painted to a good standard. I have a good deal of unpainted infantry plus a few unpainted vehicles and guns which I will throw in for free if you want them. If you want terrain items we can negotiate.


British
9 x Matilda II, 10 x Crusader I, 10 x A13 MkII, 10 x Lt tank MkVI, 5 x A9, 5 x A10.
5 x RR a/c (3 mg, 2 ATR conversion), 4 Marmon Herrington a/c (3 mg, 1 20mm), 3 x Dingo.
8 x universal carrier, 10 x 15cwt truck, 5 x 3ton truck.
2 x 2pdr portee, 2 x 2pdr+tow, 2 x 25pdr+tow, 2 x Bofors AA+tow.
20 infantry bases, 4 mmg bases, 3 engineer bases, 2 ATR bases, 2 x 2" mortar bases, 2 x 3" mortar bases.

Italian
15 x M13/40, 10 x M11/39, 7 x L3/33, 2 x AB40 a/c.
5 x Lancia heavy trucks, 4 medium trucks, 2 light trucks, 2 radio trucks, 4 motorcycle bases.
2 x 20mm AA+tow, 2 x 47mm ATG+tow, 2 x 100mm gun+tow, 1 x 105mm gun+tow.
18 x infantry bases, 4 x mmg bases, 3 x 8cm mortar bases, 4 x light mortar bases, 2 x ATR bases.

German
4 x MkIV, 10 x MkIII, 5 x MkII, 2 x PzJgr I.
2 x 222 a/c, 1 x 234 a/c, 1 x Radio a/c, 3 x 250/1, 1 x 250/10
5 x light truck, 2 x Blitz truck, 1 x Blitz radio truck, 2 x Kubelwagen, 6 x motorcycle bases
3 SP 20mm, 2 x 88mm+tow, 2 x 37mm ATG+tow, 1 x 50mm ATG+two, 1 x 75mm IG+tow.
9 x infantry bases, 4 x mmg bases, 3 x engineer bases, 1 x 8cm mortar base.

Terrain etc.
5 GHQ middle eastern houses, 2 pillboxes, 16 x 10cm lengths barbed wire, 4 palm tree bases (2 or 3 trees per base), 4 x 5cm lengths walling, around 30 dug in markers designed for my 2cm x 2cm infantry bases.

Tuesday, 14 June 2011

The Battle of Qabr al Ahmar

Time once again to take a break from the Seven Year's War and dabble with my 6mm Desert War collection, using Blitzkrieg Commander II as the rules. 

As with most of my recent desert games I am taking inspiration from Frank Chadwick's book Benghazi Handicap, and the scenarios therein. This time I have chosen the first scenario given, the Battle of Qabr al Ahmar, which took place on August 5th 1940. Supposedly this was the first real tank battle of the desert campaign, and featured a number of the much derided M11/39 tanks on the Italian side:


It is sad to relate that the GHQ M11/39 tank models I needed for this battle were bought at Colours 2010, and have languished in their blister packs ever since. How time flies! But one of the conveniences of this scale that  you can assemble and paint, to a reasonable standard, 5 tanks from a pack in an hour or two. And so only very little effort was required to get the forces I needed ready.

Those of you who have the book might have noticed that the battle is called Gabr el Ahmar by Frank. There is almost nothing on this battle on the net or in any of my reference books, but one thing I think I have established is that it should be Qabr not Gabr, and al not el. Qabr translates as tomb (gabr doesn't translate as anything), so we can have a small building as the centrepiece of the terrain, really for decoration only. Here is the map from the book:


As usual, a 4' x 4' table is perfect for 6mm models, and the terrain is easily set up. Forces are also modest. These are the Brits from the book...


...which I have transposed for BKC into:

7th Armoured Brigade, plus Supports. CO, CV8

Initial Troops 

8th Hussars (+). HQ CV8
1 A9
5 MkVIB
1 37mm portee
2 Rolls Royce armoured cars (recce)

Reinforcements

6th RTR. HQ CV8
3 A9
3 MkVIB

'A' Company, 1st Battalion KRRC. HQ CV8
3 infantry units in light trucks (veteran, ATR upgrade)
1 37mm ATG with tow
1 scout carrier (recce)

'F' Battery, 4th RHA (off table). FAO CV7
2 25pdr artillery units

BP = 9.  25% = 5

Reinforcements arrive move 3. May use flank deployment. CO arrives with reinforcements.

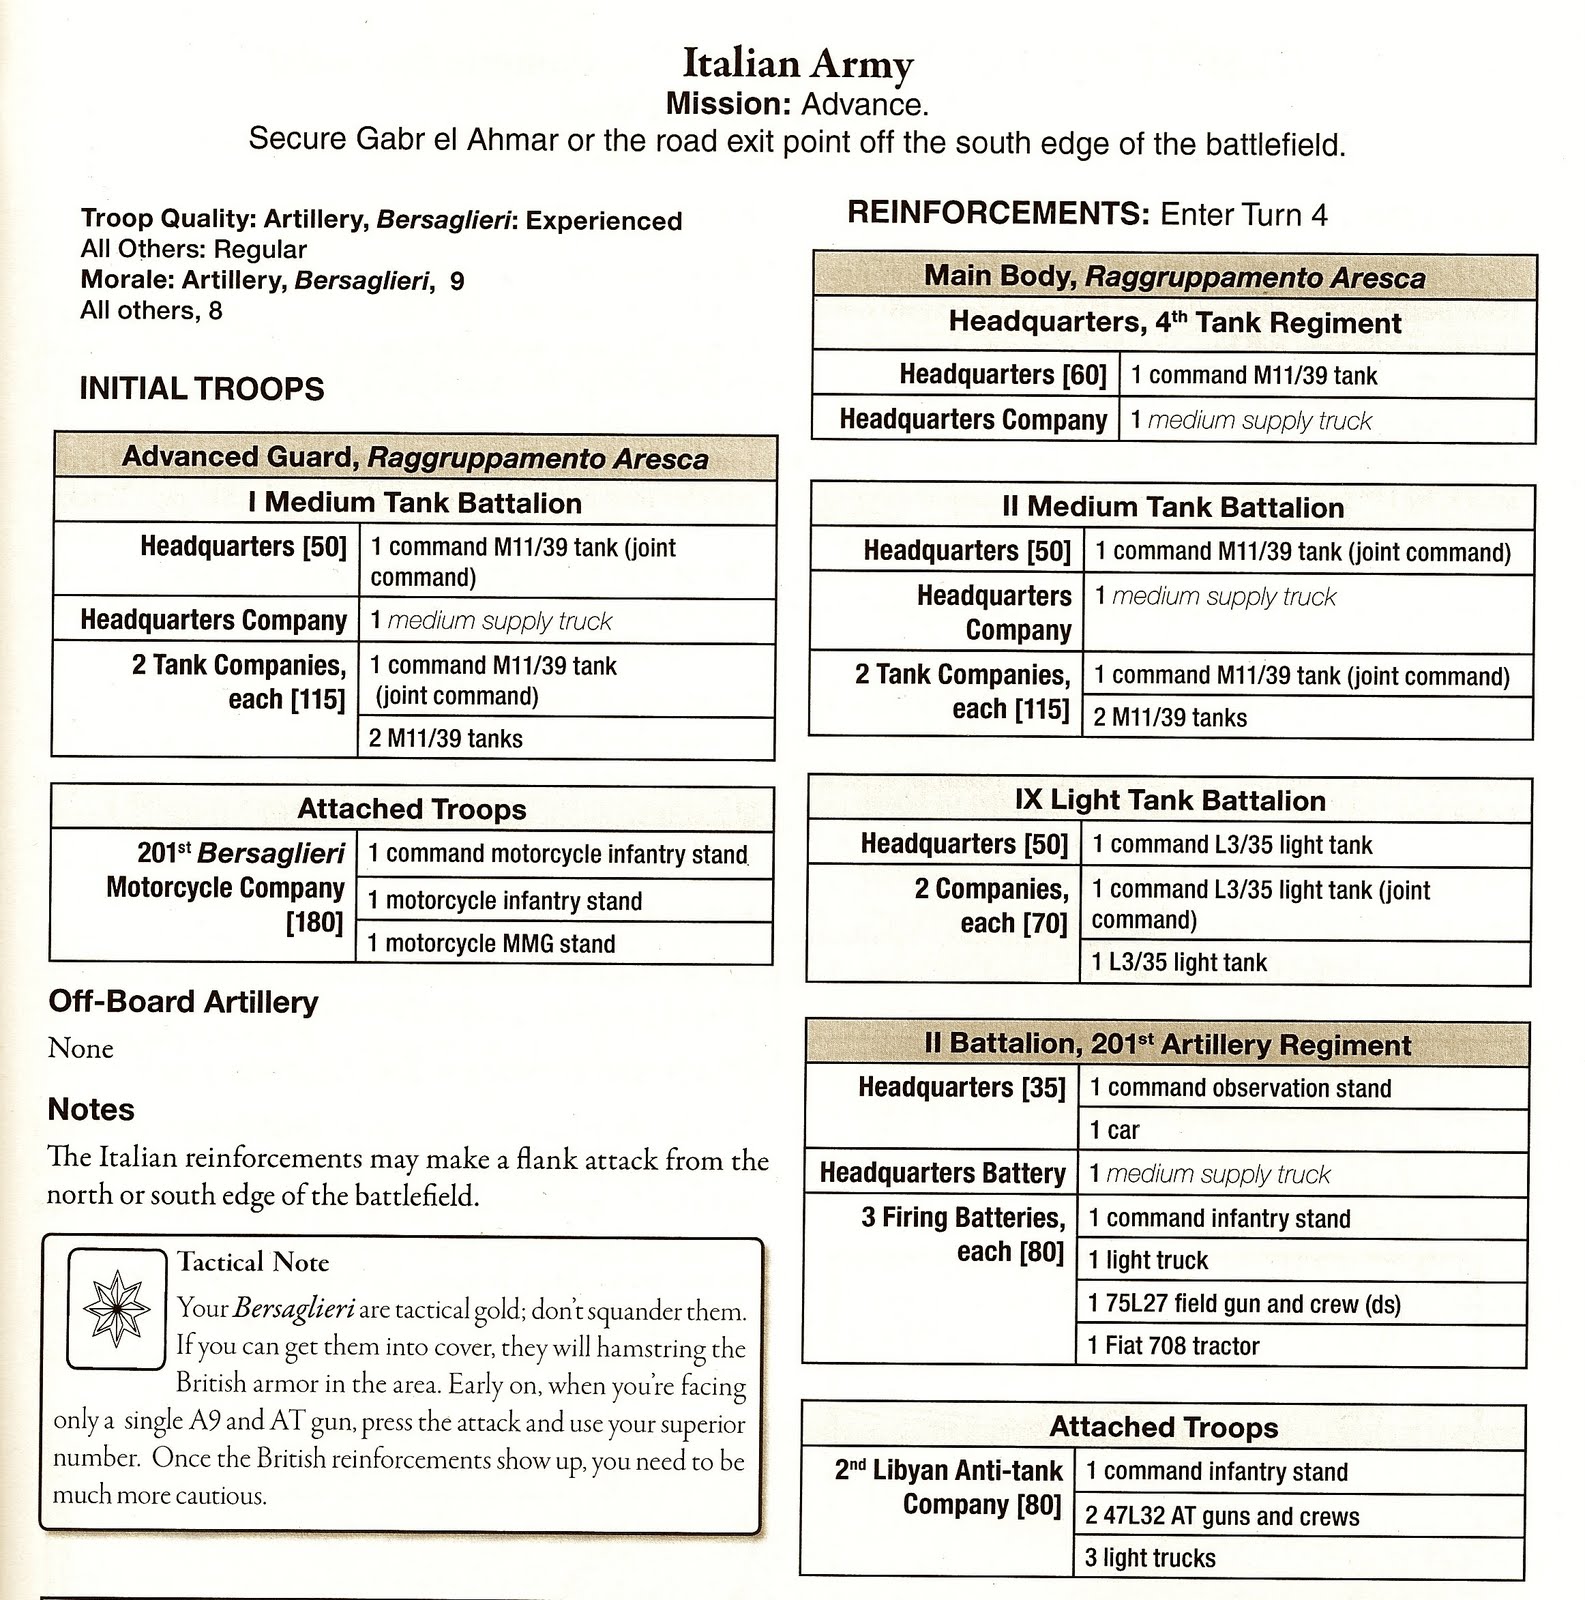
For the Italians the book gives...


...which I transpose as:

Raggruppamento Aresca. CO CV8

Initial Troops

1st Medium Tank Battalion. HQ CV7
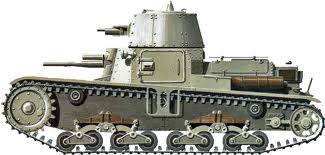
5 M11/39

Motorcycle company, 201st Bersaglieri. HQ CV7
2 m/c infantry units (regular)
1 m/c mg unit (regular)

Reinforcements

2nd Medium Tank Battalion (+). HQ CV7
5 M11/39
1 47mm ATG with tow

9th Light Tank Battalion (+). HQ CV7
5 L3/35
1 47mm ATG with tow

2nd Battalion, 201st Artillery Regiment (on table). HQ CV7
2 75mm artillery support units with tows (veteran)

BP = 11.  25% = 6

Reinforcements arrive turn 4. May use flank deployment. CO arrives with reinforcements.

Notes
I have separated the Italian initial forces into 2 commands, as I think it will be handy and fun to have the infantry available to go their own way. For the British initial forces, I have folded the Rolls Royces into 8th Hussars, reasoning they were supposed to act as a recce force for the tanks. This is obviously just personal choice.

2 pdrs will have to stand in for the 37mm ATGs of the Brits, as I don't have the correct models, but they will fight as 37mms, the stats being different. There are only 2 guns in the Italian artillery formation as I only have 2 suitable models, but I think this will be enough to represent their role. The Libyan-manned 47mm ATGs of the Italians have been added to the tank battalions.

The book states that reinforcements for both sides can enter 'from the north or south edge', which doesn't fit in with the map orientation (north being up, as usual). I have taken this as a misprint, having encountered something similar in one of the other scenarios, assuming it should read 'east or west edge'.

I have made my own assessments of troop quality, guided by Mr. Chadwick. The British infantry get veteran status. It is not normal with BKC to give veteran status to support units, but as the Italian gunners were famous for their resolve, they get the higher rating as well.

The game will be fought as a standard BKC encounter scenario, except that I have no idea whether the forces have equal points (and I don't intend to check!).

The Battle

Shallow wadis are represented by brown felt shapes: these are treated as high area terrain for movement purposes. Units in a shallow wadi can claim partial cover but do not get a save value. The rough ground (shown by the fine gravel seen in the bottom right hand corner) attracts the dense terrain modifier but offers no cover. Moving on Qabr al Ahmer also means a modifier for dense terrain.

The Italian 1st Medium Tank Battalion moved quickly to centre table, watching with bemusement the antics of the British initial forces (who suffered 2 command blunders in 4 moves)

Combat was limited until the arrival of the reinforcements. The Italians managed to get themselves sorted out into a reasonably balanced deployment.

The Italian 9th Light Tank Battalion have their moment of glory, cresting the rise of Qabr al Ahmar and machine gunning the KRRC company. They would soon be driven off by the British light tanks (see 'House Rules and Other Stuff' below).

Half the Italian artillery failed to arrive on table (another command blunder), but the half that did set themselves up on a rise to the east of the road and did some useful shelling.

The Italians didn't fancy flank deployment (with their low CVs), but 6th RTR managed a delayed flank deployment which brought them right under the barrels of the Italian 2nd Medium Tank Battalion.

A determined slugging match went on for several moves, which the Italians eventually lost.

Qabr al Ahmar was the focus of the fighting. The Italian 1st Tank Battalion suffered a command blunder which saw them recklessly charging forward into a hornet's nest of British fire, which was to lead to their destruction.

A cloud of smoke hangs over the battlefield as the game ends. British light tanks have also suffered, but victory was with the British who knocked out a large number of Italian units in the last couple of moves, taking the Italians well beyond their breakpoint whilst themselves only losing 6/9.


House Rules and Other Stuff
BKC2 doesn't give the British Vickers Light Tank MkVI an AT value, but the vehicle had a heavy machine gun (Vickers 0.50" or Besa 15mm) supplied with armour piercing rounds and designed for anti-armour fire. Hence I give these tanks 1/20 for their AT value, and they were able to drive the Italian L3/35s off Qabr al Ahmar during the game with no trouble.
The M11/39s fought nobly but in a firefight their limited traverse and AT value of 1/40 puts them at a real disadvantage. If anyone knows why their main armament gets only 1 attack rather than the 2 attacks of other 37mm/40mm weapons of this period, I would be glad to hear from you. For the moment I'll just go with the rules.

There is an interesting article by David Brown in the latest Battlegames (Issue 26) arguing that the Warmaster system makes command and control subject to rather too much luck. He makes a number of interesting points, and this battle might be seen to support some of them - there were a large number of command blunders which screwed up the plans of both sides for no apparent reason. I am happy to accept these as a bit of fun, but I can understand the reservations of some gamers. In BKC2 there is a rule allowing the CO to re-order units that failed to receive any orders from their HQ. This is a good and simple adaption which means players can bring some command focus to bear via a well placed commanding officer.

Paul rang the changes by bringing round some beer. This meant drinking Speckled Hen from cans, but then (as they say) war is hell!

Saturday, 1 January 2011

Fort Capuzzo, June 16th 1941


Following an autumn dedicated to SYW gaming, I have finally turned back to WW2. I decided to get the 6mm Western Desert stuff out, using (of course) Blitzkrieg Commander as my ruleset. Funny really: at the height of my concentration on SYW, I had actually considered selling my GHQ Western Desert collection to make money for more SYW purchases. Luckily I had the sense to realise I would return to my other interests in time.

This will be a fairly long post: as with some previous Western Desert reports, I find it fun to mix in some real photos of the actual area and consider some of the scenario alternatives. Once again I turned to the Command Decision scenario book Benghazi Handicap by Frank Chadwick for inspiration, and chose the scenario 'Rally Forward', which covers the German attempt to recapture Fort Capuzzo from the British on the second day of Operation Battleaxe, June 16th 1941. In the original battle the Germans failed to re-capture the Fort, due it seems to a stubborn, well conducted British defence supported by tanks, an unusual lack of tank/infantry cooperation on the German side, and a lack of German resources in infantry. I went with the forces and map given in the book, though Barrie Pitt's Crucible of War: Wavell's Command might suggest some alterations, which I will mention at the end.

Here then is the game map reproduced from the book. Designed for a 6' x 6' table using 15mm miniatures, 4' x 4' would be fine in 6mm:


Below are the German forces as outlined in the book. It is easy to convert to the BKC equivalent as Command Decision uses the same ratio of models to real troops. However, the BKC website includes a download called 'Converting Orders of Battle' which gives some useful advice if you want it.


So for BKC these forces came out as:

CO, CV10. 1 recce unit (PzII)

1st Bn, 8th Panzer Regt
HQ CV9, 2 PzII, 2 PzIII, 1 PzIV

2nd Bn, 8th Panzer Regt
HQ CV9, 2 PzII, 4 PzIII, 1 PzIV

Regimental Troops, 8th Panzer Regt
HQ CV9
3 infantry units + ATR upgrade, 1 MG unit, all on motorcycles
3 infantry units + ATR upgrade, 1 MG unit, all in trucks
1 37mm ATG unit with tow
1 50mm ATG unit with tow
1 88mm ATG unit with tow
2 20mm Sdkfz10/4 units 

1st Bn, 33rd Artillery Regt
FAO CV8, 3 105mm artillery units (off table). 6 artillery assets.

Below is the British OOB from the book and the BKC equivalent I used:


CO, CV8. 1 recce unit (scout carrier)

1st Bn, The Buffs
HQ, CV7
12 infantry units + ATR upgrade
1 mortar unit
2 2pdr portee units
1 2pdr ATG unit with tow

7th RTR
HQ, CV7, 4 Matilda II

Battery, 31st Field Regt
FAO CV7, 1 25pdr artillery unit (4 gun, off table). No assets.

This gave the Germans 2745 points, with a breakpoint of 11 (13, minus 2 for flexible doctrine). The Brits had 1580 points, breakpoint 10. I decided to play the game as an Assault scenario, but allowing no flank deployment as this was not indicated in Benghazi Handicap. The points advantage for the Germans was well over the 50% allowed for in BKC, but it still seemed the Germans had their work cut out. They had half the infantry the Brits had, and a limited advantage in tanks, especially considering how tough the Matildas are. Their main advantage was in artillery, and their superior CVs. As all the Brits would be able to dig in, we decided to use the 'auto suppress' optional rule, and extend it's use to on-table HE fire from mortars, infantry guns and tanks etc. In particular this would give the Germans the option to use their PzIVs in their historical role of bombarding and suppressing the British 2 pdrs.

For a bit of period flavour, the photos below give some contemporary views of Fort Capuzzo and the surrounding terrain:


The Game

First photo shows my interpretation of the game map, looking from the north (German) table edge. Tarmac roads in dark grey, tracks in yellow. Shallow wadis are represented by brown felt shapes: these are treated as high area terrain for movement purposes. Units in a shallow wadi can claim partial cover but do not receive a save value. The rough ground (shown by the fine gravel scattered in the bottom right hand corner) attracts the dense terrain command modifier but offers no cover.

British set up. All 4 Matildas are dug in on the British right flank, an interesting tactic which shut off this flank from the possibility of attack as far as I was concerned (as the German player).

If any reader doubts whether the Brits would have dug-in their Matildas, here is a photo from Tobruk around the same period. With only the turret exposed, a very tough nut to crack.

The Germans enter the table, with the stronger panzer unit aiming for the weaker British left flank. They would have to find gaps through the wadis, relying on arty and direct HE to suppress the British 2 pdrs. The weaker panzer battalion is on the German left flank and would play a waiting game. Infantry support in the centre, with ATGs leading.

The auto-suppress rule payed off well for the Germans throughout the game, as can be seen by the measles rash of red dice in this and later photos. We thought this historically sound.

German right flank creeps steadily forward. One portee 2pdr has been KO'd, but the British mortars have claimed the 88mm near the road.

The threat to the British left forces Paul to move his Matildas out of their pits and move them round the back of the fort. The HQ of 7th RTR has been knocked out by artillery in a freak rash of sixes (bottom right).

Now is the time for the German left flank armour to advance, but in typical BKC fashion the command rolls failed at the crucial moment. German FAO in foreground, who was vital to the advance.

Auto-suppression cuts both ways. We were using the 'reduced artillery fire zones' optional rule, which gave the Brits only a 10cm circle for their arty. Nevertheless, here they have a successful shoot against German tanks and infantry bunching up as they negotiate the line of the wadis.

As the game nears its end, the Germans close in on the fort, aided by suppressive artillery and direct HE fire. The tank duel between the panzers and Matildas (centre background) starts to go in the German's favour, now that the Matildas are in the open. The British were hampered by their low CV, not getting in enough fire orders to tip the balance in their favour. The German left flank Panzer Battalion has caught up.

Last move, move 8. The German infantry have broken through on the British left flank following a close assault, and have managed to get 2 units into the fort, but this is not enough. The Matildas are scattered, with 1 knocked out, 1 suppressed and fallen back, and a third skulking behind the fort to avoid German fire. In a desperate final charge the German 1st Panzer Battalion lunge towards their objective but lose 2 tanks destroyed and 1 suppressed (the latter out of picture to the left), demonstrating the likely result of doing without covering fire. Overall, the Germans have been cautious, advancing under the cover of suppressing fire, and have lost only 5 out of a breakpoint of 11. The British end on 6/10, including their destroyed HQ from 7th RTR. The result then is a minor victory for the British.

And in conclusion...
A most enjoyable game. Just for once I tried hard to think about my tactics rather than just charging in, and it almost worked. Things would have been much tougher for the attackers if the auto-suppress rule had been limited only to artillery, though I leave it to you to decide whether our modification is justified.

In Wavell's Command, Barrie Pitt indicates that 15th Panzer Division had 80 tanks available for this attack, which would work out to 16 tanks rather the 12 we used, if you assume 5 tanks in a German tank platoon. He also suggests the presence of German engineers, so perhaps a company of these could be included. His battle account is not detailed however, so for this game I took Frank Chadwick's word for the balance of forces. Having the British 25pdrs on-table (another option suggested by Pitt's account) would make the British anti-tank defence rather too strong, in my opinion. Despite the historical validity of digging in Matildas, I don't think this was actually done in the battle itself, so perhaps only the British infantry should be allowed to dig-in, which would help the Germans.

And finally...
A couple of photos I found online showing how other gamers have represented Fort Capuzzo. The lower photo in particular shows a rather different interpretation of the surrounding terrain.

http://willwarweb.blogspot.com/2008_06_01_archive.html 
(A game put on by the Society of Gentlemen Gamers)

http://saskminigamer.blogspot.com/2008/02/wargames-weekend-08-part-2-saturday.html

Hope you enjoyed the post. Once again, best wishes for 2011 to all visitors. Leave a comment!

Wednesday, 15 April 2009

Hafid Ridge


A10s of C Squadron, 2nd RTR, who would be the first British regiment
to attack at Hafid Ridge. Photo taken in April 1941, reproduced in
Tank Combat in North Africa, by Thomas Jentz.

Having chosen 'Swanning About' as the next Benghazi Handicap scenario to refight, I wanted to do the write up a bit differently. So I'm starting with some photos and explanation that might get you into the mood for the wargame. An overview of Operation Battleaxe and the Hafid Ridge action, which took place in June 1941, can easily be summoned online, or through any decent book on the campaign. Such an overview is not the purpose of this little introduction. Rather, I wanted to briefly explore some aspects of the battle which might illuminate the wargames scenario.

If you have already read my earlier post, 'Wargaming 2008', you will know that I do not really believe miniature wargames are capable of 'simulating' warfare in any meaningful way: I believe what we are doing is playing with toy soldiers. But that doesn't prevent us from doing some research into our period, especially when we are considering a refight of an historical battle.

Hafid Ridge is often cited as an example of the poor tactics of British armour during this period: a gung-ho charge against a well concealed line of German anti-tank guns. However, Frank Chadwick, author of Benghazi Handicap, makes it clear that this was not the whole story. Military historian Paddy Griffith has described the problems the British had in his book, World War II Desert Tactics.

'On Hafid Ridge the British would encounter a phenomenon that would become almost typical in subsequent battles. This was the allure of an enemy position that appeared to be only lightly defended, or occupied only by vulnerable soft-skinned vehicles. The temptation would be strong for British armour to charge in piecemeal and without careful preparation, leading to disastrous results when the enemy's 'vulnerable' trucks turned out to be accompanied by towed guns, some of which turned out to be very dangerous indeed to attacking tanks. On Hafid Ridge this problem was made worse by the complexities of the terrain, which turned out to consist of three successive ridges rather than just one; the Axis forces lurking behind the second and third caused all sorts of unexpected difficulties to the British armour that had successfully cleared the first.
This battle therefore stands as a classic early example of all those difficulties of reconnaissance, navigation and terrain analysis that proved such pitfalls for tacticians throughout the whole desert war.'

That there were problems with British tactics can hardly be disputed: the reference in the 6th RTR war diary to carrying out 'a good broadside shoot ... at speed' has been much quoted, and is hardly indicative of modern tactics. However, the British of 2nd RTR and 6th RTR did have a confusing and difficult situation to deal with, and were facing a well laid out defence. These factors should be borne in mind.

If you're not familiar with it already, the concept of the stutzpunkt is central to this action: a defensive position prepared for all-round defence which was intended to hold out even if outflanked, and consisting of anti-tank guns supported by infantry with (ideally) some artillery support in range as well. The literal translation of stutzpunkt is (I have found) a little awkward; but 'strongpoint' makes a good one word summary. Stutzpunkt 208 was one of 4 main stutzpunkte which anchored the German/Italian defence during Operation Battleaxe (the others were Stutzpunkte Halfaya, 206, and Qalala). There were 3 other supporting stutzpunkte in rearward 'backstop' positions. The idea of these positions was to delay and damage attacking forces whilst a panzer counter attack was prepared and launched. Some aspects of these positions are shown in the photos below:
This 88mm is dug in at Halfaya pass, but indicates what one of the 88mm positions on Hafid Ridge may well have looked like. The caption is well worth reading. The photo is taken from Thomas Jentz's invaluable Tank Combat in North Africa.

This is a pair of German gunpits, including one which seems to contain a 20mm flak gun as employed at Hafid Ridge. Once again, not actually Hafid Ridge (as far as I know) but indicative of how hard to spot such positions could be, even in open desert terrain. The image is from a New Zealand website, 'The Desert War'.

This photo (from lonesentry.com) is captioned as being of a 'dummy Axis gun position near Halfaya Pass'. If so, this shows how convincing such a position could be. The British concluded they had encountered dummy positions during the Hafid Ridge action, as the map below (once again from Jentz's book) shows. It is interesting to note how hard it is to work out the lie of the land from this map. Working out where the various ridges and dips were must have been a real problem for the British.


Jentz's book presents most of the primary evidence from both sides regarding Hafid Ridge. The extent to which there were dummy positions, or the extent to which the German defence was in any way 'mobile', is not really clear. It would seem survivors of the first line of positions may have fallen back behind the second ridge to join their comrades, which tempted the British on. The position was certainly arranged in depth, with many, possibly most, of the guns in dead ground between the ridges rather than actually on the ridges.

It is worth noting that both British tank regiments believed they were shelled by artillery at various times, and that the Hafid position contained a number of field guns. However, the order of battle for Stutzpunkt 208 did not include any artillery, just 20mm, 37mm, 50mm and 88mm AT guns. Probably fire from the 88s and the 75mm guns of German Panzer IVs was mistaken for artillery. Benghazi Handicap gives the Germans no on- or off-table artillery for this scenario. German reports indicate the British may have suffered some artillery fire from guns supporting Stutzpunkt 206 during their approach to contact.

I hope this introduction has given you a bit more feel for the circumstances of the battle, whether or not you possess Benghazi Handicap. Without further ado, this was my adaption of the scenario for BKC, using a 4' x 4' table with 6mm size models.


'Swanning About'
Hafid Ridge, June 15th 1941

British

Initial troops: 2nd RTR:

HQ (CV8), 3xA13, 2xA10, 2xA9

Reinforcements: 7th Armoured Brigade

Brigade HQ: CO (CV9)

6th RTR: HQ (CV8), 9xCrusader I

JAXO Column: HQ (CV8), FAO (CV7), 1xcarrier (recce), 3xinfantry units in 3 trucks, 1x2pdr portee, 1x25pdr unit (on or off table), 2 assets

Breakpoint: 11

German

Initial Troops: Stutzpunkt 208 Garrison

HQ (CV9), 1x88mm+tow, 1xSP20mm AA, 1x37mm+tow, 2xm/c(mg) units, 1xm/c unit

Reinforcements: 8th Panzer Regiment

A maximum of 3 battlegroups, formed at the player's discretion from:
CO(CV10), 2xHQ(CV9), 3xPzIII, 3xPzII, 2xPzIV, 3xm/c units, 1x50mm+tow, 1x37mm+tow

Breakpoint: 10

All German command units have a 25cm command distance increment.


Deployment
British initial troops deploy first up to 15cm from baseline. Then German initial forces deploy anywhere up to the centre of the table. All may be dug-in. They may also use hidden deployment, and are allowed 3 fighting units plus one command unit as dummies.
British reinforcements deploy up to 15cm from baseline during the command phase of move 3.
German reinforcements deploy up to 15cm from baseline during the command phase of move 5. Any German reinforcing battlegroup may also use flank deployment on either flank, in the first two thirds of the table.

Victory conditions
Both sides seek to break the opposing force, in order to control the area. Minor objective is to inflict 25% casualties, the major objective is to break the opposing battlegroup. No turn limit.

Notes
This battle was a natural for the optional 'Hidden Deployment' rules from the first edition of BKC. However, with such a small initial force, and considering the circumstances of the battle, I decided to allow dummy units for 50% of the force, plus a command unit as well. This should keep the British guessing for a couple of moves. Making 2nd RTR deploy first, before the German defence is positioned, is another attempt to give the defenders an edge. The 25cm command distance for the Germans was a small experiment to help them with both initial deployment and the mobile battle to follow. Perhaps this would help to represent their greater tactical flexibilty.
Both sides have the option of a separate brigade level CO operating solo and therefore able to intervene around the battlefield, rather than having the CO allocated to a fighting formation as in my Mechilli refight.
I also decided to go for simple victory conditions without objectives, as if this was a BKC 'encounter' battle.

The Wargame

I wasn't entirely happy with the look of the terrain. I had ordered 2 custom ridges from TSS but had asked for them to be too squared off at the ends. Silly me. The colour of flock used by the company has also subtly changed since I acquired my tiles, although the photo accentuates the colour difference. These two problems together resulted in the rather unconvincing rectangles you see above.
German baseline on the left (this direction is north), British on the right (south). The wadis in this game are 'shallow' in CDTOB terms, so they only count as dense terrain for BKC. The edge of a wadi will break LOS to units within the wadi.

This is the end of move 1. The A13 squadron of 2nd RTR have positioned themselves on the crest of the first ridge, and two tanks have been knocked out. This has meant that the real 20mm flak and 88mm gun have been revealed (if they were dummies they wouldn't have been able to fire), and the dummies removed.

Move 3, and 6th RTR and Jaxo column have arrived, deployed on the British right flank. 2nd RTR see no advantage in taking on the German gun line and so fall back and manoeuvre around the east end of the ridge as well. In this movement they were covered by smoke fired in move 2.

Next move finds the British huddling uncertainly in dead ground. Where will the German reserves arrive?
Half the German tanks with an HQ, plus the anti-tank guns and infantry under the CO, arrive on the German baseline to oppose the British tanks. A Crusader is knocked out. The other half of the German tanks were unfortunately ordered to arrive on the German right flank, well away from the action. Even more unfortunately, they will fail to arrive until move 8.

Move 6, and the high point of German success. The British fall back from the fire of German tanks and supporting anti-tank guns. 2nd RTR, however, start to sneak up on the Germans behind a rise on the east flank.

Moves 7 and 8 and the British start to use their advantage in tank numbers. 2nd RTR breast the rise and mince up the German tanks, supported by long range fire from the Crusaders. They are also in mg range of the German anti-tank guns and the 50mm is lost, whilst one 37mm is suppressed and the other knocked out. The infantry also make an impact, despite their small numbers, advancing forward and helping to engage the 37mm. German motorcyclists respond by moving forward to screen the German line. The 25pdr of Jaxo Column manages to suppress the 88mm during move 8. The Germans get some satisfaction with the destruction of 2 tanks from 2nd RTR, from a mixture of infantry anti-tank rifles, 20mm flak and 37mm fire.

The final positions. During move 9 the rest of the German tanks finally move across to help their comrades who are under severe pressure. 6th RTR wheels across the ridge and decisively defeats them in a flurry of opportunity fire, although half their number end up suppressed (indicated by the brown lichen placed behind them). A tactical mistake here: the Germans should have halted outside half 2pdr range, but within half 50mm/75mm range, which is possible with the ranges in BKC. This they failed to do, the German commander rashly advancing too far under the influence of Hoegaarden (Belgian white beer) provided by the British commander! 
Although 2nd RTR are nearly wiped out, mainly by fire from the 88mm, move 10 sees the Germans lose their next to last tank and go over their breakpoint by one. They need to roll 9 to continue, but an 11 sees them abandon the field. Probably a wise decision - they have lost 7 out of 8 tanks, as well as the 50mm, one 37mm and two of the motorcycle stands. British losses were 6 tanks from 2nd RTR and 1 from 6th RTR, with no loss amongst supporting arms. These losses mean the victory counts only as minor one.

Conclusion. 
A fun game, taking 3 hours to complete. Use of command re-rolls by the British CO, operating as a brigade commander (a house rule) were prominent in keeping the British moving. If the second German tank group had arrived on time and on the German left flank, it might all have been different. Although history was reversed, it was interesting that many features of the real battle manifested themselves. For example, 2nd RTR advanced, then backed off after initial casualties. There was also much skulking around behind and around rises and dead ground by both sides. The need for British tanks to close to mg range when attacking soft targets was a real problem for them. 
This has turned out to be a long post, but I hope you have enjoyed having something to get your teeth into!