Followers

Saturday, 16 July 2011

Defending The Gorge, 3rd September 1939


My relentless search for other people's scenarios that I can rip-off for my own games has once more borne fruit. 

Of late I have been enhancing my moments of relaxation by looking through old issues of Battlegames, and in issues 1 and 2 I found the Battle of Liebenau, a scenario by Jim Purky (aka Der Alte Fritz) for the SYW. Liebenau is a real place where in 1757 a rearguard action by the Austrians against the Prussians was contemplated but never fought. 
Deciding to fight this 'might have been' battle, Jim based his scenario on the Battle of Guildford Courthouse, which of course took place in 1781 during the American War of Independence. In Jim's battle the Prussians must overcome the Austrians who are deployed in depth in three lines, as the Americans were in 1781. The narrow table derives from the supposition that the attack is taking place along a valley with steep hills to either side. Jim's map for the battle is shown below (with written permission of Battlegames magazine. If you wish to use this map contact the copyright holder at the email address given):


My first intention was to refight the scenario as given, as a straight SYW battle. But something in the idea of defending a narrow valley in a rearguard or delaying action rang a bell. Eventually I realised I was remembering 'Defending the Gorges', a 'real' battle from Fall Weiss, Chris Pringle's 1997 scenario booklet covering the 1939 Poland campaign. Chris's map for the scenario is large scale and rather basic, and covers 3 gorges (hence his plural). For the detail of a battle for one gorge, I thought why not go for a table based on Jim's SYW idea. 

There you have it then. From the fictional Battle of Liebenau (1757), via the real Battle of Guildford Courthouse (1781), to 'Defending the Gorge', a representation of 10th Mechanised Brigade's defence against the attack of 2nd Panzer Division in southern Poland, on 3rd September 1939. I have selected the centre of Chris's 3 gorges for my re-fight. Like Liebenau, Tenczyn is a real town, but rest of the terrain is fictional and based on Jim's map. The forces however come from Chris's scenario so should be reasonably correct historically. The game will, as always, be fought using Blitzkrieg Commander. The map below gives the basic layout of the game: the dark green areas are woods. Jim's original table size was 10' x 6' - mine will be 6' x 4'. As you can see the main change is leaving out the river, which didn't feature in the 1781 or 1939 battles:


The Poles
The 10th Mounted Rifles, one of the 2 motorised infantry battalions within 10th Mechanised Brigade, form the heart of the defence. The first line consists of the tankettes of 121st Scout Tank Company supported by a company of the 10th Mounted Rifles. The rest of 10th MR forms the second line. The third line consists of 121st Light Tank Company with its Vickers tanks, supported by the Brigade's reconnaissance infantry company. Off table is a 75mm artillery battery and a 100mm artillery battery. 
Unusually the Poles will have some air support. Even more unusually we have a brief account of the actual mission, flown by the 24th Reconnaissance Flight, in Tomasz Kopanski's book PZL.23 Karas:

"On 3rd September another bombing raid (six Karases) was flown. This time it was directed against a German armoured column moving in the mountainnous terrain in the area of Rabka-Podwilk. Each Karas carried six 100kg and two 50kg bombs. Having located the enemy column, the Flight crews bombed it from an altitude of 600-800m, obtaining direct hits on some vehicles. Then they strafed the column. German AA defences managed to shoot down one aeroplane."

The Poles are thus granted 2 ground attack units (Karas), along with 2 air assets. As the Germans automatically have full air superiority according to the BKC rules, it remains to be seen whether this air support will get through during the game.

The Germans
Elements of 2nd Panzer Division were attacking the Tenczyn gorge. In the game they are allocated a Panzer Battalion (a total of 10 model tanks), 2 Schutzen Battalions, a reconnaissance detachment (standing in for Jim's hussars) and a strong off-table artillery force of 3 105mm batteries and 1 150mm battery. German air support in the real battle apparently came from a force of Me110 fighter bombers, but I allocated 3 JU87 dive bomber units with 6 assets, as I have a Ju87 model available.

Scenario Notes
The game would be played basically as an assault scenario with Tenczyn as the objective. The points balance was about right, but with the Poles able to deploy further forward than normal and with no flank deployment possible, the turn limit was removed. We would just see how it went.
It is not normal for the defenders to have air support, but as described this was available in real life. To speed things up for an evening game I intended to deploy both sides fully in advance. Aiming points for air and artillery assets would therefore be plotted with full knowledge of enemy dispositions. This rather takes the normal guesswork out of this activity, but the advantage would be the same for both sides' air assets, whilst the advantage to the German artillery would help compensate for the forward deployment of the Poles. 
Note there are no FACs, even for the Germans. The rules state an FAC is possible for the Germans, but this seems a bit doubtful to me for the Polish campaign. If one did allow a German FAC in 1939, I think a CV of 6 or 7 would be appropriate rather the 8 given in the rules.

The Game

The game got underway with scheduled artillery and air strikes. 
The Stukas picked off the exposed TKS tankettes supporting the Polish first line. On the right you can see 2 PzIs that have been caught in a Polish minefield.

As the Germans advanced (rather slowly), the Polish Karas made their appearance.
They were shot down by a storm of AA fire and had no effect.

Vickers tanks and the recce company wait in Tenczyn. Bofors AA unit on hill at left: a really useful weapon that makes a pretty good anti-tank gun in this period.

Dug-in troops are a bitch to shift in BKC II: it usually comes down to a close assault. Even then you need to assemble a heavy advantage in numbers to assure success, as here. 

The German right flank has now broken through to the Polish second line.

View of the same situation showing the Polish Vickers tanks taking some revenge against the leading German Panzers.

To the left of the road, the Germans failed miserably to make any significant progress, with a succession of failed command rolls. This was their position at the end of five moves: total advance 20cm!

Unfortunately that was as far as we got. That was the end of move 5 and we had run out of time, mainly due to being rather rusty with the rules. We had gamed from 8.00pm to 11.00pm, with half an hour of pre-game preparation and then taking an average of half an hour per move. Although the game was unfinished, and neither side was anywhere near their breakpoint, I would give a moral victory to the Poles who seem unlikely to be shifted from their second line. The Germans were not really on form and their left flank was a disgrace - some demotions seem likely! It was interesting to see what a tall order breaking through 3 lines of defence is, even when there is a reasonable superiority in numbers. 
Despite the frustrations, we found we had enjoyed ourselves and a pleasant evenings wargaming had taken place. BKC II is always a pleasure to play.

Finally, it's great to see the number of followers of this blog increasing. Thanks for your interest, and for the interesting comments that have been coming in recently. 

Friday, 8 July 2011

Black Powder - The Minimalist Approach

Black Powder - Big Games for Elite Wargamers?


Our game has been developed and played almost exclusively on tabletops at least 6 feet wide and between 10 and 14 feet long. The game works best on large tables and using relatively large forces.
Black Powder rulebook, p.4.

It was an interesting decision for the authors of Black Powder to publish a set of rules designed to work best for big armies and very big wargames rooms. The former would make creating forces daunting for the newcomer, whilst the latter would seemingly exclude the overwhelming majority of wargamers, regardless of their experience or the size of their collections. Fourteen foot tables - you must be joking! But Rick Priestley and Jervis Johnson didn't get where they are today without having a keen commercial sense. My guess is that they recognised the appeal of a big, bold product with high production values, and knew that wargamers would adapt it to the limitations of their own circumstances.

And this of course is exactly what happened. Gamers with more normal wargame set-ups than messrs. Priestley, Johnson and the Perry twins quickly adopted reductions in move and firing distances, reductions in unit sizes, and reductions in the size of models used. The good old 6' x 4' table was quickly found to be perfectly adequate for Black Powder.

But there is more than one way to reduce the size of your Black Powder game. 6mm miniatures and halved distances will give you a physically smaller game, but there is still the matter of the army structure as presented in the rules. That is, armies of at least 3 brigades (and preferably 5) with each brigade containing 3 to 6 units. Can you play Black Powder with armies only having 2 brigades, or even just one? And what about brigades of 2 units, or just one? 

The one unit brigade is really already catered for, by the 'marauder' rule. For the rest, it has become apparent to many wargamers that the key to scaling down the size of Black Powder armies is adapting the Brigade Morale rules. And whatever size of game you are playing, these same rules are the key to adjusting game length to your preference.

Small Games for Normal Wargamers.

Players need not feel too bound by these particular rules - we are happy to ignore or change them where we feel it appropriate to do so - we suggest you do the same.
Black Powder, p.96 ('Victory and Defeat')

The authors of Black Powder are sensible enough to indicate from the word go that amending or adapting the rules is fine by them. However, as the above quote shows, when it comes to the Brigade Morale rules they are practically begging the wargamer to make his own changes. The rules contained in the book are central to the stated aim of having big games that can be played in an evening, and they work very well for that purpose. But you might want your big game to last all day, or you might want a small game that will not be all over in half an hour. The answer is to change the Brigade Morale rules to slow down the rate at which brigades are lost. This can be done very simply, and I have adopted 2 main options, one of my own and the other borrowed from wargamer The Last Hussar, whose blog can be found on my list of favourites (see his post for 5th March 2011). The 2 options are completely separate: one does not build on the other.

Option 1.
'Units count as lost for Brigade Morale only if they have been destroyed or have left the battlefield and cannot return'.
Thus shaken units and units that have left the table but are eligible to return are not counted as lost for brigade morale. I have found this works well for extending the duration of big battles into a full day (for example, at a wargames convention), and also for games where you have smaller brigades and/or not too many of them (say 3 brigades with 3 units each, or just 2 brigades). I used this option in my recent 'Battle of Burndt', which can be found a couple of posts down.
Note that with this option, all the other published rules for brigade morale are retained and used normally. There is no extra work or additional thinking to be done when using this option: it could hardly be more simple.

Option 2. (The Last Hussar Option).
'Brigades are only broken when more than half of their units are lost. In addition, shaken units in a broken brigade can be rallied, which may result in the brigade returning to unbroken status. Disorder can also be removed as normal from units in a broken brigade, unless the unit makes a compulsory or voluntary retire move'.
This is an amendment which can cause a modest amount of additional work, and which I use to cope with small games and small brigades. It means you can have a Black Powder game with just 1 or 2 brigades, and brigades with just 2 units that are still reasonably resilient. 
Note that you have to be allowed to recover from disorder even if the brigade is broken, in order to then issue 'rally' orders to remove casualties and restore a unit to unshaken status. This might then mean that your brigade is no longer broken and can resume the fight. Of course, if your 3 unit brigade has lost 2 units destroyed, there is no way back for it. But if it has one unit destroyed and one shaken, you can try and rally the shaken unit in order to get your brigade unbroken again. If you have a 2 unit brigade, it needs to have both its units destroyed to render it completely useless. 
Note also that keeping the pressure up on a broken brigade and forcing constant retire moves makes it harder for your opponent to recover from broken status.

One Brigade Games

Two nice little scenarios came up recently which were just right for trying out one-brigade battles. The first is the Cavalry Clash teaser from Battlegames issue 23. Map is shown with written permission of Battlegames magazine. Contact the copyright holder at the email address given if you wish to publish it yourself.


I won't detail the whole scenario, but this is an encounter battle with a few tweaks to make it more interesting. It involves a single cavalry brigade on each side, with 4 units in each brigade (one of the red units is off-table at game start). Original table size was 9' x 6', with large Charles Grant-style units. Using option 2 above I have played it out solo, and with an opponent at the Portbury Knights club. In each case the battle went on for around an hour and a half, with units falling back shaken then re-entering the fight, as well as the competing brigades becoming broken then recovering. This can result in what looks like a hopeless situation being turned around, if you persevere and use the right tactics to husband your meagre forces. The games were really good fun. For a short game you can stop on the first occasion a brigade is broken, but for the full game you should carry on until a brigade is broken and has no chance of recovery. This will be when the brigade has had over half its units destroyed.
Turns are very quick and the number of moves achieved is high. If there is a down side it can seem as if luck plays a stronger role than normal; and of course the feel of a big battle is lost. My set-up for the game, on a 6' x 4' table and with my own smaller units, is shown below:


The second game is The Combat of St. Ulrich from the Lead Gardens blog (22nd December 2010). I was attracted to this small game by the charming and beautifully drawn map which introduced it:


As you can see this game involves a mixed force of cavalry, infantry and guns, but for Black Powder  this will still only constitute a brigade on each side. As well as using option 2, I decided to make the guns count as units for brigade morale, contrary to the published rules (p.96). Littlejohn summarises the scenario as follows:

A Bleiherzen brigade is surprised by the advance guard of a slightly larger Grolstein force, and rather than withdrawing promptly across the river bridge at St. Ulrich, the Bleiherzen commander recklessly decides to give the Grolsteiners a bloody nose before retreating across the river to safety.

The map of course has different names for the countries, as a result of the development of Littlejohn's imagi-nations. The defending Bleiherzen/Christenheim brigade has 2 infantry units, a cavalry unit and a gun battery. The attacking Grolsteiners/Schwartzbergers have the same with the addition of a grenadier unit (not shown on the map). It was easy to set this up on a 6' x 4' table using my own Prussian and Austrian units, which are slightly smaller than Littlejohn's.
Playing solo, this game was shorter than the all-cavalry encounter. The Austrians were easily beaten in 4 moves, which took me about 45 minutes. However, the game was extended usefully by the Brigade Morale changes. The Austrians would have lost in move 2 under the normal rules as they had their cavalry destroyed and one infantry unit shaken. On move 3 two of the Prussian infantry units were shaken, which would have broken the Prussian brigade under the usual rules. The game might then have been a draw, even though at this stage the Prussians were clearly on top, with the Austrian cavalry destroyed and the Austrian infantry outnumbered in a close range firefight. The dynamics of the scenario obviously affect how long your one-brigade games will last. In this case it would have been fun to change sides and run through the game again, if I had been gaming with an opponent.
Below are a few photos of the game in progress:

The Austrians in front of St Ulrich

The lines come together

 End game. The Austrians have 2 units destroyed and one shaken and disordered.
No need to take this to the wire: they have conclusively lost.

Post Script
Having got the table and figures out and having an hour or two spare, I couldn't resist refighting the scenario with Charles Wesencraft's rules from Practical Wargaming. Straight away, the game had a completely different feel. Wesencraft's 'control table' idea was ahead of its time (a precursor of the Warmaster system if ever I saw one), but combine this with rather too numerous morale tests which are very dice dependent, and units are soon all over the place. This detracts from the feel of an 18th century  action. One also misses rules to create a force structure (no brigades here) and to produce an end to the game. Presumably one fights until a result is obvious or agreed. 
On the other hand firing and melees are delightfully simple, and basically the rules work. Nevertheless, I don't think I'll be giving up on Black Powder just yet. Nostalgia is all very well, but rules have come a long way since 1974!  

Tuesday, 5 July 2011

And So It Begins...

Yes, the first supplement for Black Powder has been trailed on the Warlord Games website and will be available soon: though when and for what price we are not told (though Amazon are quoting £15, paperback). 


I should be pleased: to the disappointment of Napoleonic gamers it covers the 18th century, obviously including the SYW. But I'm afraid I regard supplements as first and foremost a money-making concept (or should that just be 'con') cooked up by wargames companies over the last decade or so to generate extra profits. Any real benefit to wargamers is secondary. Those few of you who read my article on 'The New Wargaming' in Battlegames 24 or my post on the same subject in December last year will be familiar with my curmudgeonly and jaundiced attitude to such things.

It's hard to tell exactly what purchasers will be getting, but it looks like some potted histories of 18th century wars and campaigns will be presented, along with suggestions for revised stats, special rules and army lists appropriate for each sub-period. In addition there will be a few scenarios. And what's wrong with that, you might ask. Well, in the great scheme of things I suppose the answer is, nothing much. But I have always been of the opinion that the stats and special rules ideas should have been in the original rules, considering the size and cost of the rulebook. And 18th century scenarios before 1775 were also conspicuous by their absence in that original publication. Plus I don't really need potted histories as I do my own background reading. And lastly, well, who needs army lists? Oh yes, I remember, that will be the suckers who feel the need to be spoon-fed everything by gaming companies who regard them only as sources of profit.

I say, steady on old chap. Let's be a bit more considered.

Won't such a book be a great introduction to the period for newcomers? It might well be (depending on the quality of the information therein), but consider that a 'newcomer' purchasing the rules and the supplement together will have to part with £45 in one go. Oh, and by the way the American War of Independence is not included in this supplement - it will have another supplement all to itself. Perhaps in about 3 years time we will be able to purchase a supplement listing all the available supplements.

Warlord Games have had a great success with Black Powder, and deservedly so in my opinion. It looks like Hail Caesar will be as successful, or perhaps even more so. Good, well done. One has to assume that profits have been made. It would have been a nice bit of old-fashioned goodwill to provide some helpful period-specific stats and special rules for free online, as a thank you to customers. But profits come first, and profit is what supplements are all about. Okay, those guys at Warlord Games are providing employment to people, and they have to pay the mortgage like everyone else. I just wish some wargamers (and they are already drooling around the Warlord Games forum) wouldn't act as if Warlord were doing them a favour just by publishing this stuff. A bit of self respect is required, gentlemen.

So no, I won't be partaking. Which is a shame as I'm sure there will be some thought-provoking and useful ideas present. Perhaps I'll cadge a look at someone else's and make a trip to the photocopier. After all, sharing is one of the great things about any hobby. Unless you publish supplements, of course.

And finally... Don't be offended by this post if you love supplements and can't wait to buy this one. It's just me sounding off. It's my blog, after all. If I can't be bad tempered and self-righteous here, where else am I going to indulge myself?

Good gaming 'til next time.

Tuesday, 14 June 2011

The Battle of Qabr al Ahmar

Time once again to take a break from the Seven Year's War and dabble with my 6mm Desert War collection, using Blitzkrieg Commander II as the rules. 

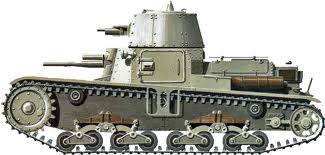
As with most of my recent desert games I am taking inspiration from Frank Chadwick's book Benghazi Handicap, and the scenarios therein. This time I have chosen the first scenario given, the Battle of Qabr al Ahmar, which took place on August 5th 1940. Supposedly this was the first real tank battle of the desert campaign, and featured a number of the much derided M11/39 tanks on the Italian side:


It is sad to relate that the GHQ M11/39 tank models I needed for this battle were bought at Colours 2010, and have languished in their blister packs ever since. How time flies! But one of the conveniences of this scale that  you can assemble and paint, to a reasonable standard, 5 tanks from a pack in an hour or two. And so only very little effort was required to get the forces I needed ready.

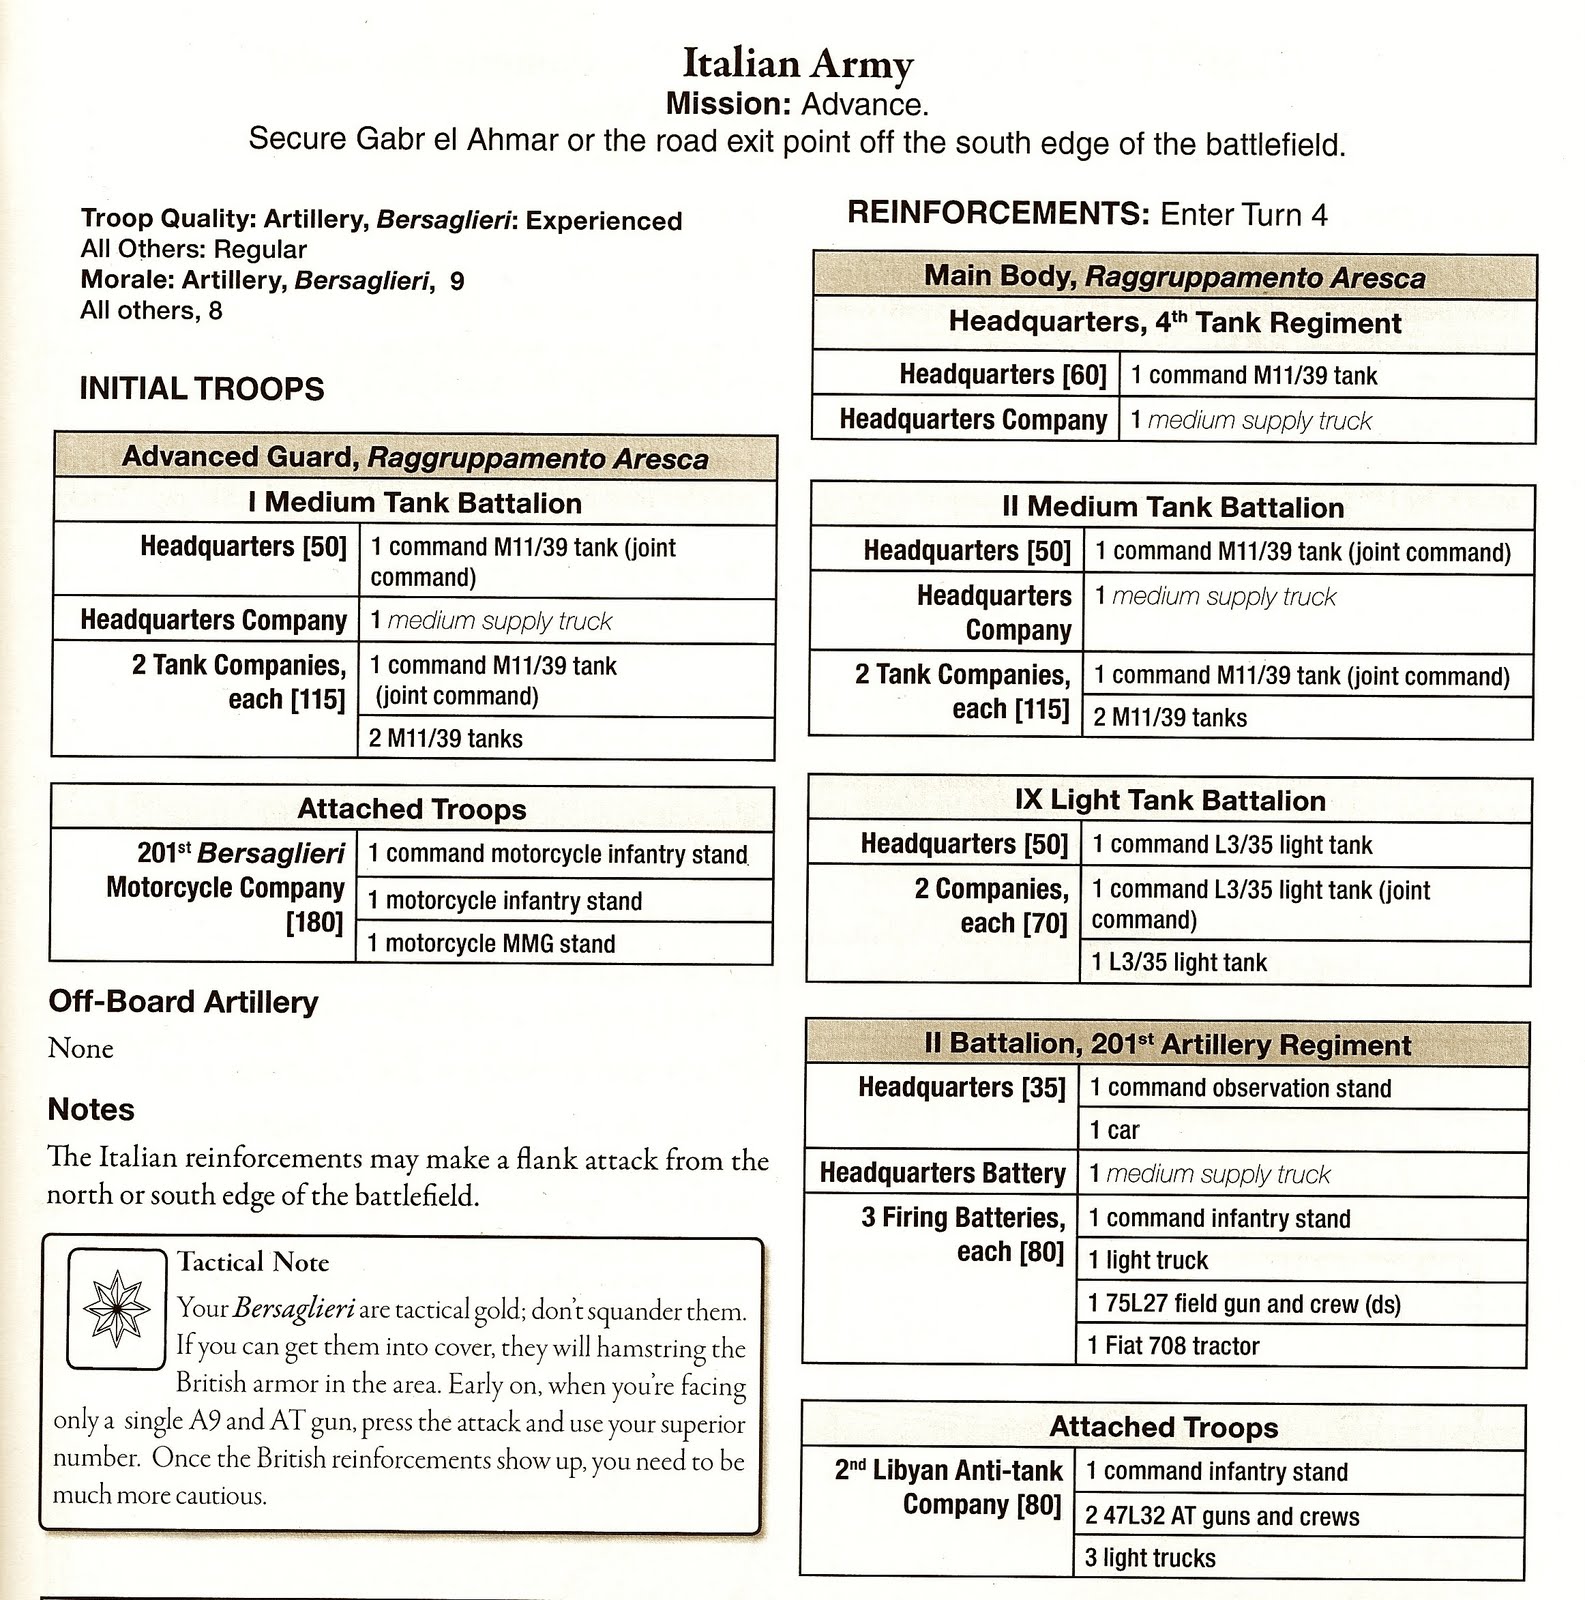
Those of you who have the book might have noticed that the battle is called Gabr el Ahmar by Frank. There is almost nothing on this battle on the net or in any of my reference books, but one thing I think I have established is that it should be Qabr not Gabr, and al not el. Qabr translates as tomb (gabr doesn't translate as anything), so we can have a small building as the centrepiece of the terrain, really for decoration only. Here is the map from the book:


As usual, a 4' x 4' table is perfect for 6mm models, and the terrain is easily set up. Forces are also modest. These are the Brits from the book...


...which I have transposed for BKC into:

7th Armoured Brigade, plus Supports. CO, CV8

Initial Troops 

8th Hussars (+). HQ CV8
1 A9
5 MkVIB
1 37mm portee
2 Rolls Royce armoured cars (recce)

Reinforcements

6th RTR. HQ CV8
3 A9
3 MkVIB

'A' Company, 1st Battalion KRRC. HQ CV8
3 infantry units in light trucks (veteran, ATR upgrade)
1 37mm ATG with tow
1 scout carrier (recce)

'F' Battery, 4th RHA (off table). FAO CV7
2 25pdr artillery units

BP = 9.  25% = 5

Reinforcements arrive move 3. May use flank deployment. CO arrives with reinforcements.

For the Italians the book gives...


...which I transpose as:

Raggruppamento Aresca. CO CV8

Initial Troops

1st Medium Tank Battalion. HQ CV7
5 M11/39

Motorcycle company, 201st Bersaglieri. HQ CV7
2 m/c infantry units (regular)
1 m/c mg unit (regular)

Reinforcements

2nd Medium Tank Battalion (+). HQ CV7
5 M11/39
1 47mm ATG with tow

9th Light Tank Battalion (+). HQ CV7
5 L3/35
1 47mm ATG with tow

2nd Battalion, 201st Artillery Regiment (on table). HQ CV7
2 75mm artillery support units with tows (veteran)

BP = 11.  25% = 6

Reinforcements arrive turn 4. May use flank deployment. CO arrives with reinforcements.

Notes
I have separated the Italian initial forces into 2 commands, as I think it will be handy and fun to have the infantry available to go their own way. For the British initial forces, I have folded the Rolls Royces into 8th Hussars, reasoning they were supposed to act as a recce force for the tanks. This is obviously just personal choice.

2 pdrs will have to stand in for the 37mm ATGs of the Brits, as I don't have the correct models, but they will fight as 37mms, the stats being different. There are only 2 guns in the Italian artillery formation as I only have 2 suitable models, but I think this will be enough to represent their role. The Libyan-manned 47mm ATGs of the Italians have been added to the tank battalions.

The book states that reinforcements for both sides can enter 'from the north or south edge', which doesn't fit in with the map orientation (north being up, as usual). I have taken this as a misprint, having encountered something similar in one of the other scenarios, assuming it should read 'east or west edge'.

I have made my own assessments of troop quality, guided by Mr. Chadwick. The British infantry get veteran status. It is not normal with BKC to give veteran status to support units, but as the Italian gunners were famous for their resolve, they get the higher rating as well.

The game will be fought as a standard BKC encounter scenario, except that I have no idea whether the forces have equal points (and I don't intend to check!).

The Battle

Shallow wadis are represented by brown felt shapes: these are treated as high area terrain for movement purposes. Units in a shallow wadi can claim partial cover but do not get a save value. The rough ground (shown by the fine gravel seen in the bottom right hand corner) attracts the dense terrain modifier but offers no cover. Moving on Qabr al Ahmer also means a modifier for dense terrain.

The Italian 1st Medium Tank Battalion moved quickly to centre table, watching with bemusement the antics of the British initial forces (who suffered 2 command blunders in 4 moves)

Combat was limited until the arrival of the reinforcements. The Italians managed to get themselves sorted out into a reasonably balanced deployment.

The Italian 9th Light Tank Battalion have their moment of glory, cresting the rise of Qabr al Ahmar and machine gunning the KRRC company. They would soon be driven off by the British light tanks (see 'House Rules and Other Stuff' below).

Half the Italian artillery failed to arrive on table (another command blunder), but the half that did set themselves up on a rise to the east of the road and did some useful shelling.

The Italians didn't fancy flank deployment (with their low CVs), but 6th RTR managed a delayed flank deployment which brought them right under the barrels of the Italian 2nd Medium Tank Battalion.

A determined slugging match went on for several moves, which the Italians eventually lost.

Qabr al Ahmar was the focus of the fighting. The Italian 1st Tank Battalion suffered a command blunder which saw them recklessly charging forward into a hornet's nest of British fire, which was to lead to their destruction.

A cloud of smoke hangs over the battlefield as the game ends. British light tanks have also suffered, but victory was with the British who knocked out a large number of Italian units in the last couple of moves, taking the Italians well beyond their breakpoint whilst themselves only losing 6/9.


House Rules and Other Stuff
BKC2 doesn't give the British Vickers Light Tank MkVI an AT value, but the vehicle had a heavy machine gun (Vickers 0.50" or Besa 15mm) supplied with armour piercing rounds and designed for anti-armour fire. Hence I give these tanks 1/20 for their AT value, and they were able to drive the Italian L3/35s off Qabr al Ahmar during the game with no trouble.
The M11/39s fought nobly but in a firefight their limited traverse and AT value of 1/40 puts them at a real disadvantage. If anyone knows why their main armament gets only 1 attack rather than the 2 attacks of other 37mm/40mm weapons of this period, I would be glad to hear from you. For the moment I'll just go with the rules.

There is an interesting article by David Brown in the latest Battlegames (Issue 26) arguing that the Warmaster system makes command and control subject to rather too much luck. He makes a number of interesting points, and this battle might be seen to support some of them - there were a large number of command blunders which screwed up the plans of both sides for no apparent reason. I am happy to accept these as a bit of fun, but I can understand the reservations of some gamers. In BKC2 there is a rule allowing the CO to re-order units that failed to receive any orders from their HQ. This is a good and simple adaption which means players can bring some command focus to bear via a well placed commanding officer.

Paul rang the changes by bringing round some beer. This meant drinking Speckled Hen from cans, but then (as they say) war is hell!

Wednesday, 1 June 2011

The Battle of Burndt


Now what Horse and Musket wargamer could come across this map and not want to fight out the battle? Not that I'm blowing my own trumpet here: the map comes from the 'Lead Gardens' blog which I have recently discovered and which I highly recommend (see Favourite Links). The map depicts the set-up for the fictional battle of Burnt Commons (September 1642), during the English Civil War campaign created by Littlejohn on his blog.

Not much imagination is needed to translate this into a SYW battle using Black Powder. The village of Burnt acquires a 'd' to make it sound Germanic, and we use the following forces:

Austria (Newcastle/Royalists)

C-in-C (SR8)

Infantry Brigade (Brigade Commander SR8)
4 line infantry battalions
1 artillery battery

Cavalry Brigade (Brigade Commander SR8)
2 cuirassier regiments
2 dragoon regiments
1 hussar regiment
1 light infantry battalion

Prussia (Essex/Parliamentarians)

C-in-C (SR9)

Infantry Brigade (Brigade Commander SR9)
2 grenadier infantry battalions
3 line infantry battalions
1 artillery battery

Cavalry Brigade (Brigade Commander SR9)
1 cuirassier regiment
1 dragoon regiment
1 hussar regiment
1 jager detachment

Notes
I resisted the obvious temptation to make the side marked in blue on the map the Prussians. That hill position looked too much like a typical Austrian defensive set-up, with the Prussians set to do the attacking. Therefore the Prussians have a couple of grenadier regiments included, and with their cavalry outnumbered it looks like they will be relying on their well-drilled infantry to carry the burden, as so often in real life. The Prussian infantry will be using the enhanced stats outlined in my post of 5th March, so we will see how they work. 
The dismounted dragoons on the right flank of both armies have been replaced by light infantry as I have no appropriate figures for dragoons on foot. The light infantry and hussars on both sides will use the 'marauder' rule, the hussars being set down where the isolated cavalry units are shown on the map.
Two brigades a side is a small battle for BP, so I will be using one of my alternative Brigade Morale house rules. For this battle, units will count as lost for brigade morale only if they have been destroyed or have left the table and cannot return. That should avoid the action being over too soon. 
The first side to have both its brigades broken will lose. If the winning side then has no brigades broken, they have scored an outstanding victory. If they have one brigade broken, they have had a hard fight and only score a minor victory.
Original table size was 8' x 5', but the original battle featured 40mm figures. Therefore I chose a 6' x 4' table which would give about the same amount of room for my 30mm soldiers.

The Game


"So is this battle going to be good for business?"
The tavern in Burndt before the game
.
The set-up. I was able to be pretty faithful to the scenario map.

On the Austrian right the Croats keep a close eye on some of my recently painted sheep. These troops remained unengaged for the entire battle

Prussians eye-view of the Austrian infantry position.

The game gets under way. The Austrians were sprightly and aggressive from the word go. They moved off the hill and formed all their infantry battalions into a single line. The Prussians edged forward to meet them, intending to give them a taste of Prussian volley fire.

On the Prussian left, their cuirassiers (foreground) decided to take the opportunity to charge their Austrian opposite numbers, as the second Austrian heavy cavalry regiment had headed off into the fields.  With an uncanny foresight that was to be a feature of Austrian tactics for the rest of the battle, the Austrians didn't countercharge but rested on their numerous supports. Despite the Prussians' charging advantage casualties were equal in the melee, and so the support bonuses saw the Prussians driven back through their own supporting dragoons. The subsequent Austrian 'sweeping advance' then destroyed the dragoons, leaving the situation as seen in the above photo. 

In the next turn the Austrians pressed home their advantage on the disordered Prussian cuirassiers. The result was predictable - the Prussian left wing cavalry had now been wiped out, and the cavalry brigade as a whole was broken. In the background the infantry firefight continues.

The Prussian infantry commander swings his second line to counter the unopposed Austrian cavalry...

...but the Austrians are on a roll. The leading cuirassiers get 3 orders and set off to cause mayhem in the Prussian rear (right background). Note the Prussian hussars pushed into the far corner of the table by their compulsory retire moves (extreme background). The Austrian dragoons prepare to charge the nearest Prussian infantry battalion in front and flank.

The Austrian command rolls continued to go well. The Prussian infantry battalion was driven back through the unit to its rear (centre background), although the doughty Prussians saw off one of the dragoon regiments with closing fire and shook the other in the melee. The marauding Austrian cuirassiers charged and destroyed the Prussian artillery battery: they are seen reforming on the left of the photo. 
Now the Prussian infantry were enveloped and under the most severe pressure. Austrian fire had already despatched the left hand infantry battalion of the Prussian first line: now the neighbouring grenadier battalion was destroyed. Under the revised brigade morale rules the brigade was technically still in being, but with 2 other Prussian infantry battalions shaken, the Prussian commander (myself) decided to call it a day.

On the Prussian right flank the Austrian hussars had moved aggressively against the farm, hoping to push out the jagers. (We had decided that the farm would not count as a built up area, in keeping with what we saw as the spirit of the original scenario. The walls were cover, the building counted as decoration).

The jager were affected by the breaking of the Austrian cavalry brigade and had to give way to the approaching hussars. They were then charged in the final move of the game, surprisingly holding their own. 
But this made no difference to the final result. The Prussian infantry were obviously about to be broken, whilst both Austrian brigades were intact. Therefore, the Austrians (curse them) had scored an outstanding victory.

In Conclusion
We had completed 5 moves in a leisurely 2 hours of gaming. The Austrian command rolls had rarely failed them and they ended up running rings around the Prussians, an unusual experience for Frederick's men. The rules had produced a typically sprightly and incident-packed game.
The increased firing stats of the Prussian infantry didn't seem to give them an unfair advantage, and I will continue to use them. In accordance with tradition, we had consistently forgotten the -1 to command rolls when within 8" of the enemy (12" in the original rules). We always seem to forget the equivalent rule when playing Blitzkrieg Commander! Still, it was the same for both sides. Another rule we often forget is that firing dice rolls of 6 cause disorder. Why this important rule consistently slips our minds is a mystery. But the game was most enjoyable anyway. Paul's excellent bottle of Berberana Rioja simply added to the pleasure!

Wednesday, 18 May 2011

Black Powder & Howitzers

Before the post, a thank you. Following a recent comment famine, the last 12 hours has seen a record 7 comments and 3 new followers. Well, 6 comments really as Steve Johnson posted the same comment twice. I think he realised I was feeling lonely. So thanks to all who posted and those who became followers. I hereby promise to leave more comments on other people's blogs.

To keep the party atmosphere going, I have added the proper 'Follower' widget so all followers get their logo at the top of the page. And to celebrate, what better than another post?

Howitzers in Black Powder
The photo shows a couple of howitzers recently acquired from (you guessed it) the RSM95 range. Austria to the left, Prussia to the right.


Checking the howitzer rules in BP I found that they make howitzers handy things to have, but the rules also have some misconceptions about the capabilities of these weapons. The basic mistake seems to be that howitzers are lumped in with the very different mortars. Viz:

1. All mortars and howitzers have a minimum range of 6"... This is simply allowing the room for the shell to reach the top of its trajectory before falling upon the target. (p.81).
Reasonable for mortars but quite incorrect for howitzers. These were perfectly capable of firing on a flat trajectory (sometimes using their shells for ricochet fire just like cannonballs) and were furthermore very effective users of grape or canister. So it is appropriate to use the same rules for fire within 6" (i.e. short range) as for ordinary guns.

2. Ranges have been fixed at somewhat less than equivalent cannons... (p.81).
I have found no real evidence for this. For example, in the SYW period the ranges of the Austrian 6pdr gun and 7pdr howitzer are comparable. So my smoothbore field howitzers get a range of 48".

3. Enfilade Fire... [not allowed to] cannons firing overhead at a target, or howitzers or mortars that lob their shots upon their target. (p.55).
For overhead fire in general or mortars, quite right. But again, howitzers were capable of (and commonly used) low trajectory fire, including canister. Either allow enfilade fire for howitzers as normal, or allow it for howitzers firing at up to half (or 'medium') range.

4. As mortars/howitzers have an explosive or incendiary shell, they inflict the same amount of damage regardless of range. These weapons therefore have the same number of attacks at all ranges as shown in their profile. This is normally 2 for a smoothbore field howitzer. (p.81)
A sensible seeming rule, but I can't find any 'profile' for howitzers in the rules. The only stats example that has howitzers (p.169) keeps standard gun stats of 3-2-1. I presume the above rule means that BP would give pure howitzers stats of 0-2-2, whilst my comments under 1 above would mean you should really use 3-2-2. However, this raises the question of why all guns in a SYW army weren't howitzers, if they were so effective. Well, Frederick II for one was pretty keen on them, but the point remains. Therefore it might be better to leave howitzer stats at 3-2-1, reasoning that it was much more difficult to hit at long range and that therefore casualties caused at long range would be less, as with guns but for slightly different reasons.

I am pretty confident that the above objections are watertight, but as always comments are not only welcomed, they are positively encouraged.

Thanks again to all readers.

Friday, 13 May 2011

Decorate Your Battlefield


The effort needed to paint sufficient troops for my tabletop battles has in the past precluded the creation of figures which are there just to make the table look more interesting. However, I recently decided that some figures of this kind would make a pleasant change from painting 'real' soldiers, and would also improve the appearance of my Hochkirch battlefield when I take it to Colours in September.

So after some online searching I ordered various bits and pieces (mainly civilians and a few sheep) from Hovels and Spencer Smith Miniatures. In the latter case I selected from the Willie Figures range.

Hovels


I ordered 8 of the 'wedge tents' from the ACW range (to represent the Prussian camps at Hochkirch), and from the 'Animals and Civilians' range I ordered a total of 9 sheep, a farmer, an innkeeper and an innkeepers wife. Total cost £24.38 including p+p. You can see them posed above with an RSM musketeer for comparison.

I was very pleased with these items. I ordered with a bit of trepidation as the figures are advertised as 25mm (so I thought they might be too small) and Hovels aren't really known as a figure manufacturer (so I thought the quality would be poor). Wrong on both counts. The figures fit perfectly with my RSM95s, and quality is excellent - well sculpted, well cast figures with little or no flash. The tents are also good - just the right size and well cast in resin with no bubbles or other faults.


Close up of 'wealthy farmer', RSM musketeer and 'innkeepers wife'.

Willie Figures

You can see below the figures I ordered from the Willie range. Again I was well pleased. This is an old range, of course, but the quality is fine and these are nicely proportioned, anatomically correct figures fully compatible with my RSMs. 


From left to right: D36 French Engineer Officer, D35 British Sutleress, N5 British Company Officer, D8a Lady Riding Side Saddle, RSM musketeer, D10 British Mounted Officer, N31 Gentlemen, N32 Lady, N33 Farm Boy, N34 Farm Girl. 

For my taste the pose of the lady's horse is a little extravagant, but on the other hand I particularly liked the portly sutleress. There is a bit of flash on these figures (which were cleaned up quickly for the photo) but it is very easy to remove. The officer figures come with separate swords to glue on. Total cost was £17.12 including p+p (I ordered 2 of the French Engineer Officer, British Company Officer and Sutleress, 1 each of the rest).


Close up of Lady Riding Side Saddle, RSM musketeer, Gent and Lady.

Service from both manufacturers was good. So overall I am well satisfied and looking forward to working my way through painting these models in the next few months. With a few individual musketeers and officers from the RSM range added in, I can produce some solo figures and vignettes which should add a bit of class to my SYW table.