Followers

Thursday 19 December 2019

The Battle of Sittangbad

So, time for some real historical wargaming again. Just for once the stars aligned and five of my wargaming friends were available for a game. The get-together was intended as a low key tribute to Stuart, so what else could I consider but a re-fight of the big battle from his favourite book, Charge!. As far as any real wargamer is concerned, of course, Sittangbad is an historical engagement in its own right. The date is given as 13th September 1766 in the book, and as the book came out in 1967 I'm convinced the battle was actually wargamed on 13th September 1966 then back-dated 200 years.

The original map from Charge!, with the position of the redoubt added in.
My representation. Table size 7.5' x 6'.

An additional attraction was that the battle could feature a number of the figures Stuart had gifted to me during our friendship, in particular all of the required command figures and all of the Imperial infantry. A downside was that my own units were a third of the size of those in the original battle. Playing using the Charge! rules would be an issue for this reason alone, not to mention that the full Charge! rules are not much to my liking and would be largely a mystery to the other players. So the re-fight would employ my own Post of Honour rules.

With smaller numbers of figures per unit, more units overall would be appropriate. I decided doubling the number of units from the original would work best, and so the orders of battle became those listed below. I managed to concoct the names for the various generals from those actually present, plus a few extra derived from unit names contained in the book.

Imperial Forces - Commander, General Lentulus.
Infantry Brigade, General Kornberg, 4 infantry battalions, 1 field battery.
Light Cavalry Brigade, General Sapt, 2 hussar regiments.
Heavy Cavalry Brigade, General Fuchs, 1 cuirassier regiment, 1 dragoon regiment.
2 light infantry battalions, independent.

Electoral Forces - Commander, Herzog Johann.
Infantry Brigade, The Erbprinz, 4 infantry battalions, 1 field battery.
Infantry Brigade, General Steinzeit, 4 infantry battalions, 1 field battery.
Heavy Cavalry Brigade, General von Luckner, 2 cuirassier regiments, 1 dragoon regiment.
Light Cavalry Brigade, General Montmort, 3 hussar regiments.
2 light infantry battalions (independent).
1 horse artillery battery (independent).

All units were classed 'regular', apart from any cuirassiers and the Electoral horse battery who were classed 'superior'. General von Luckner was deemed to be 'dashing', whilst General Sapt was declared 'dithering'.

Scenario Conditions
The Electoral Army has a +1 modifier for initiative. The Electoral objective is to seize the east end of the Sittangbad bridge before the end of move 10. If they achieve this they have won; if they fail the Imperial Army has won. However, if either army is broken before or during move 10 they have automatically lost.
Troop conditions
Only light cavalry or dragoon regts. may dismount. Cuirassiers and horse artillery are superior, all other troops are regular.
Electoral deployment.
The light cavalry brigade, light infantry and the horse battery can be deployed on-table north of the Eisenberg Hill and Eisenwald at game start. At the start of the next turn the heavy cavalry brigade is deployed in the same area. At the start of the next two turns, one of the remaining infantry brigades can deploy in the same area.
Imperial deployment.
The whole Imperial army is deployed on table at game start, as far as possible as per the book.
Terrain
The Weser is impassable. The Sittangwald can only be entered by light infantry. The marsh is impassable to all troop types. All other hills are gentle.

The Game
As with the original battle, it was obvious that only a fighting withdrawal would offer the Imperial forces any hope of victory. Any attempt to fight a pitched battle would end in tears. For the Electoral forces, an attack down their right flank was an obvious move, as the other flank was blocked by the impenetrable marsh.

Left to right - Craig & Paul (Electoral forces), Roy & Steve (Imperial forces).
Apologies to Nick - he joined in on the Electoral side but got missed out on the photos.
As expected, the Electoral heavy cavalry commenced a brisk canter to pass north of the Sittangwald
in an outflanking move. The Imperial forces all started retiring, but the light cavalry brigade were caught
by their more numerous Electoral counterparts and suffered accordingly.
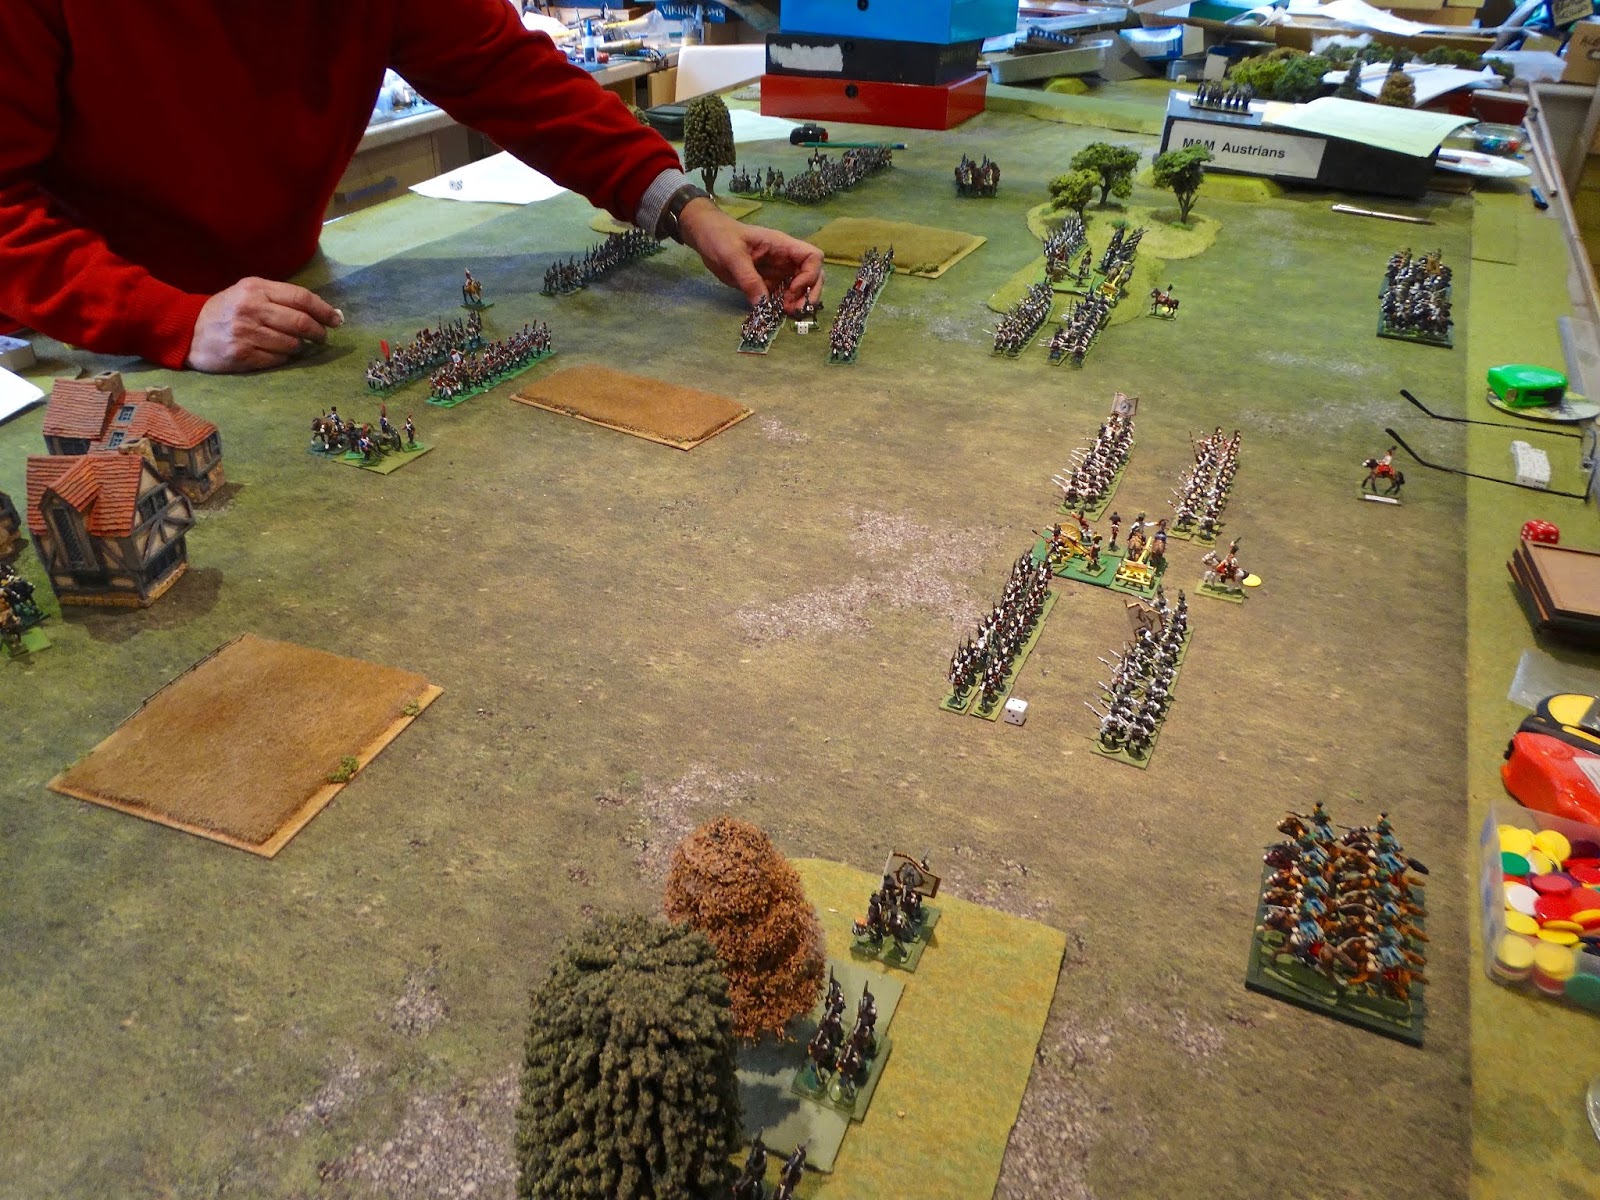
A close up of the first close combat of the game. Imperial infantry are seen making
all speed back towards Sittangbad covered by the Zamoyski battalion in the redoubt.
All 4 infantry battalions seen here were painted by Stuart Asquith and gifted to me in 2016 (see this post).
Craig keeps up the pointing tradition in fine style.
Bad things are happening to the Imperial cavalry just out of shot to the left...
...as we see here. The Electoral heavy cavalry have engaged decisively and the Imperial dragoons
are backed up unsupported against the northern outskirts of Sittangbad.
By this time (around move 6), the Electoral commanders realised that the prompt retirement of the Imperial infantry had left Sittangbad rather impregnable. Their hopes of victory now rested on breaking the Imperial army before the end of move 10. Therefore they turned a number of units towards the 2 Imperial light infantry units trapped around Eisenberg village.
The game enters a crucial stage, and banter is set aside for a short while.
The new Electoral plan appears to be working. Note that 2 of the Electoral hussar regiments have dismounted to join the attack on Eisenberg village. The 2 units of Imperial Grenzers are surrounded and doomed to destruction or surrender.
The end-of-game situation at Sittangbad. Masses of Electoral infantry are approaching from the east but can have no effect before the end of the game. The Zamoyski battalion have been shelled out of the redoubt, but two other Imperial battalions are ready to fall back into the town and make a fight of it. Dismounted Electoral dragoons make a show of engaging the town from its northern flank but have no chance of effecting an entry.
A courier from the east arrives in Sittangbad with the news that the Imperial Grenzers are trapped and doomed. He is seen outside the famous Grunterhof which featured in the original book. As the tavern was positioned at the east end of the town, the Imperial commanders were determined to re-name it the Queen Vic. A sad attempt to lower the tone of our meeting.
The loss of half his force was too much for General Lentulus and he ordered a general withdrawal,
abandoning Sittangwald to the Electoral army at the end of move 8.
He is seen leaving the town and crossing the Weser accompanied by his glittering staff.

Conclusion
A neat little victory in 8 moves for the Herzog Johann, whose change of tactics reduced the Imperial army to such an extent that its withdrawal became inevitable. Well done Paul, Craig and Nick.

Thanks to all five of my guests for making the journey over and for making the game such a pleasure, with banter and good fellowship much in evidence. Certainly a game to remember, and we all hoped Stuart was looking down with approval.

'Til next time!


Sunday 15 December 2019

New Napoleonic Rules - 'Shadow of the Eagles'


Some of you may be aware that I have been developing a Napoleonic version of my Post of Honour SYW rules. I felt it was time to give these rules their own distinct title. I had one or two ideas of my own, but I also appealed on the Google group for suggestions:

Shadow of the Eagles group with download

My sincere thanks to Michael Heynen for the excellent idea that I have now adopted, which evokes the French eagle standard and the eagles so prominent in the heraldry of the Prussian, Austrian and Russian armies.

Please join the group, download the rules and feedback any comments or suggestions.


UPDATE: 20th DECEMBER
I have been a little disappointed with the limited functionality of Google Groups. Looking for something better I found 'Groups.io', who seem to be taking over from Yahoo Groups as the latter close down. A Yahoo-style group should offer a much better experience for members, with proper files and photos sections and a much more intuitive messages list. So I have a created a new group at the following location:

Shadow of the Eagles - Groups.io

Now, present members of the Google group should find themselves transferred to the new group automatically in the near future - you should receive an email from Groups.io when that happens. However, although the process is basically simple, it seems to be rather slow - I think Groups.io are a bit snowed under at the moment with all the groups transferring from Yahoo.

So if you want to just join the new group, please go ahead and request membership on the site. For any new wargamers interested in the rules, ignore the old Google Groups site and go straight to the new one. There aren't any discussion threads started at the moment, but the rules and playsheets are all available for free download.

I'm afraid there's no good news for those reluctant to give their email addresses - email is the way these groups work, so you don't have much choice. All I can suggest is that you might create a specific email just for the group, so that your usual main email doesn't get used.

Thanks for your patience whilst the new group builds.

UPDATE: 6TH JANUARY
Those of you reluctant to give out an email, and therefore wary of joining either of the above groups, may find reassurance in the following post on TMP:

Shadow of the Eagles - TMP

Thursday 21 November 2019

Seven Years War Rules - Post of Honour v.6


Seven Years War fans might like to know that I'm still improving these rules, and the latest version is now available for free download at the links below. Hope you like them!


Tuesday 19 November 2019

Farewell Stuart Asquith

So, on Monday 18th November, I attended the funeral of Stuart Asquith. There was a beautiful service at Cheltenham Crematorium, when heartfelt and moving tributes from two of Stuart's children allowed us an insight into the much loved husband, father and grandfather. There was also a speech from Charles S. Grant, who explained how Stuart's 'life in wargaming' was so significant to thousands of wargaming enthusiasts worldwide.

We then proceeded to the wake. At the family's request I had set up a display intended to reflect Stuart's wargaming hobby, as well as his love for toy soldier collecting. On one side a stylised Napoleonic wargame, on the other his magnificent toy castle ('Castle Stuart') surrounded by some (in fact, less than half) of his astonishing collection of Britain's figures.


The castle was actually a gift from Charles S. Grant from many years ago, and one of Stuart's prized possessions.


Just a couple of close ups of the 30mm wargaming figures, which exemplified Stuart's wonderful painting style which brought out the colour and drama of the Napoleonic uniforms.


Wakes are funny things. You are there to grieve and remember, but (particularly with someone like Stuart who was so loved by his family and was such a dear friend to so many others), you also celebrate a life. And so I hope a few smiles will be excused. 

Wargamers and cake? Who'd have thought it.
We both knew Stuart would have approved. Myself and Dave Ryan.

The photo above shows the wargaming contingent of the gathered mourners. Sadly, Charles Grant couldn't make it to the wake as he had to fly back to Scotland the same day (via Amsterdam, as the schedules would have it). The very fact that he had made it to the funeral at all was evidence of his great determination to be present.

Left to right:
  • John Curry, History of Wargaming project.
  • Some wargamer much smaller than John Curry.
  • Roy Boss, President of the Society of Ancients.
  • Phil Olley, well known proprietor of the 'Classic Wargaming' and 'Phil's War Cabinet' blogs.
  • Dave Ryan, owner of Caliver Books and Partizan Press
  • Henry Hyde, who hardly needs any introduction.
And so we went our separate ways, and the figures were tidied away. I was honoured to have been invited and to make some small contribution to the event. Stuart was a great inspiration to so many wargamers and a great ambassador of the hobby. He was also a great pleasure to know. He will be sorely missed.

Friday 8 November 2019

Stuart Asquith, 1946 - 2019

Most readers of this blog will probably already be aware that one of the great figures of our hobby has recently passed away - Stuart Asquith, who died a few days ago. As this blog has recorded, I was lucky enough to find myself living in the same small town as Stuart, and we first met nearly three and a half years ago. The photo below was taken during our first wargame together. A bit of pointing action is taking place for the photographer - which became a bit of a standing joke between us.


A Life In Wargaming
Stuart was already a keen wargamer by the time of his marriage in 1966. Like so many of us he seems to have started with Airfix ACW armies, but in 1967 he discovered the book Charge!, by Lawford and Young, and essentially never looked back. I have lost count of the number of times he has told me that that particular book would always be his favourite, and the rules within were the ones he most enjoyed playing. Many of our games on his 6' x 3' dining table were fought with stripped down versions of the Charge! rules.

The cover of Battle seen below has Stuart in the blue shirt on the left, sporting what he used to call his 'porn star moustache'. By this time (1978), his writing career was already well under way, and within the magazine was the latest in his 'Battles of the ECW' series. He was eventually to take over Terry Wise's iconic 'Observation Post' column, which moved to Military Modelling when Battle was incorporated into that magazine. Terry was one of Stuart's colleagues in the famous Rayners Lane Wargamers Group, which Stuart founded and which included many well known wargamers, including Donald Featherstone and Charles Grant (senior). The group lasted from 1978 to 2001. Charles Grant's son, Charles S. Grant, became a life-long wargaming partner and friend of Stuart's.


Stuart's first book was out in 1979 - The Campaign of Naseby, published by Osprey. Since then Stuart has had over 20 books published, the last of which (Stuart Asquith's Wargaming 18th Century Battles) was published by The History of Wargaming Project in 2016.

Apart from the books, Stuart's greatest publishing legacy is undoubtedly his editorship of Practical Wargamer magazine, which was published bi-monthly from 1987 to 1999. Alongside Practical Wargamer, Stuart worked for the same publishers as editor of Regiment magazine.


Sadly, the cut-throat world of publishing saw both the above magazines stopped in 2000. This was a considerable blow to Stuart - his own words from 2016 demonstrate the consequences:

"Suddenly my wife and I had no income and a mortgage on a large London town house still to pay. So for about 5 years I was at a low ebb with the hobby. I gave away all my 25mm figures; my terrain boards, formerly belonging to Terry Wise, went to the tip. I thought I was selling my books, but the buyer defaulted on payment..."

Temporarily disillusioned with the hobby, Stuart moved to Northleach in the Cotswolds, and for about 5 years did little or no wargaming, until gamers from the nearby Cirencester Wargames Club brought him back into the fold. He rebuilt his collection as his painting mojo returned, maintaining a prodigious output of excellent figures, and we met a few years later.

Stuart was always an Old School wargamer. Mainly he was a strictly historical gamer, but he was also dismissive of those committed to pedantic detail. He was a firm believer in simple rules - he said my Honours of War rules made his brain hurt! As for figures, it was the 25-30mm 'Willie' figures of Edward Suren and the work of Charles Stadden which particularly inspired him, right through his wargaming life. He was never shy of calling his beautifully painted collection 'the toys'.

When I first met him, Stuart was still bubbling with ideas for games that would get his collection out on the table. I treasure the memories of the gentlemanly and relaxing games we played together, when winning hardly mattered and the pre- and post-game discussion would include ideas for the future and stories from the past. You can get the flavour of those games from the posts HEREHERE and HERE. Those were days when my wall calendar was graced with entries such as 'Wargame with Stuart' or 'Stuart - Black Cat Cafe'. Now I have had to make a final and very sad entry - 'Stuart's Funeral'.

The photo below shows Stuart, with his friends Steve Gill and Phil Olley, on 1st September this year awarding prizes at the Cotswold Wargaming Day held in Northleach. His last wargaming event. As usual, everyone was keen to speak to him, and he always had something interesting to say.


I'm going to miss that guy. Stuart is survived by his charming wife and three children. My sincerest condolences to any of his family who may read this. We have lost a giant of the hobby - rest in peace my friend.

Thursday 31 October 2019

The Fourth Wargaming Magazine

It is usual to state (as I did in this post) that there are 3 glossy magazines supporting our hobby. I think this is mistaken. I was forgetting that there is a fourth, namely the magazine of the Society of Ancients, Slingshot.

Cracking cover!

Now, some of you (like me in the past) may be under the impression that Slingshot contains rather arcane articles that have more to do with archaeology and academia than wargaming, and that it's all rather too, well, specialist. There may have been some truth in that in the past, but in my experience, no longer. 

The magazine as I have experienced it over the last 2 years, and especially recently under the enlightened and professional-level editorship of Justin Swanton, contains an excellent mix of historical information, wargaming battle reports, analysis of wargaming practices, and reviews of books and rules. Frankly indispensable if you are an Ancient Wargamer.

Of course, you can't get it in Smith's, but you can buy individual copies or subscribe. Check out the SoA website here.

In conclusion - highly recommended!

Sunday 20 October 2019

The Bridge At Atzbach

At the present time, Wargaming, Soldiers and Strategy is definitely my favourite wargaming magazine - by a long way. Miniature Wargames is just too full of sci-fi, fantasy and steam-punk for my taste, and Wargames Illustrated is, well, a bit too much like Wargames Illustrated. All crash-bang-wallop and the excitement of consumerism.

Established readers of this blog will know I am a sucker for a good map and a good scenario. Imagine my pleasure when WSS 104 provided both in an article by Henry Hyde, from his series entitled 'Tabletop Tactics'. There were in fact 2 good scenarios in the article, both based around the effect of bridges. I will overlook the fact that Henry called the article 'A Bridge Too Far' (clichéd, Henry, far too clichéd!), and merely say that my attention was drawn to the first, in which a bridge over an uncrossable river had to be taken by assault. The map for this is reproduced below - my thanks to editor Guy Bowers for allowing me to use it.

The map from WSS104, reproduced by permission. © Karwansary Publishers 2019.
The defenders were confined to the country north of the bridge, the attackers were to come from the south with the intention of taking the bridge and then exploiting northwards to take hill D and farm C. 

In past games, assaulting bridges has presented itself to me as a bad option for a scenario - they are just too easy to defend, with attackers being easily shot down as they try to cross. But I reflected that my experiences derived from games where taking a bridge was part of a larger game, with the result that usually not enough forces were available to do the job properly. Henry sensibly indicated that the attacker should have 2 or 3 times the strength of the defender, and with this in mind I decided it would be interesting to see if a bridge assault could indeed be made to work as a wargame. Unsurprisingly, it turned out that Henry was quite correct, and it could.

To further test my Napoleonic rules, I set the game in that period. I would have to use my 28mm SYW figures (see previous post), but for a solo game that would be fine. The forces and scenario were as follows:

French Forces (attackers)
Light Infantry Demi-Brigade: 3 battalions + horse artillery (all superior)
Infantry Brigade: 6 battalions (regular)
Cavalry Brigade: 2 dragoon regiments (regular)
Artillery Brigade: 3 field batteries (regular)
Independent Cavalry: 1 Hussar regiment (regular)

16 units, Break Point 8 units.

Austrian Forces (defenders)
Infantry Brigade: 2 battalions (regular)
Light Infantry Brigade: 2 Grenz battalions (regular)
Cavalry Brigade: 1 cuirassier regiment (superior), 1 hussar regiment (regular)
Independent Artillery: 2 field batteries (regular)

10 units, Break Point 5 units.

Scenario
The French can deploy up to 12" from their baseline, but may also deploy on hills F and G if they wish. They have to take the bridge in 8 moves or break the Austrians in the same timescale.
The Austrians can deploy anywhere north of the river. They must successfully defend the bridge for at least 8 moves, and try to  break their attackers.
The river is only crossable at the bridge. The bridge, hill D and farm C are each worth 1 unit. In my game the farm is represented by a ruined monastery.

The Game
As you can see, I only gave the French a 60% advantage in numbers. As with the game in my previous post, they would also have the advantage of the 'French System', and better command. I didn't honestly think greater French numbers would have much effect, as bringing them to bear would be difficult. Some  extra artillery might be very useful, but they already had 4 batteries to the Austrian 2. The time limit was intended to give the French a reason to get on with their assault, rather than  just pounding the Austrians with artillery until half their units were broken!

How to deploy the Austrians was a bit of a puzzle, but in the end I lined the river near the bridge with the Grenzers, with a field battery supporting them firing straight down the road across the bridge. The line infantry and cavalry were in depth behind, with the other field battery on hill D with a decent field of fire.

The French plan was to shoot their way across the bridge. The field batteries would pound targets near the bridge, and the line infantry would move forward to the river and shoot at anything on the opposite bank. When the time was right the elite light infantry would charge across, supported by their horse battery.

Deployment. I used my normal 6' x 5' table, and moved the river slightly south in order
(I hoped) to give more room for a decent battle after the French were over the river.
The French have moved up, and it's time to try a charge across the bridge.
This was fairly easily repulsed, with the attacking unit routed. Not enough preparation it seemed.
The same turn from the Austrian side. Two line battalions had moved up and were
giving the French a lot of trouble.
A couple of moves later and the French try again, with the horse battery supporting.
You can see that the Austrian battery directly covering the bridge has been routed.
It was desperately close, with every die roll counting, but the French managed to get one light battalion
in place, causing just enough distraction to allow a regiment of dragoons to cross as well.

This was the end of the 8 moves. The Austrians had lost 4.5 units, the French 6, and the bridge was just about in French hands. A last minute French victory. I couldn't resist another turn to see if they would hang on to their tenuous bridgehead.

Check on the far side of the Toll House and you'll see an Austrian line battalion has routed and taken a supporting
Grenz unit with it. The Austrians are now broken and the French victory is confirmed.

Most scenarios try to create a nail-biting finish where both sides are in the game until the final move. This was achieved, but I think the game would be better if some fighting on the far side of the river took place. To this end, it might be good to weaken the Austrians slightly, so I would take away one of their line battalions and form a single brigade of 3 battalions. It might also be an idea to lengthen the game to 9 or even 10 moves.

Anyway, I was pleased with the scenario (thanks Henry), as well as how the rules handled it. The next challenge is to read more books and broaden my knowledge, so that I can represent other armies and other campaigns of the period.

'Til next time!

Tuesday 15 October 2019

The Action At Fausterlitzen (1805)

So, time for a much needed playtest of my new Napoleonic rules. Having made some recent changes, more games were vital, and I arranged first to go over to Roy's, where I knew I would get some well-informed feedback. Then shortly after that I had a free evening at home to consider our conclusions during a solo re-run. 
Both games featured a modest fictional engagement set in 1805, supposedly just before the Battle of Austerlitz - hence the rather cheesy title of this post.

The Scenario
Between Napoleon's famous victory of manoeuvre at Ulm in October and the battle of Austerlitz on the 2nd of December, a small French force is advancing south protecting the flank of Napoleon's eastward advance on Vienna. Light cavalry scouts advance along the road through Fausterlitzen, and on reaching the southern edge of the town they discover an Austrian force drawn up across the road ahead of them. On the far side of an area of open ground the Austrians have blocked the route south, with their right anchored on the gentle slopes of the Kleine Berg. It looks like the Austrians are in similar strength to the French.

Table size 6' x 5'. North to top of course.

The French commander decides to attack, and his forces advance through the woods north-east of Fausterlitzen until, on reaching the open ground east of the town, they are able to deploy.

French Forces
These can deploy anywhere up to 12" from the northern baseline, but are also allowed to occupy Fausterlitzen at the start of the game.

1. Infantry Brigade: 6 infantry battalions, 1 field battery
2. Infantry Demi-Brigade: 3 light infantry battalions (superior), 1 field battery
3. Cavalry Brigade: 2 dragoon regiments, 1 horse battery (superior)
4. Independent Cavalry: 1 regiment of hussars

Total 15 units. Break point 7.5 units.

All units are classed regular except the 3 light infantry battalions and the horse artillery battery, all of which are superior.

Austrian Forces
These are deployed up to 12" from the southern baseline, but are also allowed to occupy the Kleine Berg at the start of the game.

1. Infantry Brigade: 4 infantry battalions, 1 field battery
2. Infantry Brigade: 4 infantry battalions, 1 field battery
3. Independent Light Infantry: 1 Grenz battalion (inferior)
4. Cavalry Brigade: 2 cuirassier regiments (superior)
5. Independent Cavalry: 1 hussar regiment

Total 14 units. Break point 7 units.

All units are classed regular except for the inferior Grenz light infantry and the superior cuirassiers.

Command
The much better quality of the French command in this campaign is represented by giving them a +1 on their initiative roll at the beginning of each turn, and also more favourable die rolls for deciding the quality of their brigade commanders at the start of the game:
French: 1 = Inept, 2-4 = Capable, 5-6 = Inspiring.
Austrian: 1-2 = Inept, 3-6 = Capable.

The French will also have the advantage of the 'French System' - quicker formation changes, assault columns, and the ability to deploy skirmish infantry from both their light and line battalions. The Austrians are still labouring under the disadvantages of the 'Linear System' at this date, so assault columns are forbidden and the only skirmish infantry available will be the slightly dodgy Grenzers.

Deployment
Deployment will be by alternate brigades, with the Austrians going first. After all brigades are deployed, the independent units are then also deployed alternately.

The Game (1)
And so battle commenced at Roy's. In this case the table size became 6' x 4', and we gamed with Roy's lovely old 20mm Hinton Hunt miniatures, using 24 figure infantry units and 12 figure cavalry units.

The French attack commences under Roy's direction.
It appeared Roy's intention was to give the rules a stern test by going straight into the attack.
Were those assault columns (foreground) heading around my flank or would they strike the Kleine Berg?
The French dragoon brigade hovered west of Fausterlitzen awaiting developments.
The columns of high quality Legère turn towards the hill.
The Austrian cuirassiers set off to threaten their flank.
Ouch! The  French columns smash into the Austrian infantry on the Kleine Berg
and Tricolores are soon flying over the ridge.
An overview from the same turn. French pressure is strong across the table,
and the Austrians are losing units.
The French have triumphed on the Kleine Berg, but an Austrian cuirassier regiment turns back
and drives one of the French battalions westward
On their left flank the Austrians have also lost units and now the French Dragoons are closing in.
We called it here, announcing a French victory.

This was a fine test for the rules, and I went home with a few changes in mind, particularly regarding increasing the effectiveness of assault columns in close combat. Unfortunately, in his eagerness to get to grips, Roy had not bothered to deploy skirmishers, and the utility of these troops was not tested. But our post-match analysis seemed to suggest their use would be worthwhile.

The Game (2)
And so a couple of days later I was able to consolidate the lessons of Game 1 in a solo run-out of the same scenario. I'm afraid Napoleonic fans will be disappointed to see that in the absence of a Napoleonic collection, I have substituted my 28mm SYW figures. The blue-coated Prussians represent the blue-coated French, whilst the white-coated Austrians represent (you guessed it) the Austrians. My 28mm RSM95s are organised into infantry units of 16 figures and cavalry units of 8 figures.

I set up the opposing armies in the same deployment we used in the first game.
This time I deployed skirmishing infantry ahead of the attacking French columns.
Once again, the dragoons deploy on the French right.
Here they come! French artillery and skirmisher fire took a toll on the
2 Austrian battalions on the front slope of the Kleine Berg...
...with this result. One Austrian battalion routed, taking the other with it.
Now the 2 Hungarian battalions moved up from the reverse slope and braced for impact.
The French dragoons were a little more active under my control,
and steadily pushed back the defending Grenzers and hussars.
Once again, it was crunch time on the Kleine Berg, and once again the French columns were successful.
The Austrian battery is surrounded, and the final battalion of Hungarians
has suffered heavily and is about to be routed.
Overview - the Austrians are on the back foot across the table.
Just the artillery to mop up and the Kleine Berg will be an Austrian-free zone.
Just about the only Austrian success was their triumph against the French hussars on the French left.
Still, with 2 cuirassier regiments against one regiment of hussars, this was hardly unexpected.
Another solid French victory.
The French artillery had done sterling work for the whole game. A close up of one of their batteries.

The use of skirmishing infantry worked well for the French, protecting the advancing columns and helping to weaken the defending battalions. The Austrians suffered from their own lack of skirmishers, which seemed pretty historical to me. Interesting in both games was that, with basically equal forces, the French were able to attack successfully. I think this was partly due to them having an extra artillery battery, and partly to the concentration of forces against the Kleine Berg, which gave a local superiority. A tribute to Roy's original plan!

Both games seemed to me to play well, so I am optimistic about Post of Honour developing into a worthwhile set of rules. A new version incorporating lessons learned from these games will appear shortly on the Google group.

Another Napoleonic scenario coming up shortly. See you then!