
Mr Asquith has been a little under the weather of late, so it was with great pleasure that I attended his house a few days ago to recommence our regular games. The occasion was celebrated in fine fashion with a game in one of the great wargaming periods, played using some classic figures. To wit, a Napoleonic game with 30mm figures from the Willie (Edward Suren) and Tradition (Charles Stadden) ranges, both still available from Tradition of London. All the figures had been painted, and the units assembled, relatively recently by Stuart. As so often, the game turned out to be an object lesson in how much pleasure can be wrung from a modest number of figures, simple rules and a dining table playing area. To illustrate this, we will begin with the orders of battle of the opposing armies. The figures in brackets are the number of models in each unit.
British
GOC: The Duke of Wellington
2i/c: Major General Cooke
Mercer’s Troop (‘G’) RHA
Ramsay’s Troop (‘H’) RHA
1st Infantry Division
Lieutenant General Sir Thomas Picton GCB
1st Infantry Brigade
Major General Sir Colin Halkett
95th Rifles (5)
1st Foot Guards (10)
28th The North Gloucestershire Regiment of Foot (24)
2nd Infantry Brigade
Major General James Kempt
79th Regiment of Cameron Highlanders (10)
7th (2nd West Prussian) Infantry Regiment (10)
Cavalry Division
Major General Lord Somerset (Uxbridge)
1st (Light) Cavalry Brigade
7th (or Queen’s Own) Regiment of (Light) Dragoons (Hussars) (4)
8th (or King’s Royal Irish) Regiment of (Light) Dragoons (Hussars) (4)
17th Regiment of (Light) Dragoons (Hussars) (4)
19th Regiment of (Light) Dragoons (4)
2nd (Heavy) Cavalry Brigade
1st (Royal) Dragoons (4)
2nd (Royal North British) Dragoons (4)

The rules in use were particularly simple, and are appended at the end of this post. In particular, the game distances are adapted for a 6' x 3' dining table. And so we commenced the game:
We concluded the afternoon by reviewing the ECW units Stuart has put together, using the same figure manufacturers as seen in this battle. The ECW is a period I have often considered playing, but have never ventured into. I look forward to trying this new venture in the future, once we have adopted some suitably simple rules! Talking of which, the rules used for this Napoleonic dust-up are given below.
Oh and by the way, if you want to view the first 'Old School Napoleonics' post, check this link. See you next time.
British
GOC: The Duke of Wellington
2i/c: Major General Cooke
Mercer’s Troop (‘G’) RHA
Ramsay’s Troop (‘H’) RHA
1st Infantry Division
Lieutenant General Sir Thomas Picton GCB
1st Infantry Brigade
Major General Sir Colin Halkett
95th Rifles (5)
1st Foot Guards (10)
28th The North Gloucestershire Regiment of Foot (24)
2nd Infantry Brigade
Major General James Kempt
79th Regiment of Cameron Highlanders (10)
7th (2nd West Prussian) Infantry Regiment (10)
Cavalry Division
Major General Lord Somerset (Uxbridge)
1st (Light) Cavalry Brigade
7th (or Queen’s Own) Regiment of (Light) Dragoons (Hussars) (4)
8th (or King’s Royal Irish) Regiment of (Light) Dragoons (Hussars) (4)
17th Regiment of (Light) Dragoons (Hussars) (4)
19th Regiment of (Light) Dragoons (4)
2nd (Heavy) Cavalry Brigade
1st (Royal) Dragoons (4)
2nd (Royal North British) Dragoons (4)
French
GOC: The Emperor Napoleon
General Baron Gourgaud (Orderly officer to Napoleon)
2i/c: Marshal Soult
Imperial Guard Artillery
2nd Company Old Guard Horse Artillery
5th Company Old Guard Foot Artillery
Imperial Guard Infantry
General of Division Louis Friant (o/c Imperial Guard Infantry)
1st Grenadiers of the Imperial Guard (12)
2nd Grenadiers of the Imperial Guard (10)
Imperial Guard Cavalry
Lieutenant General Baron d’Hurbal (Carabiniers)
2nd Regiment of Lancers of the Imperial Guard (4)
Horse Grenadiers of the Imperial Guard (4)
Empress Dragoons of the Imperial Guard (4)
1st Infantry Brigade
Light Company 3rd Bn, 4th Confederation Regiment (Saxon Duchies) (5)
Grenadier Company, 1st Bn, 4th Confederation Regiment (Saxon Duchies) (10)
Grenadier Company, 1st Bn, 5th Confederation Regiment (Anhalt - Lippe) (12)
Grenadier Company, 1st Bn, 7th Confederation Regt (Mecklenburg-Schwerin) (10)
1st Cavalry Brigade
Lieutenant General Count Milhaud (Cuirassiers)
11th Hussars (4)
3rd Cuirassiers (red) (4)
7th Cuirassiers (yellow) (4)
The objective for each side was simple - the destruction of their opponents. The photo below shows the armies laid out for battle, with the British nearest the camera:

It will be as well to start with some close ups of selected units on their start lines, just to give a flavour of the lovely figures in use.
 |
| British cavalry, with the Light Brigade nearest. The British would suffer from their inferiority in heavy cavalry. |
 |
| The Emperor Napoleon and his suite. |
 |
| The 2 battalions of the Gloucesters with their magnificent colours. |
The rules in use were particularly simple, and are appended at the end of this post. In particular, the game distances are adapted for a 6' x 3' dining table. And so we commenced the game:
 |
| The British 1st Infantry Division, in all their glory, wait to move off. |
 |
| The inevitable cavalry melee commenced almost straight away. |
 |
| The French extreme right. Grenadiers of the Imperial Guard move through the village with light infantry covering their flank. |
 |
| A firefight commences across the main road. Both sides were initially reluctant to sound the charge. |
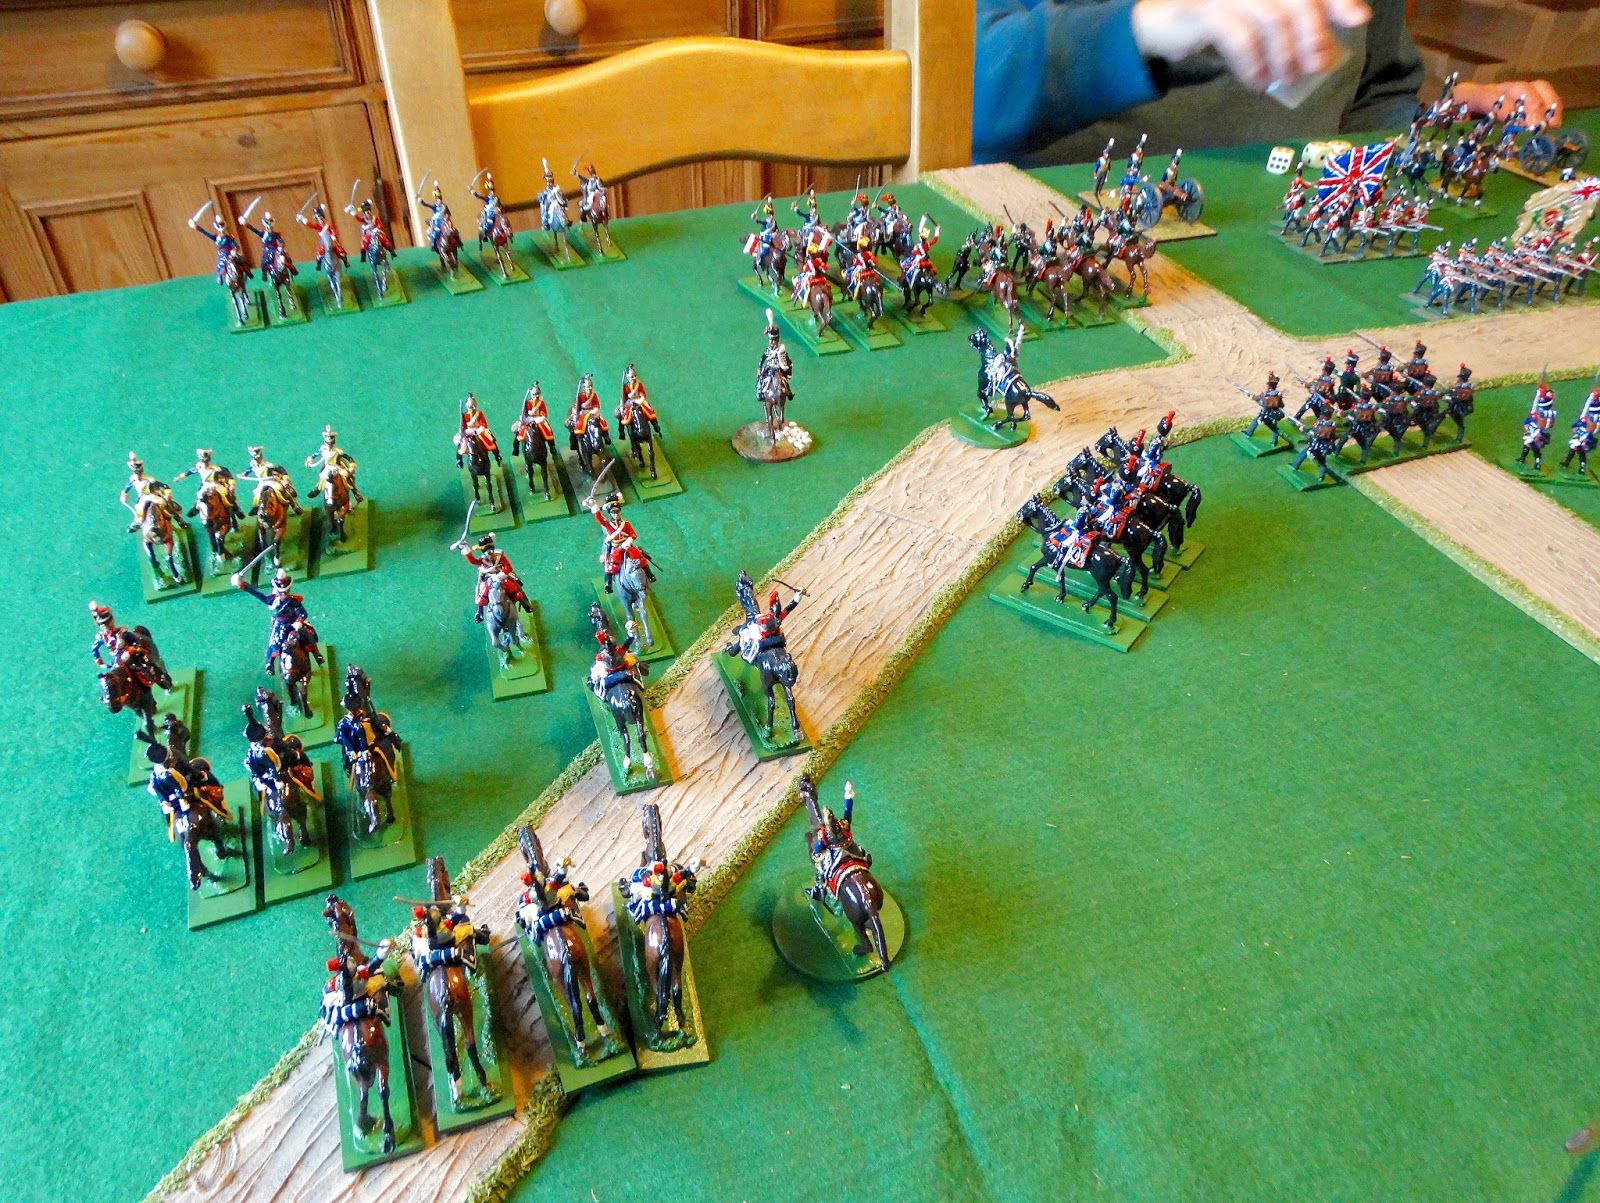 |
| The French advantage in heavy cavalry soon told on the other flank. The crossroads is firmly in French hands. |
 |
| Deadlock between the French (far side) and British (near side) infantry. |
 |
| The French cavalry breakthrough forces one of the battalions of the Gloucesters into square. |
 |
| The 95th Rifles having been ridden over at the crossroads, Stuart conceded "to save needless slaughter". Or in other words, to avoid the spectacle of his army being rolled up by my cavalry! |
We concluded the afternoon by reviewing the ECW units Stuart has put together, using the same figure manufacturers as seen in this battle. The ECW is a period I have often considered playing, but have never ventured into. I look forward to trying this new venture in the future, once we have adopted some suitably simple rules! Talking of which, the rules used for this Napoleonic dust-up are given below.
Oh and by the way, if you want to view the first 'Old School Napoleonics' post, check this link. See you next time.
