Followers

Friday, 10 April 2020

Airfix Nostalgia Project

I wonder how many wargamers of a certain age started off with Airfix figures, and at the same time built their modelling skills with Airfix construction kits? Well, that was certainly me. In the late 60s (I was 10 in 1967) I was obsessed with building Airfix kits. The new releases were a constant source of delight and making them took up a lot of my time. My standards of finishing were generally low, and improved only slowly. It's hard to say when the obsession tailed off, but let's say by about 1974 it was mostly over. By then I had started to discover wargaming.

These days I don't do much painting or modelling. I've got the armies I want, and building up more (particularly, for example, building some sort of Napoleonic collection) is far too daunting in money and time to even consider. But about a year ago I got the itch to go back in time and build an Airfix kit or two. After some lightweight reflection I agreed with myself what the project would entail:
  • I would concentrate on WW2 fighters. They would be economical on shelf space (always an issue for the model kit builder), and they had formed the heart of my old obsession back in the 1960s.
  • Five kits only. One from each of the 5 major nations - Britain, the U.S., Germany, Russia and Japan. See 'shelf space' above.
  • The kits would be bought from model shops. This was a great idea - supporting local businesses, and re-visiting the old feeling of wondering what would be in stock, and not always finding exactly what you wanted.
  • Airfix preferred, but other companies not excluded.
  • Don't overdo the standard of finish. Aim for fairly rapid completion to link with my style of work as a kid.
And so it began. Visiting local model and toy shops in Gloucester, Stroud and Witney produced the first 3 kits, all modern Airfix. The actual first was a Curtiss Tomahawk, filling the role of British fighter. Here were the project rules in action - the plane is of course American in origin, but the British version was on offer in the shop and I chose it over the obvious alternatives of Spitfire and Hurricane just because, at that moment, it took my fancy. Just like a 10 year old. The other 2, bought in different shops at different times, were a Bf-109 and a Zero.


I was knocked out by the quality of the kits. They went together like a dream, with hardly any cleaning up of parts and certainly no filling of joints needed. The transfers (should that be decals?) also went on beautifully. A coat of matt varnish finished these guys off nicely. I was a happy modeller.

Time for more enjoyable browsing in real model shops, this time Cirencester and Bourton-on-the-Water. By coincidence, the Russian and U.S. slots were both filled by Revell kits, both once again purchased on the principle of what was on the shelves and took my fancy. The Yak-3 was definitely a small kit in a big box, but again a pleasure to build:


 The Vought Corsair was my other choice:


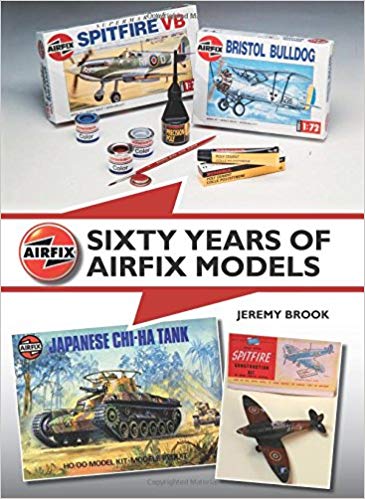
Yes, one of those crazy new-fangled starter sets. My challenge is to finish it using the paints and crappy brush provided. But those of you still awake will see the Corsair remains unbuilt. This was due to the project taking a crazy, left field direction before it was finished. I decided the project would not be complete without an original kit from my glory days, from the period known among modellers as the Airfix 'Golden Age' - which according to my Airfix book was 1952-1981. 


Obtaining a kit from the late 60s/early 70s would of course mean going online, but what the hell. The choice of old kits is pretty good and prices are mostly reasonable. I settled in the end for a model of the Westland Whirlwind which I remembered fondly from childhood days. I was genuinely thrilled to handle one of the old-fashioned 'bagged' kits again. What a nerd! I'll let the photos tell the story:


I was certain the transfers (OK, decals) would be useless after about 50 years in the bag, but actually they worked OK with careful handling (and about 4 coats of Microsol). And once again I refused to enhance the kit or even use filler. Just build it and paint it. And keep the packaging of course. There was no way those instructions or even the plastic bag were going in the bin.

Apart from the kits, this was a cheap project. I didn't buy any new paints or tools, and any paint colours I didn't have were mixed from what I did have, just like the old days. Although I was using Vallejo acrylics rather than Airfix or Humbrol enamels.

So there we are. Another project conceived, planned and executed - they call me Mr Finisher round these parts. And all tremendous fun. It really was as satisfying and relaxing a project as I had hoped it would be

Well, there is the Corsair to build. And I inherited an Airfix kit of a Mk.VI Light Tank from Stuart Asquith, which he was giving away to a good home at the last Cotswold Wargaming Day. That's under construction at the moment. I also have a terrible desire to order another 1960s kit or two - maybe a bomber like a Heinkel 111 or a Wellington. But it's time to resist - money and shelf space are limited.

Good Luck everyone. 'Til next time!

Wednesday, 25 March 2020

Cotswold Wargaming Day 2020

To those of you who saw the 'Ghost Post' regarding this event (yes, it was there and then it was gone), my sincere apologies. The date I initially settled on turned out to be the date of The Other Partizan, which is a pretty big show on the wargaming calendar. I didn't want anyone to suffer from divided loyalties, and of course I wanted as many people as possible to be able to attend both shows - and with my own being much the smaller, the Cotswold event would have been the one to suffer.

The hall last year.

So, let's start again. For a variety of reasons which I won't go into, the show will be a bit later this year, and will be held on Sunday 18th October. With luck, this later date will also increase the chances of avoiding cancellation due to Covid-19. Those who have attended in previous years and those on my mailing list will be receiving an email from me shortly. However, to be honest there is little to add to last year's info - it will be the same venue and the same ethos, perhaps with the ability to offer space to one or two extra games.

So, with luck, 8-10 games, no traders, but an informal 'wargaming market' where you can offload stuff you don't want, and acquire stuff you never knew you wanted at knock-down prices. Minimal entry fee and free tea, coffee and biscuits.

Last year again - quality figures by Phil Olley.
To summarise:

THE COTSWOLD WARGAMING DAY 2020
SUNDAY 18TH OCTOBER, 08.30 - 17.00
THE WESTWOODS CENTRE
BASSETT ROAD
NORTHLEACH 
GL54 3QJ


Fingers crossed for a good outcome to the present pandemic. My sincere best wishes to everyone regarding the very difficult times to come.

Tuesday, 24 March 2020

The Battle Of Maida, July 1806

Historical battles are extremely useful for the playtesting of rules, as they mean we can see just how well the rules allow the historical events to unfold. One has to be careful of course - for example, just because the wargame goes a different way to the original battle, it doesn't mean the rules are wrong. But players have to sense that the historical events are at least possible.

As Napoleonic battles go, Maida is a very playable one - only about 5,000 troops a side, on a flat plain, and where the course of the battle is reasonably well known. Plus it has the classic match-up (for British players at least) of French vs. British. Indeed, not that long ago it was touted by senior historians (Sir Charles Oman, no less, being among them) as a classic contest of British line against French column. More recently, historians (including Oman) have come to agree that both sides fought in line at this predominantly infantry battle, but that hardly makes it less interesting for the wargamer.

The battle was fought in Calabria, in southern Italy, at that time occupied by the French (though in no great strength). The French were planning an invasion of Sicily, held by the British, in pursuit of greater dominance of the Mediterranean. The British sought to frustrate these plans by means of a pre-emptive spoiling action, in which the French forces across the Straits of Messina would be attacked by a force landed from Sicily. And indeed, only 3 days after the British landing, the Battle of Maida took place, and was a resounding British victory.

Easily the best source for the battle is Richard Hopton's The Battle of Maida 1806: Fifteen Minutes of Glory. The 'fifteen minutes' refers to the dramatic events at the start of the battle, when two French regiments on their left wing attacked the English right, to be decisively seen off by the classic British tactic of two carefully timed volleys followed up by a spirited bayonet charge. The battle went on to last about 3 hours, from 09.00 to 12.00 - and the British remained victorious at the end.

Once again I was lucky enough to take advantage of Roy's lovely collection of 20mm Hinton Hunt figures. Readers can look up the details of the battle for themselves, but for the record the forces in our wargame were as below:

British (right to left)

Kempt’s converged light battalion - including some ‘Corsican Rangers’ and Sicilians.

Acland’s Brigade - 81st Foot and the 78th Highlanders.

Cole’s Brigade - Converged Grenadier battalion and the 27th Foot.

Oswald’s Brigade (reserve) - 58th Foot and de Watteville’s Swiss battalion.

There was also the 20th Foot, coming up from the beach independently. There were 10 4pdrs, which I represented by 3 batteries of light guns. These seem to have been distributed amongst the 3 leading brigades.

Total 5,300 infantry, 10 light guns.

French (left to right)

Compere's Brigade - 1st Legere and 42nd Line, with 2 battalions each. Some separate voltigeurs are needed to fight south of the river.

Peyri's Brigade - Polish regiment of 2 battalions, plus a Swiss battalion.

Digonnet's Brigade - 23rd Legere (2 battalions).

Artillery (independent) - 1 light horse battery.    

Cavalry (independent) - 9th Regiment Chasseurs à Cheval.

Total 5,100 infantry, 300 cavalry, 4 light guns.

As my rules have standard sized units, I decided to only have 1 battalion of Poles on the French side to give 8 battalions each, reflecting the pretty equal numbers of infantry on each side.

I relied on Richard Hopton's book for the final decisions regarding the forces on each side. His work is detailed and well researched. All infantry battalions had 24 figures, with 12 cavalry figures in the Chasseurs à Cheval.

Playing The Game
Deploying the forces on Roy's table turned out to be an interesting challenge. I was using three different maps to guide me - David Chandler's map in On The Napoleonic Wars, the map from Hopton's book, and the map from Bataille Empire. All differed, especially regarding the position of the French cavalry and the artillery on both sides. The potential weaknesses of the account in the recently released Bataille Empire have been discussed in a previous post reviewing those rules.

Map from Chandler.
Map from Hopton. A really bad publishing decision to use 'portrait' for this map.

Deploying the forces on a 6' x 4' table soon proved impossible, and the deployment extended into a space around 8' x 4". As usual, I went with Hopton when in doubt. Some shots of the resulting action are given below.

The troops deployed ready for action. British nearer the camera.
French voltigeurs on the south bank of the Amato river.
The 2 battalions of the 1st Legere are matched against Kempt's light battalion,
supported by a battery of light guns and the guns from Acland's brigade.
The 1st Legere gain the initiative over a series of moves, and turn the historical tables
on the Brits by delivering a series of deadly volleys to Kempt's unit.
And there they are gone. The French are also driven off by casualties received during their advance.
A serious slogging match in the centre also favours the French.
The arrival of the 20th Foot was delayed by dice roll. They finally entered the table on move 5,
on the left of the British forces, but it was too late. The British right and centre had already collapsed.
The skirmishing between light troops on the other side of the Amato was indecisive.

And so a resounding French victory resulted. Was there anything wrong with the rules? Firstly, I had not properly insisted that the 1st Legere divide their fire between Kempt's battalion and its supporting guns, which the rules require (and which would have made sense). However, it was also obvious that the initiative system needed revising. The French won the fire initiative 4 turns in a row, and managed to advance whilst at the same time issuing crushing volleys which overwhelmed the British in a rather non-historical way. As a result, I have changed the rules so that firing is always simultaneous.

This was a very useful (and enjoyable) game in 2 respects. Firstly, deploying the various units on-table showed up inconsistencies in the maps contained in the various books, and threw up questions of which units faced each other in the actual battle. It struck me in particular that the support of the British artillery would have been vital to Kempt's battalion in the original battle, an issue which only Hopton properly brings out.

Secondly, the question of fire initiative was brought to the fore by re-fighting a battle where British volley fire was so decisive. One always has to be careful to avoid making big rule changes as a result of one game, but here some nagging doubts from previous games were thrown into sharp focus.

Covid 19 Stops Play
Thanks for hosting Roy - as usual a great pleasure to use the facilities of your gaming room. It looks like this will be my last game against a live opponent for a while. Very best wishes to all readers for a safe and healthy time over the coming months. Maybe our hobby will provide a good way to pass the time for anyone staying at home. Bon Chance!

Thursday, 27 February 2020

Ancien Régime To Grande Armée, 1792-1815

When developing my set of Napoleonic rules, one of the first tasks I set myself was to try and understand the change in tactics that took place between the Seven Years War (with which I was familiar from developing Honours of War) and the Revolutionary and Napoleonic Wars. What was so different about Napoleonic tactics that made it a more complex and demanding period to wargame? And what were the reasons for the differences, such as the reliance on squares, the use of the columns of manoeuvre and attack, and the increased use of skirmishing infantry?

To bring my thoughts together I wrote the following short essay. It can be found and freely downloaded in the files section of the online group for Shadow of the Eagles, with the full footnotes present (you will need to join the group to access the file). For the purposes of this post, I should note that the main sources for my investigation were:

Brent Nosworthy: Battle Tactics Of Napoleon And His Enemies
Paddy Griffith: The Art of War Of Revolutionary France 1789-1802
George Jeffrey: Tactics And Grand Tactics Of The Napoleonic Wars
Robert Quimby: The Background Of Napoleonic Warfare

I am, of course, no expert in this period of warfare, and the essay should be read as being my own current understanding of the subject, rather than any form of authoritative statement. I present it here hoping it may be of interest, and perhaps form a basis of discussion or further research for readers.


François Gérard, 'Napoleon at the Battle of Austerlitz'.

Ancien Régime To Grande Armée

What we usually call ‘Napoleonic Warfare’ was not created by Napoleon Bonaparte - Napoleon was an extraordinary military leader but no great innovator. He inherited an army and a system of warfare that had its origins as much in the 18th century as in the French Revolution. Nevertheless, ‘Napoleonic Warfare’ is usually described as being dramatically different from what came before. Having already published a set of wargames rules set in the mid 18th century, it was important for me to establish what was new about warfare between 1792 and 1815, and how these changes in warfare came about. This is particularly important as many of France’s opponents in this period were still using some or all of the old methods, and this clash of different methods gives Napoleonic wargaming much of its flavour. What follows then, is my appreciation of the tactical and grand tactical developments that shaped warfare in the period covered by Shadow of the Eagles.

Changes in infantry tactics were the most substantial and significant ingredient of these new developments, although cavalry and artillery benefited as well. Particularly fascinating is that these changes started with experiments in drill at the sub-tactical level, but the full flowering of the new ways of warfare depended on a range of broader contributory factors, including the very nature of the French Revolution itself.

We should start, then, with those ‘sub-tactical’ roots. Two new developments in drill originated in Prussia during the mid-18th century, and they were subsequently developed for the French Army by the Comte de Guibert, chief military advisor to the French Government 1787-89. These were the replacement of ‘processional’ deployment from column to line with the ‘perpendicular’ method; and the discovery of how to form ‘closed squares’.

The first meant that each battalion could now march up to its deployment point in column and then change directly into line, instead of forming part of a ‘procession’ of other battalions in column who would have to march across the front of the enemy (exposing their flank) before halting and quarter wheeling into line (fig.1). The process of changing from column to line was thus both much quicker and much safer under the perpendicular process. Battalions, brigades or divisions could change into line much closer to the enemy without undue risk – 400 to 500 paces, rather than at least 1000 paces and often more.


The second development, ‘closed squares’, was discovered during experiments in drill when it was found that a closed column (a column with the minimum interval between successive ranks or sub-units) could be quickly changed into a closed square by having the men at the sides and rear face outward. This was much quicker and easier than deploying into an open square (the formation so familiar from images of Waterloo). So again, infantry could safely manoeuvre in column much closer to the enemy, in this case enemy cavalry, than before.

Neither of these methods saw much use in the Seven Years War, but were introduced into the French Army, along with many other standardisations and simplifications, by the Règlement (manual) of 1791 which was based on Guibert’s work. The innovations created a much higher level of tactical flexibility. Units in column were always going to be easier to manoeuvre than units in line, and the longer they could stay in column the better. In the words of Brent Nosworthy, these developments meant that ‘it was no longer imperative to deploy all of one’s infantry into line prior to the battle. The order to form line could be delayed until the enemy was well within sight and the commander had time to analyse his opponent’s intentions’. Even more importantly, groups of highly manoeuvrable columns could have the option of acting independently, rather than being forced to be part of a linear army formation. The infantry columns had less fear of exposing their flanks, as they could quickly deploy defensively against enemy forces approaching from any direction, by forming closed square against cavalry or line against infantry.

Columns had their drawbacks. They developed much less firepower than units in line, and their depth made them more vulnerable to artillery fire. Changing into line as enemy units came within musket range was the officially preferred option, but formation changes whilst under fire were always risky, especially with poorly trained troops. Thus if the attacking troops thought their opponents were already badly damaged or of poor quality they might simply charge in column. The mutual advantages and disadvantages of line and column also led to the famous ordre mixte (‘mixed order’), where regiments or brigades would deploy with some battalions in line and others in column, according to how their commanders perceived the situation.

Despite potential drawbacks, armies adopting columnar tactics could be freed from the single axis of attack that linear armies commonly suffered from, deriving from the need to ‘maintain the line’. A linear army would be reluctant to break up its line by attacking in different directions, both because of the physical difficulty of manoeuvring a large number of units formed in line, and because of the danger of exposing the flanks of the sub-groups. A non-linear army moving in columns could much more easily employ multiple axes of attack, with units in each sub-group able to quickly redeploy if flank threats developed. Other advantages accrued - friendly cavalry now had room to support its infantry more quickly and easily, and did not have to be confined to the flanks, whilst reserves kept waiting in columns could be more easily deployed when and where they were needed.

There were two final steps that completed the picture. The French had started to employ permanent (rather than ad hoc) brigades and divisions (the latter typically of 3 brigades) from the mid 18th century, to improve army performance. By the end of the Revolutionary Wars, this tendency had conveniently combined with the new non-linear deployment systems to create what we know as the ‘Napoleonic’ system of warfare, where brigades, divisions, and then corps (formed of two or more divisions) could manoeuvre independently, with each of these formations being commonly formed by a combination of infantry, cavalry and artillery. As Nosworthy says, this ‘provided the death blow to the single entity, single axis of operation quality of grand tactics, so pervasive up until that point’. And finally it was here that the new political and social outlook of revolutionary France came into play, creating an environment where commanders-in-chief, and their subordinates in charge of corps, divisions and even brigades, were allowed and encouraged to act independently on their own initiative as their local situation changed. The more conservative Ancien Régime-style governments and their armies would have to learn the hard way the advantages of the delegation of both authority and responsibility on the battlefield.

To step back a little, we see here the explanation of the much greater use of squares in the Napoleonic era as compared to the early and mid 18th century. It was not because the lower quality infantry of mass armies (and particularly French mass armies) couldn’t defend themselves in line any more. Indeed, if poorly trained, infantry would in any case have little chance of forming an effective square. It was rather that, in battles involving developed Napoleonic armies, the cavalry and infantry battles were no longer separate, and infantry were not depending on being formed into a continuous line of units, each protecting the flanks of their neighbours. Infantry would encounter cavalry more frequently, but could be confident of defending themselves against unexpected threats by rapid realignments and quick changes of formation. Conversely, cavalry had the potential to be more effective as it could operate in much closer support of infantry and artillery.

The other great tactical difference of revolutionary and Napoleonic warfare when compared to the 18th century was of course the much greater presence and significance of light infantry skirmishers. This type of infantry had been part of the French army throughout the 18th century, well before their value was emphasised during the French-Indian Wars and the American War of Independence. French light infantry took part in both the War of the Spanish Succession (1701-1714) and the later War of the Austrian Succession (1740-1748). Their usefulness was of course also well-known in other armies, notably in the Grenzer (‘border’) units of the Austrian army. In general, however, France was consistently ahead of other nations in the use of skirmishing tactics in the period 1792-1815, and expanded the use of such troops greatly. In fairness it should be noted that the British army also had considerable success in this field, having drawn their own lessons from their experiences in North America.

On the battlefield, skirmishers could be very effective in seizing and holding broken or wooded terrain. They also commonly acted in front of the main line of battle, using controlled, aimed fire to harass and hopefully disrupt formed enemy infantry whilst presenting difficult targets to any return fire. This was a function they could perform in attack or defence. However, their effectiveness in these roles was highly dependent on their level of training. Most nations in our period eventually had a least one light company in an infantry battalion trained to split off when necessary for the skirmishing role and to act in concert with similar companies from other battalions in the same regiment or brigade. Whole battalions were also raised who were supposed to be able to act either as formed infantry or skirmishers, most famously the légère battalions in the French army. In the poorly-trained early revolutionary armies, whole battalions would commonly degenerate into amorphous grande bandes of loose order infantry under the pressure of enemy fire.

In summary, the assumption that battlefield columns, the use of squares and the prevalence of skirmishing light infantry were a direct reaction to the mass, untrained nature of the new armies of Revolutionary France would appear to be incorrect. The tactical changes that underlay the eventual creation of Napoleon’s Grande Armée derived from Prussian and French developments firmly grounded in the mid to late 18th century, developments which had become significant trends in French military tactics before the time of the Revolution. It would be foolish to deny that these developments were well suited to armies that had to make do with large numbers of quickly trained men. However, employing the full range of tactics and grand tactics that made up Napoleonic Warfare at its most efficient needed armies that were, in contrast, thoroughly trained and well disciplined. The revolutionary armies learned their trade as the years passed, but would not realise their full potential until the appropriate discipline, training and doctrine were provided in the famous camps around Boulogne that created the extraordinary Grande Armée of 1805.

Saturday, 22 February 2020

Bataille Empire

A review of the latest big rules thing in Napoleonic wargaming from someone who hasn't played them might seem a bit problematic. But this book interested me as soon as I heard about it - it's size, it's positive reception, and the fact that the various army lists and national characteristics (reputedly very informative) took up twice as much space as the rules themselves. So, in a moment of madness, I decided to pay out the £30 plus and get me a copy. As for waiting until I've played them a few times before I post a review... well, as I don't intend ever to play them that would be a really long wait. I'll explain later.


It's Big! And It's French!
Yes, this book is indeed a fair size, and no mistake. In overall proportions and heft it is very similar to my copy of Black Powder, but Bataille Empire is a soft-back and has a wacking 256 pages compared to the 182 of BP. I was a bit concerned that a soft-back binding might not be the best or most durable for wargaming, but the quality of the binding is good and the book can be roughly handled with confidence.

This is a translation of a book originally published in French. The standard of translation is generally very good, with only the odd mistake and the occasional stilted phrase. Considering the length and technical detail involved, it is a fine effort. The standard of photos, diagrams and tables, and the general formatting and layout, are all good. Compared to BP, the photos are kept within proper bounds, being attractive but never taking up more than a quarter of a page, and usually much less.

The Rules
Here I have to be careful. I would refer readers to this previous post, where I explain my view that I find most rule books these days too long and complex. Such is my view of Bataille Empire. I'm afraid the effort of learning them and playing them is going to be too great, and I doubt I would enjoy playing them anyway. But the online reviews by those who have played them are generally positive. It is instructive for me to reflect that a lot of wargamers like a bit of complexity, and are fondly attached to their tables, lists of factors, and their 'ifs, buts and maybes'.

I think, however, that my view of them as a complex set is sustained by the comparison in online reviews of BE to such sets as Field of Glory (Napoleonic), (which I wouldn't play if you paid me). As further comparisons, I would rate BE as a bit more complex than Over The Hills, or roughly comparable to General de Brigade. The jacket blurb does contain the compulsory phrase regarding fast play, but this is a term that is used far too much these days, and should usually be taken with a large pinch of salt. Wargaming is, in any case, not really a 'fast play' hobby. The best to be hoped for (by me, anyway) is for a bit of simplicity whilst retaining period flavour. These rules are not simple and will take a bit of getting used to.

However, the rules do score by their determined incorporation of national characteristics into most aspects of the rules, including command and control. Which leads me to the best thing about this book.

A Wargaming Resource
This is the great appeal of the book to me - the fact that about 150 pages are devoted to army lists and national characteristics for just about every relevant nation. These include most of the information on quality, organisation and tactical doctrine that the wargamer needs. The phrase 'army list' can bring up thoughts of those super-dry and rather off-putting lists one finds in various DBx books. However, here we are talking about a genuine historical resource which distils down the known facts into the required picture - how, and how well, did these nations fight, and what constituted the differences between them? And how can I put together a representative army for a particular period suitable for the wargames table?

Only the most basic appreciation of the rules is needed to interpret the various tables of organisation, but there is also a significant amount of straight text explaining the background, composition and quality of the various units of each nation, and crucially how they changed and developed over the Napoleonic period. The blurb in this case is bang on - "this book is complete and requires no other supplement". This, of course, goes a fair way to justify the considerable expense of purchasing this volume in the first place.

Doubtless there will be quibbles over some interpretations, considering the wealth of detail presented (see below), but as an introductory resource to the period for wargamers this volume could hardly be bettered.

Maida Mistake?
After all those gushing phrases, I should sound a note of caution based on one area of the book where I found myself questioning the content. As I am currently planning a re-fight of The Battle of Maida (1806), I was very pleased to find that battle featuring as one of the four example historical scenarios in the book. Having read Richard Hopton's book on the subject, which appears to be the definitive account, two things surprised me.

First, the description in BE of the River Lamato (or Amato) as 'not passable', whereas just about all other accounts rate it as entirely passable (Hopton describes it as 'easily fordable by infantry', hardly surprising for a small river in the south of Italy during July). This was a significant factor in the battle, as an initial combat between light troops is generally agreed to have taken place on the far side of the river from the main battle, which makes the map in BE incorrect.

BE also makes the point that the French had more artillery than the British, when the real situation appears to have been exactly the opposite. Hopton gives a very complete and detailed description of the composition and quality of the troops on both sides, and is quite clear that whilst four 6pdrs and two howitzers were left behind in the British camp, ten light guns were taken to the battlefield, giving the British a significant advantage over the four light guns of the French.

So it appears BE is not infallible. Hardly surprising given the ground it covers, and I feel a bit like the oft-quoted character standing behind a painter and decorator gleefully pronouncing 'you missed a bit there mate'. But it usually pays not to get all your information from one source.

A Definite Thumbs Up
I started by describing my purchase as 'a moment of madness'. I did indeed feel I was taking a risk in shelling out £30 for a rulebook I was certain I would never use just for the rules. But I'm very glad to have this book on my shelves, and it will be of great use to me. I would recommend it to any Napoleonic wargamer. The official online support is in French, but an English Forum is now available and will doubtless soon grow.

Finally, a recommendation for Firestorm Games if you are considering a purchase. At the time of writing, Firestorm have a worthwhile discount on this book and offer speedy delivery with a sensible price for postage - I had my copy within 48 hours. Nice one.

So there we are - a rulebook containing rules I don't really want to play, which I strongly recommend you buy. For once, the description 'more than a rule book' is entirely justified. Should you end up with a copy, I hope you will agree with me.

'Til next time!

Wednesday, 12 February 2020

The Battle of Mollwitz, part 2

So, about a month after re-playing Charles Grant's version of this battle (see previous post), I turned to representing Mollwitz with as many historical factors taken into account as possible. I won't bore the reader by recapping the background circumstances of the battle, which can easily be discovered online. But the historical factors I tried to include in the wargame itself will be outlined. First, however, the map of the battle as wargamed is shown below.


At Mollwitz, 21,000 Prussians attacked 19,000 Austrians over a flat April landscape covered in snow, apparently up to 2 feet deep in places. The Prussians outnumbered the Austrians in infantry (about 16,000 to 10,000), and their infantry was also significantly higher in quality, much of the Austrian infantry being described as recently recruited and poorly trained. On the other hand, the Austrians had more and better cavalry, outnumbering the Prussians in this arm by about 9,000 to 4,000. The situation in artillery was also interestingly asymmetric, with the Prussians having 46 guns against just 10 Austrian. I should indicate that most of the fine detail here is provided by the outstanding account of the battle given on the appropriate page of the excellent Obscure Battles blog.

On that April day in 1741, the Prussians, under the combined command of Frederick the Great and the Count Schwerin, advanced slowly over the snow covered ground towards Mollwitz. They managed to cramp their left flank uncomfortably against the Kleiner Bach, with the left flank cavalry forced to deploy on the far side. The Austrians had been expecting the Prussians to approach from the north (failures in reconnaissance being a feature of the campaign), and had to re-deploy their infantry quickly in reverse order, with those expecting to be on the left flank being on the right, and vice-versa. This unsettled a force already suffering from lack of training, and unfortunately also provided with wooden ramrods rather than the more modern and durable iron ones in use by the Prussians. 

Having advanced into artillery range, the Prussian battery Lehwaldt began to fire on the Austrian left flank cavalry under General Römer. To avoid this fire, and to cover the still-deploying Austrian infantry, Römer moved away to his left and set himself up for a flank attack against the Prussian right.

This is where my re-fight commences, as shown on the map. Römer is ready to strike at Schüllenberg, whose weak cavalry is shored up with some grenadiers under his command. The rest of both armies are ready to engage, with hussars pushing ahead on the southern flank and the Prussian artillery nicely positioned to pound the Austrians before their infantry advances. 

This would be a good time to show the forces in use. This is not a big battle, but some 'bath-tubbing' was still needed, with one model battalion or regiment representing about 2 real ones. I was, however, a little generous with the cavalry which I represented at a ratio of about 2:3 where it suited me, to get decent numbers on the table. S = superior, R = regular, I = inferior.

Austria: C-in-C Neipperg

Left Wing Cavalry (Römer, dashing)
3 cuirassier regiments (S)
1 dragoon regiment (R)

First Line Infantry (Göldy, dependable)
4 infantry battalions (I)
1 grenadier battalion (R)
2 light batteries (R)

Second Line Infantry (Harrach, dependable)
3 infantry battalions (I)

Right Wing Cavalry (Berlichingen, dithering)
1 cuirassier regiment (S)
3 dragoon regiments (R)

Independent Cavalry
1 hussar regiment (R)                                              19 units:  Break Point 9 units.


Prussia: C-in-C Frederick (dithering), Schwerin

Left Wing cavalry (Posadowsky, dithering)
1 cuirassier regiment (R)
1 dragoon regiment (I)
1 hussar regiment (I)

First Line Infantry (Marwitz, dependable)
5 infantry battalions (R)
2 grenadier battalions (S)
2 field batteries (R) (Bty Dohna)
2 light batteries (R)

Second Line Infantry (Leopold, dependable)
4 infantry battalions (R)

Right Wing Cavalry (Schüllenberg, dithering)
1 cuirassier regiment (R)
1 dragoon regiment (I)
1 grenadier battalion (S)
2 field batteries (R) (Bty Lehwaldt)                               21 units: Break Point 10 units.

Scenario Conditions
Neipperg is placed in front of Mollwitz. Frederick is behind the Prussian right wing. Schwerin is with the Prussian centre.

Effect of snow – no grazing fire is allowed. No charge movement bonuses.

A pre-game bombardment will take place. The Austrian light guns start the battle deployed, whilst the Prussian light guns start limbered.

The Austrians have the initiative on the first two turns. Thereafter roll for initiative with no modifiers.

Frederick and Schwerin will act as dual C-in-Cs – in effect the Prussians have an extra commanding general at the start of the game. Frederick will leave the battlefield when Schüllenberg’s brigade has lost 2 units (see below).

The Wargame
With the historical conditions in place, this is a tough battle for the Austrians to win. In the real battle, Römer thrashed Schüllenberg's cavalry but the Prussian infantry shored up the flank and little further progress was made, with Römer himself being killed. However, the initial disaster had looked bad for the Prussians, which led Schwerin to encourage Frederick to leave the battlefield. Nevertheless, Schwerin then ordered forward the well-drilled Prussian infantry who advanced remorselessly, firing all the while - some sources estimate they may have been firing 4 volleys per minute to every 2 from the Austrians. With Berlichingen's cavalry unable or perhaps unwilling to intervene effectively against the left flank of the enemy infantry, the Prussian musketeers eventually put the Austrian centre to flight. To have a chance in the wargame re-fight, the Austrian cavalry on both flanks would need to intervene more decisively.

I represented the terrain with an old white sheet for snow, plus a bit of snow flock (you can get anything these days) to tart up the buildings, trees and roads. An 8' x 6' table would have been ideal with 28mm figures, but my 7.5' x 6' table sufficed. I was able to tempt 4 wargaming friends over with promises of home-made cake (not baked by me, thankfully), and so we had a nice set-up with 2 gamers per side and myself umpiring. Post of Honour were of course the rules in use. What happened in the game is shown in the photos below.

Set-up 1. Pampitz in the foreground, with the Austrians defending Mollwitz in the background.
Set-up 2. Römer's cavalry near Grunningen waits to strike the Prussian flank.
Neipperg takes up position behind his centre on the outskirts of Mollwitz.
The cream of the Austrian cavalry await their moment.
Battery Dohna prepare to bombard the Austrian line.
The game starts, and Römer's charge goes in. He has good initial success against the weak Prussian cavalry.
But the Prussian players are already putting together a strong infantry flank guard of grenadiers.
On the other flank Berlichingen strikes hard at the inferior Prussian cavalry across the Kleiner Bach.
The Prussians put up a stiff fight, enabling their infantry to form a secure line on the other side of the stream.
The Prussians are moving infantry to the flanks to fend off the Austrian cavalry.
This has weakened their centre which has lost formation somewhat. The Austrians are daring to hope.
All to play for, but Paul and Craig seem a bit concerned with the odds against Römer.
It turns out they were right. History is repeated as the supporting Prussian grenadiers
stand fast and blast the attacking cavalry with musketry. Römer's horsemen are decisively seen off. 
Harrach marches the second line infantry out to fill the gap in the Austrian left flank.
In the far background the Austrian right wing cavalry can't breach the Prussian infantry flank guard.
An indecisive Austrian hand hovers over their dragoons.
The Prussian infantry reforms and begins to move forward in a solid-looking line.
The crunch approaches. Can the Austrians hang on, or will Prussian quality triumph?
At last the 2 lines are in musket range, and the Prussians are soon in the ascendent.
Note the orange dice behind the Austrian line, indicating 'weakened' units.
And they're gone. Harrach's units rout and the Austrian left flank is wide open.
At this point the Austrians had also lost more than half their units. A Prussian victory! 
An Historical Outcome
There had been a large and rather fun cavalry fight on the Prussian left flank which never happened in 1741, but apart from that history had pretty much repeated itself. It was pleasing to see that the rules could cope with a strongly asymmetric battle and produce the expected outcomes. On the other hand, there was plenty of interesting gaming and a few tantalising glimpses of a possible reversal for the Austrians, which kept everyone involved.

I missed a few points of the rules, but nothing that would have changed the outcome. It's always surprising how, even as the rules author, the interest of the game and the accompanying banter can divert your attention from the straight and narrow. I think everyone had a good time, although I have a sneaking feeling that my visitors thought the true highlight was my wife's cake, warm from the oven. Thank you guys for coming over yet again and creating a great day's gaming. I enjoyed myself immensely.

Another historical re-fight beckons later in February, this time the Battle of Maida, 1806. See you again soon!