So, a few weeks ago, I headed over to Roy's full of anticipation for a WW2 game set in the Western Desert. I had been working on my WRG-derived rules - I had recently checked over all the gun and armour stats and had even come up with a fancy alternate activation scheme for the turn sequence. What could possibly go wrong?
The day actually started very well. Roy had a pile of box files waiting, extracted from the depths of his Alladin's Cave of a wargames room, and I had the pleasure of picking out the forces I thought would make an interesting game. We threw history to the wind and went for a Flames of War-style tank punch-up set in 1942, with minimal infantry and just a battery of supporting artillery on each side. The table was 6' x 4'. The forces were:
British - Force HQ: Dorchester ACV
Crusader tank company: HQ (Crusader III) plus 3 platoons each of 3 x Crusader III
Grant tank company: HQ (Grant) plus 2 platoons each of 3 x Grant
Carrier platoon: in 6 x Universal Carriers
Recce section: 2 x Humber II
Artillery: 4 x 25pdr off-table plus AFO
German - Force HQ: Sdkfz 250 with Rommel impersonator
Panzer company: HQ Pz. III (kurz 50mm), platoon of 4 x Pz. IVG, platoon of 4 x Pz. III (lang 50mm),
platoon of 4 x Panzer III (kurz 50mm)
Infantry platoon: in 4 trucks, plus towed 88mm Flak 36 and towed 50mm Pak 38
Anti-tank section: 2 x Diana SP 76.2mm
Anti-aircraft section: 2 x SP AA 20mm
Artillery: 4 x 10.5cm LeFh off-table plus AFO
The British had 17 tanks to the Germans 13, but the latter had some powerful anti-tank gun support. The models were 15mm-1/100th scale.
We deployed by alternate platoons, and then set to. The action was quickly under way, and proved deadly - rather too deadly, in fact. But before some analysis, here are some snaps of the game:
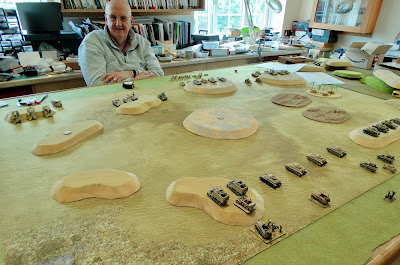 |
| Roy took the Brits - Crusaders to his left, Grants to his right. |
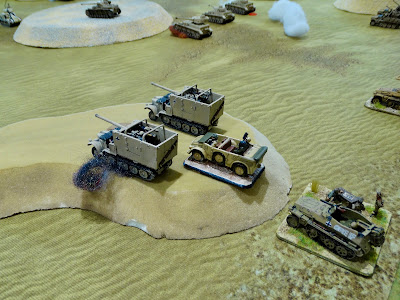 |
| The cracking Diana models - or to be more accurate, the two 7.62cm FK36(r) auf Panzerjäger Selbstfahrlafette Zugkraftwagen 5t (Sd.Kfz. 6/3). |
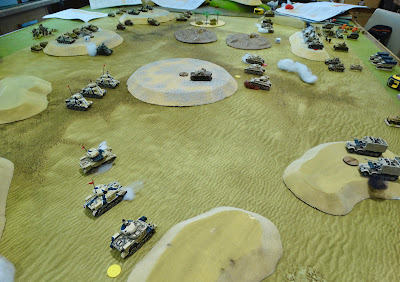 |
| The Grants get going in the foreground. Their thicker armour was useful, but 2 were soon knocked out. |
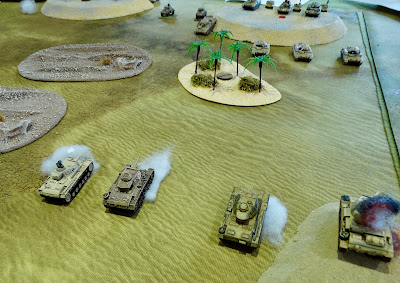 |
| But by move 4 the Pz.III (kurz) platoon had been wiped out... |
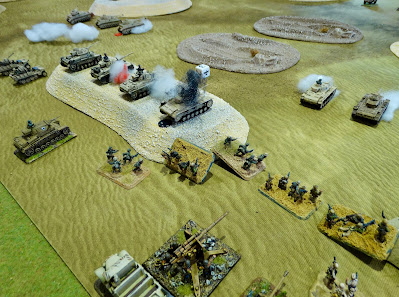 |
| ...as had the platoon of Pz.III (lang). Plus half of the PzIVs! |
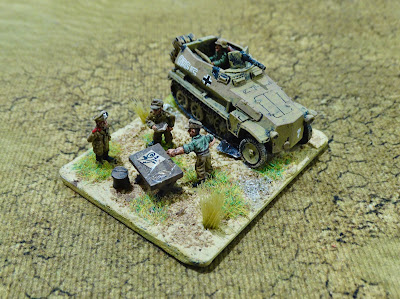 |
| 2 or 3 Crusaders had also been destroyed, but my Rommel impersonator had little choice but to call it a day. A game that seemed to be over before it had really started. |
Truth be told, it had not been much of a game. It wasn't hard to see why. A stationary Crusader with a 6pdr could hit on a 2 up to 500m, then a 3 up to 750m (the usual battle ranges). Against a Panzer III, a knock out was automatic if hit. So tank knock outs were just too easy and predictable, even if the stats stood up historically. Firing from the other direction was slightly more difficult, with even the long 50mm gun rated slightly weaker than the 6pdr, but knock outs were still pretty easy.
This was a result of not seeing the wood for the trees. I had gone over the stats repeatedly with my reference material, but the consequences during a game had eluded me. Most of my games had been set in Poland 1939, where the tanks are mostly just armoured cars with tracks, so easy knock outs are expected. Not so later in the war. This was also the first time I had tried a real tank-heavy engagement, popular with many gamers but a rare occurence in real life. So this had been a valuable play-test. But how to solve the problem?
The Phil Barker mechanic for deciding whether AFVs are knocked out was quirky and original, and I had decided to keep it as part of the character of the rules. For those not familiar, it consists of a table with most WW2 tank and anti-tank weapons down one side, and the six armour classes (later increased to 8) along the top. A typical cell has a range band and a number - '4 at 500-1000m', for example. This means that a particular gun, firing at that particular armour, will knock-out automatically at under 500m, knock-out on a roll of 4 or more at 500 to 1000m range, and be ineffective at over 1000m. Also, quite a lot of cells say 'All K-O' or No K-O'. The system was refined a little in rule books after 1973, but the basic mechanic was retained. It might be of interest to show an extract, pictured below:
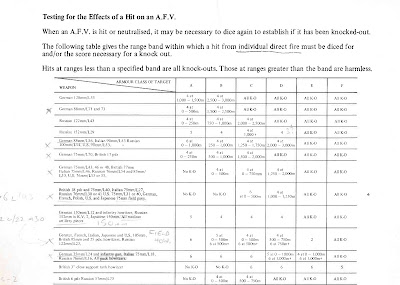 |
| © WRG 1973. |
One obvious option was to just go through the table I was using and alter all the stats to make things a bit less deadly. But I quickly began to think about ditching the system in its entirety. It was rather inflexible and lacked nuance - it was usually a choice between no knock out possible, a 50-50 chance of a knock out, or an automatic knock out if hit. It had also become apparent that fitting particular AFVs into one of the 6 classes could be tricky when they were on the cusp between the parameters for one class and the next.
My decision was to change to a much more well-used and familiar system - attack and defence values, which I had first encountered in Donald Featherstone's War Games from 1962. I had been tempted to make this change from the outset, but respect (and nostalgia) for Mr Barker's concept had held me back. But now it was time for the change. No need for armour classes - each AFV could have a defence value number that represented my best guess at the strength of its armour, whether front, side or rear. And similarly for guns - the attack value number at any particular range (and with any particular ammo type) could be tailored as required.
There are a variety of ways the system can be used, but I went for that described by Charles Grant in his 1970 book Battle - Practical Wargaming. Look up the attack value at the appropriate range, add the sum of 2 D6, and the total must exceed the defence value of the tank's armour to knock it out. If not knocked out, the tank remains 'neutralised' (i.e. suppressed) as a result of being hit, as with the original WRG rules.
The good news was, I had a specimen system already available from my own adaption of the Charles Grant rules, which I had used for many years back in the 1970s and 80s. A few hours work and I had my attack and defence value tables done. Interestingly, I checked the probabilities of various knock-outs with my most recent set of commercial rules (the Battlegroup series, which use a very similar system) and found a reasonable match. So I'm going with this change. Rolling 2 dice is somehow rather more satisfying than rolling just one, which is an additional bonus. The inevitable tweaking of probabilities that will take place in the future will be much easier with the new system. All other firing rules from the WRG system remain in use, although I once again adjusted the hit probabilities to make hits just a little less likely.
As an example, to knock out one of those Panzer IIIs pictured above with a 6pdr will now need a hit roll of 2 up to 250m range, then 3 for up to 500m, then a 4 for up to 1000m. For a frontal attack, the attack value of a 6pdr at 500-1000m is 5, the defence value of a Panzer IIIH is 11, so a roll of 7 with 2D6 is required to knock-out, a probability of 58% in favour. Naturally, as the range shortens this probability increases.
As with so many things in rule writing, I have once again been taught that getting the 'feel' right for a satisfying game is more important than a spurious 'accuracy' which says that if this gun could penetrate this armour at this range, then a knock-out will always result, whether in real life or on the gaming table.
By the way, the alternate activation system seemed to work quite well, replacing a standard IGO-UGO arrangement with one where units from each side take their 'bound' alternately. That is, in the game described, a German unit fires and moves, then a British unit fires and moves, and so on. It seems a bit more modern (I might even say a bit more 'on trend' for 21st century gaming), and gives more of the feel of real battle where punches are traded in quick succession. Plus, the choice of what order to activate your units gives a little more tactical choice.
I hope this hasn't all been too tedious for readers. Perhaps this kind of detail may be of interest to some of you. And of course, this blog is for me as much as you, recording my adventures and decisions in this strange hobby.
Roy has foolishly agreed to a re-match, so with luck we will have another, rather more enjoyable, game with the same lovely models. I will endeavour to report back.
'Til next time!

14 comments:
The 100 Crusader III tanks were first used in October 1942. They were deployed into two regiments replacing the withdrawn 2pdr equipped versions. They were not popular with troop commanders because of their two man turrets which made it far too taxing to command the tank, operate the 6pdr, select the targets & command the other vehicles within the troop so they usually kept their Crusader II tanks instead. This wasnt official policy but each regimental commander usually kept a few vehicles back as spares. Not sure if you should penalise the 2 man turret tanks but ergonomically they were certainly at a disadvantage compared to the 3 man turret tanks.
Thanks Drew. That's good info!
I think the changes you have made make a lot of sense to me Keith. When I played Rules of Engement they used a similar system of 2D6 with modifiers to try and see if you KO a tank or not. IIRC you also had to see if you hit the turret or hull as well. Possibly a step to far?
I always thought this piece from a review of Featherstone's Tank Battles in Miniature vol 1 to be interesting:
"We have a similar chapter on anti-tank guns, full of data for lots of
weapons and a discussion on hitting the target and the damage done. All very useful. There is a great table on page 129 showing the chance of hitting a target at various ranges – at 1,000 yards, for example, you will only hit a tank 37 percent of the time, but your second shot will find its mark 90 percent of the time. Nerdy? You bet; but useful if you are writing your own rules for the period."
Possibly too much detail to take into account these days, but if IIRC it was based upon those that had fought there, but I could be wrong...
Interesting point Steve. Unless you limit a turn to about 30 seconds or less, the turn will always include more than one tank shot. The WRG rules did indeed limit direct fire to 30 seconds (because "aimed fire engagements tended to be short, sharp and intermittent"), even when they gave the total length of a turn as 5 minutes in their 1988 rules. Rather artificial, I always thought. If your turn is 5 minutes, then there is time for several direct fire shots, which means hit probability is just about certain.
This explains why most modern rules don't go in for precise time scales - it just makes your head hurt and is probably pointless. The old Featherstonian concept of just using what works in the context of your game is usually the best guide.
Very interesting Keith, I love these sort of posts.
On the one hand it is a shame to move away from the raw system. Those armour / gun value pages from the WRG are printed on my mind and ping the nostalgia bell ….. but, these days there are many good WRG alternatives and if it is problematic, then it needs to be tweaked if it is to carry on breathing on the table.
It does underpin the importance of ‘designing for effect’, so that things feel right and that we get the ‘game’ that we want.
My own WWII rules evolved over time to the point of taking armour / gun vale differences and adding a die roll (a D10 for me), which has the ‘to hit’ and penetration’ built into a single roll and then I roll for damage / effect. For me, the die roll is essential to reflect all of those incidental possibilities such as how the shell strikes the plate in terms of angle etc, the different hardening values of plate metal for different nations, did the shell just catch under the turret ring etc…. All of the various ponderables.
As Steve says, 2nd shot chances to hit were very high …… but then, for the most part, we do want our games to be, well …. Games🙂
Hope the next run out brings a more enjoyable engagement.
An interesting read Keith - pity the game was disappointing. Years ago I enjoyed the Grant rules and tried to combine the percentage chances of WRG with the Grant hit/penetration. Never really got tested as I moved more solidly into SYW and ACW. I am not sure how much WW2 I will play but look forward to reading how your rules develop.
following with interest
Hello Keith
Having never written a set of rules before I admire you for the tenacity that you exhibited in putting this game together! You are just starting with playtesting but I am sure as with your other 2 that I know of and have purchased sets, Honors of War, and Shadow of the Eagles that you will get it right. I love how you bring classic wargaming to the modern table. Keep your head up and carry on sir.
Thank you Bradley! Funnily enough, I am feeling quite positive about the rules and the direction they are going. Even if they never get published, I reckon I'll have a good set I can play either solo or with my wargaming friends.
Keith I will buy any rules you ever publish. I really like the way you think. But if you keep them to yourself make sure you post on the blog what the rules are so the rest of us can play as well!
Yes, not a bad idea to make them available for free in the future if they remain unpublished - like Post of Honour.
I suspect the 90% second shot hit chance is derived from the training ground, where the target and its friends are not shooting back, there is minimal smoke and dust, etc. Even with the vaunted German 88mm guns the rounds fired work out to 25 or more per tank kill. Military History Visualized has a couple of informative videos on YouTube covering this.
Many thanks. I'll try and find those videos.
The post war book 'Take these Men' (which is recommended by the rules) has a very different picture from 'automatic knock-outs' - there are a number of examples of Desert War tank fights going on for hours, with tanks taking 3 or 4 hits but carrying on, even with crew dead.
Like Norm says, this game was another lesson in going with what works as a game, rather than being too taken up with theoretical penetration values. If one reads enough anecdotal accounts and battle reports, an overall picture can emerge of what really tended to happen, which often seems to coincide with what informed wargamers expect in their games.
I like your thinking too, Keith. For me the WRG anti-armour mechanism was too rigid and, as Anonymous wrote, was based on what would happen on a range shoot, not an engagement. The attack/defence ratings give a better feel for what's happening and allow for the part chance can play- lucky and unlucky shots are always mentioned in the memoirs of tankies. Nice models, too.
Post a Comment