Followers

Monday, 17 February 2014

Honours Of War

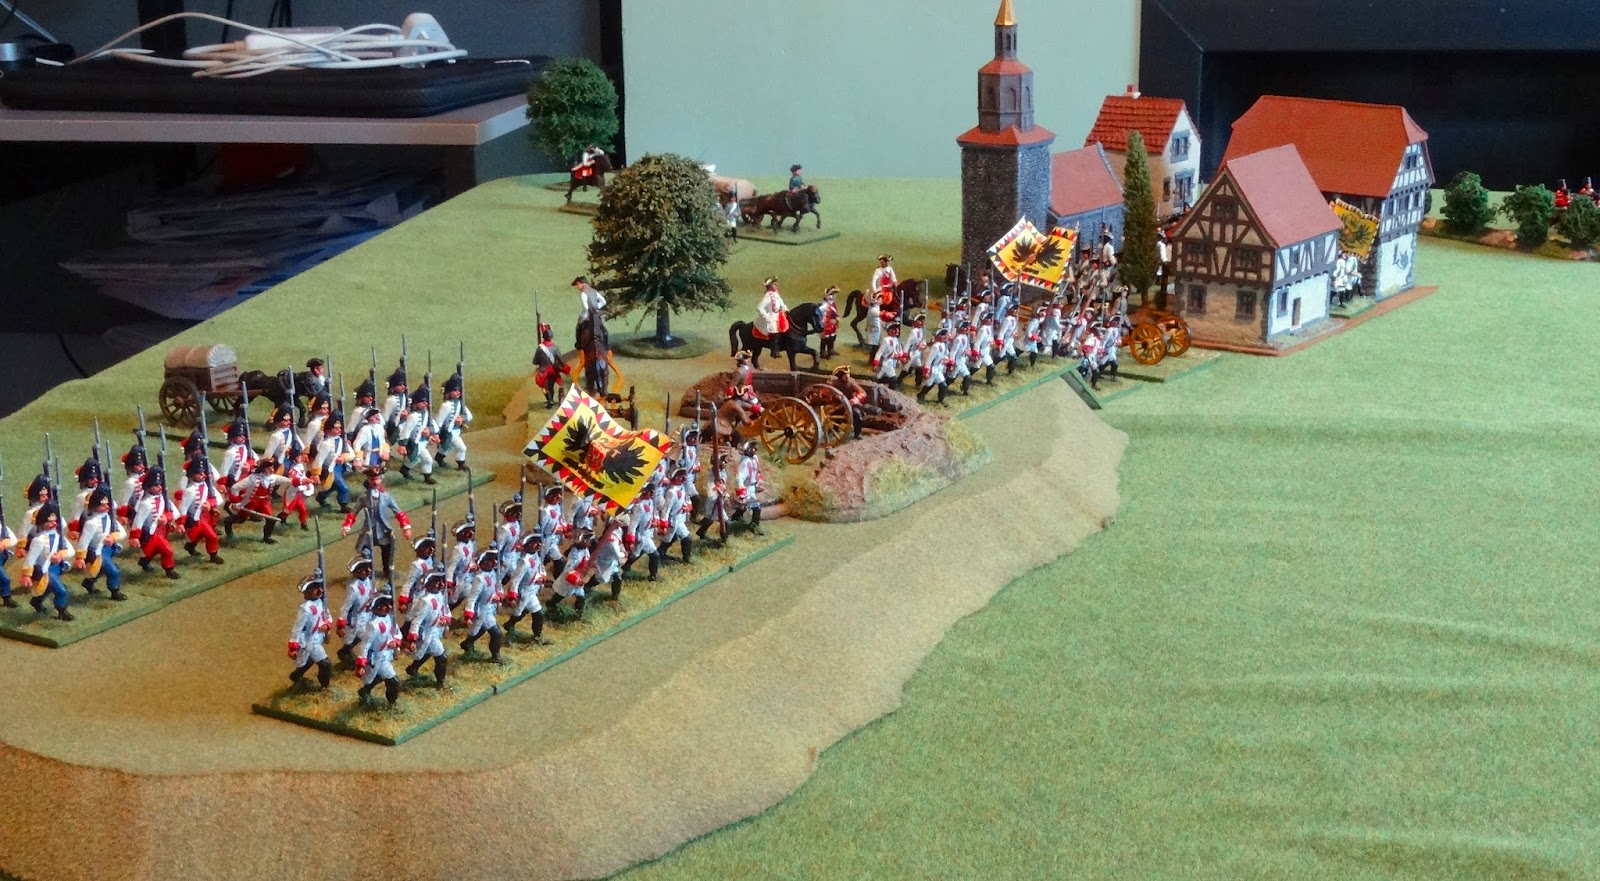
Now it can be revealed. 2014 will be an interesting year for me wargaming-wise, as I have been commissioned by Osprey Publishing to write a set of wargaming rules for the Seven Years War.

The working title is Honours of War, a phrase I found in Donald Featherstone's book on this period, Wargames Through the Ages 1420-1783,

'On the wargame table each commander will endeavour to manoeuvre the enemy
 into untenable positions so that they must accept the Honours of War...'

The definition of the phrase in the Collins dictionary is,

'The honours granted by the victorious to the defeated, 
esp. as of marching out with all arms and flags flying.'

So the phrase seemed to say something about 18th century warfare, as well as the spirit in which miniature wargames themselves should be played.

Most of you will be familiar with the range of Osprey rules published so far. Last year, some adverts for the range carried the invitation to send in proposals for further titles. This offer was backed up by an interview in Wargames, Soldiers and Strategy (no.68) with Phil Smith, who is head of the Osprey Wargames project. He confirmed the offer and the sort of thing Osprey were looking for.

I have enjoyed a few games of Dux Bellorum, courtesy of my old muckers Steve and Craig

Those familiar with this blog will know I have been playing games with my own set of rules for the SYW. So in the spirit of 'what the hell', and not expecting to get anywhere, I sent off the current version to Phil. 

His reply was a surprise. He wasn't completely sold, but he gave me room to get back to him and indicate how I thought his doubts could be resolved. These were mostly around making the rules inviting to those who might be new to the period, providing them with the possibility of modestly sized starter games and a points system to help them build their armies. I was able to confirm that these concerns could be fixed, along with making the rules playable with smaller figures than the 30mm ones I used.

And then there were 2 more surprises in store for me. Phil wrote back saying he felt I had addressed his concerns and was prepared to take my proposal to a publishing meeting and pitch it to those involved. Crikey. Then, not long after, he emailed me to say 'we have a wargame'. In other words, my proposal was accepted, and I had around a year to get the rules re-written, play tested, and ready for publication with associated diagrams and illustrations. I was gobsmacked. What an opportunity!

This was at the end of September last year. Since then I have been working the rules up towards a publishable standard. This has involved widening them to include all the nations involved in the SYW in Europe (rather than just Prussia and Austria), developing a points system, showing how the rules would work for 15mm, 10mm and 6mm models, and writing all the introductions, explanations and explanatory diagrams needed to make everything understandable to someone completely new to the rules.

The work so far has been great - my knowledge of the period is now much improved, and the intellectual exercise of getting everything together has been very rewarding. Phil at Osprey has been helpful and supportive - having the backing of a decent-sized publisher will make this project so much more enjoyable. Assuming all goes well, it will be great to get my work out there and see what people think about it. And then there will be the buzz of going to wargames shows or visiting blogs and seeing people enjoying playing games with my rules. Plus I might even make a few quid to spend on more toys!

But before all that comes the playtesting. This is where you can get involved. I have to submit my final manuscript around this time next year, so until then I want to invite gamers who don't know either me or the rules to take a look at Honours of War, play them if possible, and get back to me with feedback. You might only be able to give the rules a quick read through and let me know what you think, or you might have armies for the period already and be prepared to try a few games to really test how the rules play. All genuine contributions will be gratefully received. Apart from the chance to be on the ground floor of a new set of wargames rules, I can't offer much in return, except the possibility of a name check in the rules and maybe a free copy when they get published (no promises I'm afraid).

If you're interested, you can contact me at:

 keithflint57@gmail.com


Or, visit the Yahoo Group at this address and apply to join. A brief explanation of your interest would be appreciated:

     http://groups.yahoo.com/group/honoursofwar

All you need to explore the rules is available for download once you've joined the group.

Publication date is planned for November 2015, so there's plenty of time. Hope you can get involved.

Wednesday, 12 February 2014

The Final Spurt

Oh Matron! What I mean is, 2014 is destined to be the year that I complete my Seven Years War armies. Things have dragged on quite long enough, and now that I can afford to get figures painted for me rather than doing all my own painting the rate of completion of the final units will increase from extremely sluggish to... magnificently gradual.

Following the arrival of a recent order from RSM Miniatures, the first units to be completed were my Austrian grenadier battalions; so now I have a brigade of three.

Grenadier battalions Soro, Fiorenza and Siskovics

Also recently acquired are some heavy guns. I simply had to see how good the new Fife and Drum artillery was, and as Mr Purky doesn't do an Austrian gun as yet, I bought a couple of the Napoleonic Austrian 12pdrs from Front Rank. I preferred the look of the latter to the generic SYW 12pdr Front Rank offer. Not much to choose between the 2 manufacturers in terms of quality - both are excellent.

Fife & Drum Prussian 12pdr on left, Front Rank Austrian 12pdr on right.

And Wargaming As Well!
Just to prove the odd game is still getting played, a few photos from a recent SYW bash. Nothing fancy, just your typical weekend evening pick up game. The attacking Prussians won, by the way.

Table set up. I'm finding my new 6' x 5' table size very useful.

The Austrian defenders.

Those sneaky Grenzers secure the Austrian left flank.

How it all ended. The Austrians were conclusively overcome.
Those cavalry on the near baseline are actually Prussian Hussars - the devils
broke through  between the village and Grenzers and took me in the rear. Ouch!
I guess that explains the camera shake.

Standby for some interesting news - coming up in the next post.

Saturday, 1 February 2014

Wargaming In History vol.5

I am recently returned from a very pleasurable skiing holiday. For the first time in a long time, my wife and I would be holidaying on our own, and in the evenings there would be relaxing hours to fill in the hotel lounge. Some holiday reading was called for, so I brought Barnaby Rudge and the fifth volume in the Wargaming In History series. I leave it to the reader to guess which got the preferential treatment. 

You guessed right.

I already have volume 1 in this series, and I very much enjoyed volume 5. It was a rewarding and interesting read, as most purchasers of this series find. Of particular interest was that some of the most intriguing content involved those parts of the book where I disagreed with Charles' approach. This reflects the best thing about these books - there are the nice photos and the high production values, but it is the combination of these with detailed, thought provoking and well researched content which creates the true value. In summary, there is plenty to get your teeth into. So let's get our teeth into my reservations.

Big vanilla battalions in the wrong formation.
To start with I'm at a distinct disadvantage with this series, as they are uncompromisingly based on a set of rules I don't particularly like. For me, the original Charles Grant Snr. rules are now rather old-fashioned and clunky. What's more they involve Big Battalions of 48 figures, whereas my preference is for infantry units less than half that size. 

This latter point is important because I feel using big units makes representing big battles more difficult than it needs to be. This comes out particularly in the representation of Kunersdorf, where the cramped Russian deployment of the real battle is overemphasised (in my opinion) by units that are just too large. The forces need to be divided down into more and smaller units to give both sides (but especially the Russians) the flexibility to employ their forces effectively. To my mind, a number of the photos demonstrate this, and not just those of Kunersdorf. They are impressive at first sight but on a closer look illuminate games where there are just too many figures crammed into the available space. Of course, I have to admit this seems to be no problem at all for the players of the games themselves, so this has to remain a matter of opinion. But it surely is no coincidence that those rules which are designed to represent big battles (like Volley and Bayonet) tend to use small units - a single stand in the case of V&B. 

Another point, which I found carried over from my impressions of volume 1, is Charles' reluctance to differentiate between the qualities of different armies. This derives from the rules themselves, which it seems to me were designed for imagi-nations rather than historical play, and in which a battalion is a battalion, regardless of which army it belongs to. The refight of the 'Action at Torgau' brings this out. How could a Prussian force defeat a combined Austrian/Reichsarmee force which outnumbered it 3 to 1? One very obvious factor is the low quality of the Reichsarmee units (and the high quality of the Prussian ones), but the book deliberately decides to ignore this, which to my mind is ahistorical. To take but one example, the grandly named Hohenzollern Cuirassiers were a Reicharmee unit formed from 61 different contingents (one of them a single horseman), making it what the Kronoskaf SYW website describes as a 'prime example of a motley crew'. The author acknowledges such potential morale/quality factors, but disregards them without explaining why. Strangely, Charles is willing to apply low morale to some Russian units in the Kunersdorf game, which seems to work well in that case. 

There is also no differentiation between armies in the command and control rules, which basically consist of the use of written orders transmitted by ADCs. Overall, there is very little idea of whether one army or its commanders was better than the other, and if so in what ways and why. This for me is one of the basics if one is attempting 'wargaming in history', and the absence of such considerations is a big disappointment in the books, which nevertheless include much well researched historical detail (such as in the presentation of opposing OOBs).

Finally I was struck by the efficaciousness (is that a word?) of tactics I felt were unhistorical; viz. attacks by battalions in assault column. These turn out very well for the attackers in a couple of the games, but as far as my reading of the Seven Years War goes, attacks in column were not undertaken, presumably for the reason that they didn't work very well. But the rules appear to make them work very well indeed.

So there we have it. The units are too big, national differences are unexplored, and unhistorical tactics win the day. Doesn't sound too good, does it? But of course what shines through is the enthusiasm and enjoyment of the author and the other participants, and the spectacle of the battles represented. So as holiday reading, this book was thoroughly entertaining and much appreciated. I will be pleased to have it on my bookshelf, but further purchases from this series are unlikely. The author's approach is simply too different to my own.

I look forward to comments from defenders of the Grant style!

Thursday, 5 December 2013

Yeah, Like, A Massive Review Thing...

...kind of. Innit?

I've been widening my knowledge of the Seven Years War recently, beyond just the conflict between Prussia and Austria. The reason for this will be revealed in the new year, but so far it has involved me wasting my money on, I mean, investing in, quite a number of books. So I thought I would set down my thoughts for the benefit of other SYW buffs.

Top of the Shop
My star buy isn't a book at all, though.


After 'discovering' Courier magazine as a source for a SYW scenario (see battle report in previous post), further investigation revealed that volume 2 of the magazine (1980-81) had the Seven Years War as its main theme. Just $12 got me all 6 issues, uploaded in a few minutes from the Wargames Vault site. And there, in issues 4 to 6, were the three parts of Richard Reihn's article 'Linear Tactics And The Wargame'. All I can say is, if you wargame the SYW, get these articles and read them. Here is an educated analysis of how linear tactics worked and why, which to me was fresh and very enlightening. The articles will give you an excellent perspective on how well your rules of choice represent the period; and if you're developing your own rules (as I am), the information here is essential groundwork. One of the most absorbing reads I have had in many a year.
The other 3 issues have some interesting articles as well, but mainly for nostalgia reasons.

Ospreys and more Ospreys (as well as some Ospreys)
I got together the following list:

Louis XV's Army, vols.1-4, Rene Chartrand (Men at Arms series)
Russian Army of the Seven Years War, vols.1-2, Angus Konstam (Men at Arms series)
Frederick the Great's Allies, Stuart Reid (Men at Arms series)
British Redcoat 1740-93, Stuart Reid (Warrior series)
The Seven Years War, Daniel Marston (Essential Histories)

The interesting thing here is the variety of approach amongst some of these books, despite being part of the same series. One expects Osprey to demand a consistent format, but it doesn't always happen.

Rene Chartrand has the same problem with his books as Digby Smith had with his Armies of the Seven Years War: he can't tell the difference between a book and a list. His volumes on the French army list all the units, and are an excellent painting guide, but information on tactics, performance and army quality are conspicuous by their absence. A disappointment for wargamers. Angus Konstam, on the other hand, has got the idea - his 2 books on the Russian Army give a great overview of how the army developed and performed, as well as how it looked. Stuart Reid's book is (as he admits) basically the story of 'His Britannic Majesty's Army in Germany'. It is thankfully along the same lines as Angus' book on the Russian army, and gives a neat introduction to the composition, quality and appearance of this allied force. Stuart's other book on the British Redcoat is another good one, giving some useful insights derived from primary sources.
Daniel Marston's general introduction to the SYW does exactly what it says on the tin, but has the bonus of a series of brief overviews of the main armies, noting their strengths and weaknesses. A handy and interesting book to have around.

So overall, well done Osprey. Just don't commission any more books from Mr Chartrand.

Prussia's Glory, Christopher Duffy
I'd avoided buying this book as I already had the Osprey on the Rossbach and Leuthen camapign. My mistake. This is not a massive book (around 200 pages), but the detail on the campaign, the armies involved and the battles themselves is on another plane. Excellent maps throughout help to explain things. To be honest, the account of Rossbach is a little vaguer and less easy to follow than the account of Leuthen, but the latter is a tour de force that represents as near to a definitive account of this action as we are likely to get.
The other great thing is that along the way the reader gets a real insight into how armies in the SYW actually functioned on campaign and in battle - in other words, analysis is given as much importance as description. A further bonus is a good section on the origins and quality of the Reichsarmee.

The Coward of Minden, Piers Macksey
On the subject of analysis of how SYW armies worked, here's another first class source. Lord Sackville's reputation is restored to a large extent, as a result of Mr Macksey's detailed investigation of primary sources, but we also get a great description of the Battle of Minden and a fine insight into campaigning and fighting battles in this period. A thorough and balanced view of Ferdinand of Brunswick's strengths and weaknesses is also provided.  Don't hesitate to get hold of this book if the campaign and battle of Minden, or the general subject of the western theatre in the SYW, is of interest to you.

Charge!, Peter Young and J.P. Lawford
I guess it's a bit late in the day to review this baby, seeing as it was published in 1967. I got the softback reproduction from Ken Trotman, which is fine and nicely done. There is some interesting background on 18th century weaponry to start with, but basically this is all about nostalgia, and on that basis I'm glad I made the purchase.
As for the rules themselves, I'm surprised people still play them. Old School simplicity? There's about 25 pages devoted just to resolving melees in the 'advanced' rules, which I naturally skipped. I bow to no one regarding my interest in the early texts of our hobby, but whilst some general ideas and concepts can be useful, the overall impression from old wargaming books is that in terms of rules the hobby has moved on a long way for the better over the decades.
Still and all, a great book to own.

I think that'll do for the moment. I've had some great reading over the last few weeks, and have learnt a lot.

More random shit next time. Know what I'm saying?

Saturday, 9 November 2013

Getting Back Into It

I took some leave over the UK schools' half term week (26th October - 3rd November), and so had nine days off at home. Just for once the stars aligned and I managed to get 3 games in. 3 games in nine days? Crikey.

The first was a much delayed exploration of Barry Hilton's 'Safe Passage' scenario, which is described in the post previous to this. This I played solo on the first Saturday. What was surprising was that, although this was a game with modest forces on each side, I started setting up at 0830 in the morning, and didn't finish packing away until around 1600 in the afternoon. 

No wonder I don't game very regularly at the moment. If you want to have a game on a decent sized table and/or using decent sized forces, you need a good deal of space and time, not just physically but mentally as well. One needs to be in the mood for several hours of serious hobby activity. And somehow all those 'simple, fast play' rules that are out nowadays somehow don't seem to save that much time; and that includes my own SYW set.

Anyhow, Thursday evening saw me setting up another 18th century bash to play with my old buddies Paul and Steve. The scenario here had an interesting history. It was brought to my attention via a post on Der Alte Fritz Journal, in which an article in an old Courier magazine (March-April 1983) was remembered that included some SYW scenarios. To cut a long story short, I was able to download a copy of the magazine via the excellent Wargame Vault website at a ridiculously minimal cost. If this is the sort of thing that interests you, I strongly advise that you do the same as I did (you need Courier Magazine, vol.4 no.5). If this issue is anything to go by, modern wargames magazines have something to learn from this publication, which I found a very enjoyable read.

The scenario I went for envisaged a Prussian force detached on a foraging expedition, which finds itself isolated and under attack from a much larger Austrian force. The Prussians are saved (or not, depending on how things go) by a friendly rescue force. As envisaged in Courier, this is quite a big battle, but I reduced both table size (to 6' x 5') and forces to get something more manageable for an evening game. 

The Prussian detached force has advanced through a local town, then positioned itself on high ground beyond, with its front covered by a river and marsh. The detached force was made up as follows:

Infantry Brigade
3 line infantry battalions
1 grenadier battalion
1 freikorps battalion
1 artillery battery

Cavalry Brigade
1 hussar regiment
1 dragoon regiment

The photo below shows the Prussians deployed at the start of the game.

OK, town taken: let the foraging begin.

The position looked sound enough, but unfortunately the Prussians were about to be assaulted in flank by an Austrian force that outnumbered them more than 2 to 1:

Infantry brigade
4 line infantry battalions
2 artillery batteries

Infantry Brigade
2 grenadier battalions
2 line infantry battalions
2 artillery batteries

Infantry Brigade
1 line infantry battalion
2 grenz light infantry battalions

Cavalry brigade
2 cuirassier regiments

Cavalry Brigade
1 dragoon regiment
1 hussar regiment

Suddenly the Austrians were all over the Prussian's right flank. No wonder the magazine calls this scenario 'Surprise of a Detached Force'.


Some lucky double moves on the Austrian left mean the town is wide open to capture.

Not surprisingly the Prussians were driven off the high ground and the town was taken by Austrian light troops. On move 3, the Prussian reinforcements arrived and evened things up a bit:

Infantry Brigade
4 line infantry battalions
2 artillery batteries

Infantry Brigade
2 grenadier battalions
1 artillery battery

Cavalry Brigade
2 cuirassier regiment
1 dragoon regiment

This turned out to be a very nicely balanced scenario producing an excellent game. When we called it a day after 6 moves the Prussians had lost 7 units from their breakpoint of 10 (including 2 points lost for losing the town), whilst the Austrians had lost just 2 from their breakpoint of 9. We judged it an Austrian victory, though in truth there was still a lot of life in the game. Once again time to play had been at a premium.

The Austrian infantry have neatly sealed off the northern sector, leaving their cavalry room to operate behind them against the Prussian reinforcements. The Prussian cavalry at the top of the picture have been isolated, but the Austrians also have problems. Their right flank brigade has to march right across the table to fend off the encroaching Prussian infantry advancing from the left of the photo.

Does every wargamer have a favourite unit in his collection? Whatever the case, mine is the Prussian IR6 Garde Grenadier, seen in the photo below advancing steadily against the foe.

What a fine body of men!

So that was two games. Finally, Saturday morning saw me at Craig's place, getting ready to take part in my first game of Chain of Command. Craig had a fancy idea of describing the game live on his blog, but this ended up not happening. Yes, you guessed it, pressure of time. This miniatures wargaming lark is very demanding of time, space and motivation. 

Anyway, the game itself was most entertaining, and as usual with Craig the terrain was excellent, as can be seen here (you may have to scroll down to the 2nd November game). As for Chain of Command, I had watched the introductory videos put up on You Tube by the Too Fat Lardies, but still found it a steep learning curve. Those Lardies are certainly very clever boys, but I found myself on a few occasions thinking that maybe they were a bit too clever for my simple tastes. However, one game is not enough to come to any sort of conclusion. I can only say I hope to be able to have another try at these interesting rules. Thanks to Craig for putting the game on.

So there we are. An unusual feast of wargaming for me, and I found I still had some motivation left over to do a bit of painting. I don't know what's come over me!

More soon.

Sunday, 27 October 2013

Safe Passage

My latest SYW scenario relates to this post from August 2012. How quickly the time passes! But after more than a year I was finally ready to explore another of Barry Hilton's scenarios from his Avila mini campaign, which you can find in issue 298 of Wargames Illustrated.

This time a column of supplies is being shepherded through a gap in the lines of a besieging army. The Austrians are the army doing the shepherding, while the Prussians are trying to stop them getting through. 

Reproduced by kind permission of Barry Hilton and Wargames Illustrated.
Copyright Wargames Illustrated.

Forces and deployment were as follows:

Austria (Barry's 'French Column')

Commanding Officer

Infantry Brigade including supply column
2 line battalions
1 grenadier battalion
3 wagons

Infantry Brigade
2 Grenz light infantry battalions

Hussar regiment (independent)

The main infantry brigade and the wagons are deployed on the road at X. The light battalions and the Hussars form flanking columns either side of the town.

Prussia (Barry's 'Allied Force')

Commanding Officer

Infantry Brigade
2 Freikorps battalions
1 line battalion
1 grenadier battalion

Jager corps
2 jager detachments

Hussar regiment (independent)

Civilian militia (independent)

The Hussar regiment starts at position 1. The civilian militia can be placed anywhere on the high ground. The jager start in the 2 groves or orchards, whilst the infantry brigade deploys at position 2.

Scenario special rules
To win, at least 2 of the supply wagons along with a single fighting unit at more than half strength must exit the table over the bridge at point A. The river is fordable but not by the wagons. I counted the fields and any second level hills as bad going.

Converting Barry's varied Peninsula campaign forces for more regular SYW ones was problematic, and not surprisingly I got it a bit wrong, making the Prussians too strong. So if I play it again the Prussian grenadiers will be left out, and the Austrian hussars increased to a large unit (in my rules, 6 stands rather than 4).

Let's see how things went.

Table setup. New tables under the TSS tiles.

The Austrian supply column is assembled near the town.

I diced for the quality of commanders according to my own rules. The Austrians got 2 ditherers, the Prussians got 2 dashing commanders. Ouch! Consequently, the Prussian main force closed quickly with their opponents across the plateau.

The leading grenz battalion moves across to clear away the threat from the Prussian militia unit. The grenzers easily triumphed in this unequal contest.

You can see here how I made the Prussians too strong.
At this early stage there seems to be no way through for the Austrians. The hussar regiments clash in the background.

The two sides come to grips on the plateau. The Austrians did surprisingly well in the firefight and saw off 2 Prussian battalions. The Austrian line wavered but when the smoke cleared all 3 of their regular battalions were still in business. Meanwhile, the Prussian hussars had won their struggle with their Austrian counterparts, and can be seen in the background preparing to strike the Austrian supply wagons. Eventually they destroyed one wagon but impulsively they wheeled across the front of an Austrian infantry battalion to attack another and were destroyed by close range volley fire.

The Prussians fell back to the edge of the plateau and prepared to try conclusions again with the rallied enemy units. Flank support from the grenz battalions was crucial to the Austrians.

The Prussians are forced back again, resting their flanks on the orchards occupied by their jagers.

Time for the grenzers to engage again. This melee ended in eventual destruction for the Austrian unit.

Once again the Prussians have been forced back, whilst the Austrians pause to reform for the next push.

Attacks have gone in to both orchards but have been repulsed by the determined Prussian jagers. After 17 moves I called it here. The Prussians had held on and the supplies would not get through.

The Austrians had done surprisingly well, pushing the Prussians back across the table until they ran out of time. I was pleased with the way my rules allowed units to fall out of the line and reform, ready to attack again. The Prussians had lost 5 units from 8, whilst the Austrians had only lost 2 of their 6 fighting units, plus 1 supply wagon. Had I been using my own usual victory rules, the Prussians would have broken and the Austrians would have scored a well deserved victory.


Tuesday, 22 October 2013

New Tables

For the last 20 years and more I have been creating my playing surface by placing TSS tiles on pasting tables - the same set of tables I bought in B&Q for £7 each back in 1992. These guys have given sterling service, but age (and storage in a damp garage) has caught up with them.

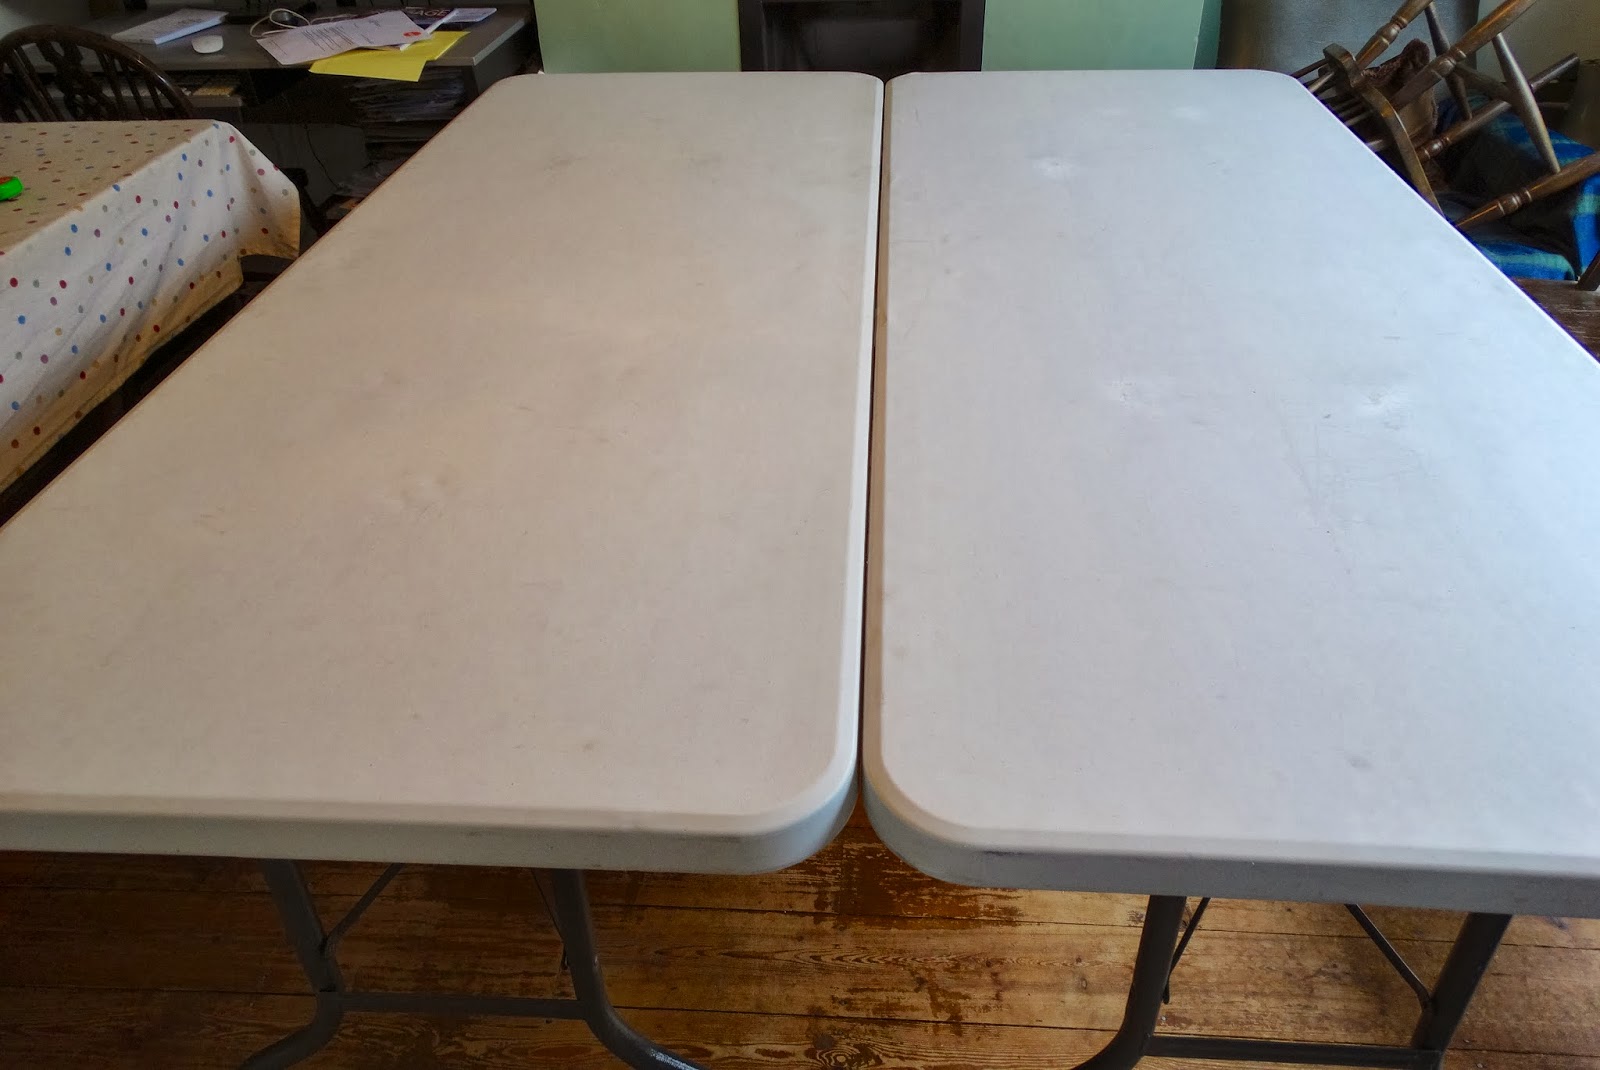
So I trawled the internet for replacements that would be sturdier, more level and not cost the earth. Finally I settled on some ex-hire tables from B E Furniture Ltd. Three tables, plus £30 courier delivery, came to £102. A bit more than the pasting tables, but excellent value when you compare these products to what you can pay.

Service was excellent - the tables pitched up within 48hrs via Fedex (and not some guy in a white van). They are exactly as described - solid, sturdy and providing a level and secure playing surface, using a tubular steel frame supporting a heavy duty plastic top. 

No more need to slip wargames magazines under the terrain tiles to get them to level up! As B E Furniture say, they are a bit scuffed and scratched in places, but they are completely undamaged and fully serviceable for my needs. 

There were also options to explore which weren't available with my cranky old pasting tables. Two of the new tables give a 6' x 5' area. I could put six 2' x 2' tiles on top, play on a 6' x 4' table and have a nice 6" wide shelf on each side for reinforcements, casualties and other paraphenalia. Or, I could use my Games Workshop Battlemats to give a 6' x 5' playing table.

Only problem was, the curved table corners and bevelled edges created a bit of a gap.

Solution - a bit of white tape from the man drawer will keep things in order.
This was just a quick job to prove the concept - a minute's work.

And there you go. I'm pretty pleased with my new playing surface.
Choose the right tape to avoid that sticky residue when you unpeel it.

And of course nine TSS tiles can be placed on top to give a 6' x 6' table. So better tables, and now I have more options as well.

I reckon these babies will see me out, so the cost is well worth it. Many gamers will only need a couple, but I wanted to able to have a larger set up if needed.

I heartily endorse these products!